基于SpringBoot的通用设备操作接口服务
2016-03-24 21:21
633 查看
需求分析
我们有一个应用平台需要和某特殊服务器对接,实现对特殊服务器的一些操作以及状态信息的读取。但是该服务器由多个厂商完成,且每个厂商的实现方式不同,因此不能通过应用平台逐一实现每个厂商的接口调用。我们考虑在特殊服务器端部署一个通用操作接口服务,应用平台仅仅与该接口通信,而具体的命令下发则由该通用操作接口服务实施。此时,仅需在接口服务项目中实现不同厂商的命令实现即可。该接口服务的需求如下:接口服务与应用平台的通信标准化并实施通信加密。
应用无需考虑服务器硬件情况,仅需与接口服务通信即可完成所有功能对接。
接口服务前端接收应用平台请求数据,后端向服务器发送命令并接收结果。
接口服务的后端应根据功能需求指定规范,并要求厂商实现这些规范功能。
接口服务的后端应支持根据不同服务器类型灵活配置,实现模块化,并可以灵活配置和替换。
接口服务后端模块应与前端请求解耦,支持厂商自行开发后端实现模块。
接口服务在启动时应该实现对设备的认证,未通过认证的设备不允许对外提供服务。
程序设计
总体实际
我们计划将后端接口服务设计为REST风格的微服务,因此采用Spring boot作为框架基础。同时考虑到前后解耦的需求,我们将项目拆分为前后端两个模块。如下所示:nmi为项目名:network management interface
--> nmi (父项目)
|-->nmi-front(前端模块)
|-->nmi-core(后端模块)
如上所示,整体项目由MAVEN管理,将项目拆分后,nmi-core以jar包形式引入nmi-front中。我们在nmi-core中制定好接口interface,不同厂商的则可以在该模块模板的基础上开发各自对应的nmi-core.jar。这样在最终部署时即可通过替换nmi-core.jar实现对不同设备的定制。
MAVEN构建
nmi父项目
<project xmlns="http://maven.apache.org/POM/4.0.0" xmlns:xsi="http://www.w3.org/2001/XMLSchema-instance"
xsi:schemaLocation="http://maven.apache.org/POM/4.0.0 http://maven.apache.org/xsd/maven-4.0.0.xsd"> <modelVersion>4.0.0</modelVersion>
<groupId>org.wsy</groupId>
<artifactId>nmi</artifactId>
<version>0.0.1-SNAPSHOT</version>
<packaging>pom</packaging>
<name>nmi</name>
<description>network management interface</description>
<dependencyManagement>
<dependencies>
<dependency>
<groupId>org.wsy</groupId>
<artifactId>nmi-core</artifactId>
<type>jar</type>
<scope>compile</scope>
</dependency>
</dependencies>
</dependencyManagement>
<modules>
<module>nmi-core</module>
<module>nmi-front</module>
</modules>
</project>
nmi-front模块
<?xml version="1.0"?>
<project xsi:schemaLocation="http://maven.apache.org/POM/4.0.0 http://maven.apache.org/xsd/maven-4.0.0.xsd" xmlns="http://maven.apache.org/POM/4.0.0"
xmlns:xsi="http://www.w3.org/2001/XMLSchema-instance">
<modelVersion>4.0.0</modelVersion>
<parent>
<groupId>org.wsy</groupId>
<artifactId>nmi</artifactId>
<version>0.0.1-SNAPSHOT</version>
</parent>
<artifactId>nmi-front</artifactId>
<name>nmi-front</name>
<url>http://maven.apache.org</url>
<properties>
<project.build.sourceEncoding>UTF-8</project.build.sourceEncoding>
</properties>
<dependencies>
<dependency>
<groupId>org.springframework.boot</groupId>
<artifactId>spring-boot-starter-web</artifactId>
<version>1.3.3.RELEASE</version>
</dependency>
<!-- nmi core -->
<!-- <dependency>
<groupId>com.rails</groupId>
<artifactId>nmi-core</artifactId>
<version>0.0.1-SNAPSHOT</version>
</dependency> -->
<dependency>
<groupId>org.wsy</groupId>
<artifactId>nmi-core</artifactId>
<version>0.0.1-SNAPSHOT</version>
<scope>system</scope>
<systemPath>${project.basedir}/lib/nmi-core.jar</systemPath>
</dependency>
<!-- nmi core -->
</dependencies>
<build>
<plugins>
<plugin>
<groupId>org.springframework.boot</groupId>
<artifactId>spring-boot-maven-plugin</artifactId>
</plugin>
</plugins>
</build>
</project>
nmi-core模块
<?xml version="1.0"?>
<project
xsi:schemaLocation="http://maven.apache.org/POM/4.0.0 http://maven.apache.org/xsd/maven-4.0.0.xsd" xmlns="http://maven.apache.org/POM/4.0.0" xmlns:xsi="http://www.w3.org/2001/XMLSchema-instance">
<modelVersion>4.0.0</modelVersion>
<parent>
<groupId>org.wsy</groupId>
<artifactId>nmi</artifactId>
<version>0.0.1-SNAPSHOT</version>
</parent>
<artifactId>nmi-core</artifactId>
<name>nmi-core</name>
<url>http://maven.apache.org</url>
<packaging>jar</packaging>
<properties>
<project.build.sourceEncoding>UTF-8</project.build.sourceEncoding>
</properties>
<build>
<finalName>nmi-core</finalName>
<plugins>
<plugin>
<groupId>org.apache.maven.plugins</groupId>
<artifactId>maven-compiler-plugin</artifactId>
</plugin>
</plugins>
</build>

</project>
代码设计
模块结构
core
core仅需负责硬件命令的下发和设备认证,如有需要添加日志功能。因此包结构如下:|>org.wsy.nmi.core
|--|>org.wsy.nmi.core.command
|--|--|>ICommand.java
|--|--|>ACommand.java
|--|>org.wsy.nmi.core.device
|--|--|>IDevice.java
|--|--|>ADevice.java
|--|>org.wsy.nmi.core.log
|--|--|>logger.java
其中
ICommand.java接口定义了所有设备应该实现的操作。
IDevice.java接口定义了设备认证相关的操作。
ACommand.java以及
ADevice.java为某厂商(如:A)的具体接口实现。
front
项目结构
nmi-front 模块带有主要的Spring boot特性,有Application启动器,controller等模块。结构如下|>org.wsy.nmi.front
|--|>org.wsy.nmi.front.controllers
|--|--|>RequestController.java
|--|>org.wsy.nmi.front.module
|--|--|>org.wsy.nmi.front.module.config
|--|--|--|>Config.java
|--|--|>org.wsy.nmi.front.module.factory
|--|--|--|>CommandServiceFactory.java
|--|--|--|>DeviceAuthFactory.java
|--|--|>org.wsy.nmi.front.module.task
|--|--|--|>InitTask.java
|--|--|>org.wsy.nmi.front.module.cache
|--|--|--|>GlobalCache.java
|--|>Application.java
主要代码说明
Application.java(sping boot 启动器)@SpringBootApplication
//需要支持外部配置properties文件
@EnableConfigurationProperties({ DeviceConfig.class })
public class App {
public static void main(String[] args) {
SpringApplication.run(App.class, args);
}
}Config.java(配置映射)
//读取指定项目
@ConfigurationProperties(prefix="device")
public class DeviceConfig {
private String mac;
private String infname;
private String deviceauth;
private String commandservice;
//....以下省略
InitTask.java(项目启动后的动作)
附:其中的GlobalCache,DeviceAuthFactory,CommandServiceFactory的具体实现在后边标出。
//这部分代码主要负责项目启动完毕后的设备认证等工作
@Component
public class PostTask {
DeviceAuth auth = null;
@Autowired
DeviceConfig config;
@PostConstruct
public void init() {
System.out.println("init finished");
try {
//从properties文件读取具体实现的Class路径,在后边通过反射加载
String deviceAuthClass = config.getDeviceauth();
String commandService = config.getCommandservice();
//根据配置加载模块
System.out.println("\n********  registering module  ********");

try {
//加载设备认证模块
auth = DeviceAuthFactory.getInstance().build(deviceAuthClass).getAuth();
GlobalCache.getInstance().setDeviceAuthState(auth.deviceAuth());

if (GlobalCache.getInstance().isDeviceAuthState()) {
//如果认证通过则继续加载命令执行模块
System.out.println("device auth success!");
System.out.println("loading command service ...");
GlobalCache.getInstance().setCommandService(
CommandServiceFactory.getInstance().build(commandService).getCommandService());
} else {
//如果认证过程失败则标记为认证失败
GlobalCache.getInstance().setDeviceAuthState(false);
System.out.println("device auth fail!");
}

} catch (Exception e) {
//如果设备认证模块加载失败则标记为认证失败
System.out.println("init fail, error:"+e);
GlobalCache.getInstance().setDeviceAuthState(false);
}

} catch (Exception e) {
System.out.println("auth err");
}
}

}
CommandServiceFactory(命令实现加载器)
通过单例模式实现,仅需一次加载即可,DeviceAuthFactory的加载机制相同,这里就不赘述了。
public class CommandServiceFactory {
private volatile static CommandServiceFactory  instance;
private String className;
private CommandService service;
public static CommandServiceFactory getInstance(){
if (instance== null) {
synchronized(CommandServiceFactory.class){
if(instance == null){
instance = new CommandServiceFactory();
}
}
}
return instance;
}
private CommandServiceFactory(){ }
//通过反射动态加载
public CommandServiceFactory build(String className) throws Exception{
this.className = className;
service = (CommandService) Class.forName(className).newInstance();
return this;
}
public CommandService getCommandService() {
return service;
}
public String getClassName(){
return className;
}
}
GlobalCache.java(全局变量)
同样以单例形式实现,用于存储认证结果,设备信息等。
具体实现略。
程序效果
配置截图
以下均是假设配置
运行效果
模块存在并设备认证成功
假设nmi-core.jar中确实包含配置文件中的实现类,则顺利加载模块并执行认证过程。启动、认证过程
以下为认证通过的启动过程截图:
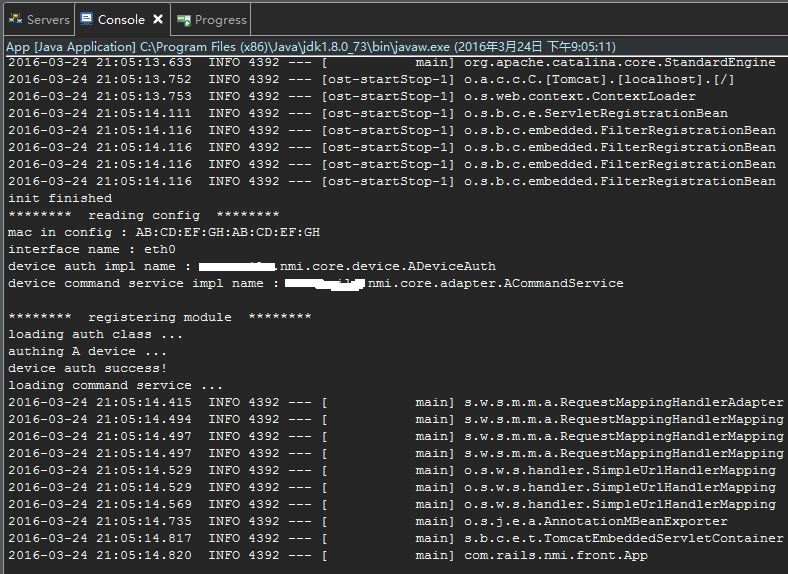
可以看到模块顺利载入,并认证成功。
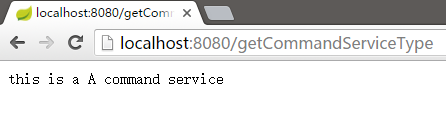
接口调用
模块加载成功同时认证成功后,可以正常调用接口。其中返回的”this is a A command service”即为假设A设备厂商的自定义服务返回的串。
模块存在但是认证失败
启动、认证过程图上可以看出,已经顺利加载模块(XXDevice),但是设备认证失败了。

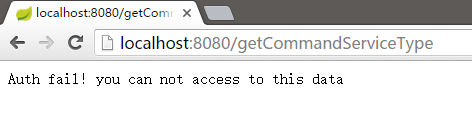
接口调用
可以看到接口是不能顺利调用的。
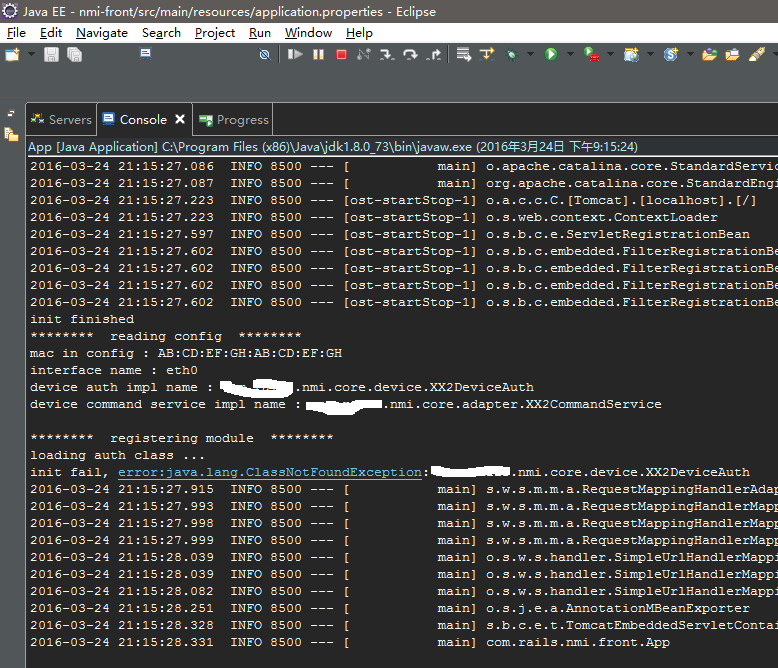
模块载入异常
比如配置文件错误,厂商并未实现接口,则无法顺利载入模块,也会造成认证失败。启动、认证过程
可以看出,模块并未顺利加载(class not found err),因此无法认证设备。
接口调用
和上文的认证失败是相同的,因此不在列举。
总结
Spring boot 实现REST风格的微服务实现了接口微服务的前后分离解耦
通过反射机制按照配置动态加载接口实现
设计并实现了设备认证流程

相关文章推荐
- centos6.5上安装docker
- fastjson处理接口时的一个问题
- Java反射随记
- AS3中的反射(速记) 分析
- 局域网与广域网接口标准
- RJ-45接口信号定义
- DVI 视频接口图文解析
- 如何设置域名接口
- 通过C#实现自动售货机接口
- C#中IEnumerable接口用法实例分析
- C#中实现判断某个类是否实现了某个接口
- C#隐式/显示实现接口方法详解
- C# 反射(Reflection)的用处分析
- C#通过反射创建自定义泛型
- C#实现两接口中同名方法实例分析
- 详解C#中的接口属性以及属性访问器的访问限制
- 通俗易懂的C#之反射教程
- C#根据反射和特性实现ORM映射实例分析
- C#中的ICustomFormatter及IFormatProvider接口用法揭秘
- C#接口实现方法实例分析