LinkedHashMap超详细分析
2016-03-21 15:28
573 查看
我先笼统地用语言介绍LinkedHashMap,如果看的不是很明白,不要紧,下面会结合源码进行分析。
(1)Map 接口的哈希表和链接列表实现,具有可预知的迭代顺序。此实现与 HashMap 的不同之处在于,后者维护着一个运行于所有条目的双重链接列表。此链接列表定义了迭代顺序,该迭代顺序通常就是将键插入到映射中的顺序(插入顺序)。
(2)注意,如果在映射中重新插入 键,则插入顺序不受影响。(如果在调用 m.put(k, v) 前 m.containsKey(k) 返回了 true,则调用时会将键 k 重新插入到映射 m 中。)
(3)此实现可以让客户避免未指定的、由 HashMap(及 Hashtable)所提供的通常为杂乱无章的排序工作,同时无需增加与 TreeMap 相关的成本。使用它可以生成一个与原来顺序相同的映射副本,而与原映射的实现无关:
如果模块通过输入得到一个映射,复制这个映射,然后返回由此副本确定其顺序的结果,这种情况下这项技术特别有用。(客户通常期望返回的内容与其出现的顺序相同。)
(4)提供特殊的构造方法来创建链接哈希映射,该哈希映射的迭代顺序就是最后访问其条目的顺序,从近期访问最少到近期访问最多的顺序(访问顺序)。这种映射很适合构建 LRU 缓存。调用 put 或 get 方法将会访问相应的条目(假定调用完成后它还存在)。putAll 方法以指定映射的条目集迭代器提供的键-值映射关系的顺序,为指定映射的每个映射关系生成一个条目访问。任何其他方法均不生成条目访问。特别是,collection 视图上的操作不 影响底层映射的迭代顺序。
可以重写 removeEldestEntry(Map.Entry) 方法来实施策略,以便在将新映射关系添加到映射时自动移除旧的映射关系。
output:
看到这里,我们只能发现LinkedHashMap是HashMap的子类,它的构造方法也仅仅是调用了父类的构造方法,那么双链表体现在哪儿呢?
首先,HashMap的构造方法都要调用一个方法 init(),而LinkedHashMap对这个方法进行了重写:
如果已经熟悉过HashMap,那么你一定可以发现,这里的Entry<>已经和HashMap中的Entry内部类不一样了,所以,LinkedHashMap重写了HashMap中最基本的单元Entry:
看到这段内部类的代码,我们可以总结出两个重要的特性:
(1)这里的 before 和 after 是增加的。此处的Entry它继承了HashMap.Entry,所以它的成员变量有:
hash值(这个容易被忽略)
key 和 value 两个变量
用于维护哈希表的 next
用于维护双向循环链表的 before 和 after
(3)LinkedHashMap中依然在使用 【桶+链表】 的典型哈希表结构。这一点从它复用的HashMap中的代码可以看出。所以,它依然会有resize,使用的是链表来维护顺序,所以,resize并不会破坏这个顺序的维护。
分析到这里,双链表的特性已经暴露无遗。在接下来分析其他特性的时候,对这个特性的理解会进一步加强,因为这是LinkedHashMap的根本。
好吧,不卖关子了。其实跟上面的构造方法采用的是同一种方式,所以有一点tricky。
首先,LinkedHashMap确实是调用HashMap的put方法。该方法会调用addEntry方法,addEntry方法会调用createEntry方法。而LinkedHashMap重写这两个方法,而不是直接重写put方法:
啰嗦地提一下HashMap中的put操作,它会先通过hash找到要放入的桶,然后遍历桶中所有元素(如果有的话),看看要插入的节点是否已经存在;如果不存在,则插入到桶的首部,将该节点的next指向旧的桶的首节点

output:
上面的例子说明,如果使用的是默认的插入顺序,再次put之前已经添加过的key,会改变这个key对应的值,但是不会改变整个序列的顺序。这一点可以从 HashMap 的 put 方法看出:
也就是说,如果put的key是已经存在的(这种表述不严谨,但可以这么理解),它在调用父类HashMap的put方法中就 return oldValue 了,不会有下面的 addEntry 等一系列操作。
accessOrder是一个boolean变量,它在初始化的时候为false,这时,就是默认的 【插入顺序】;如果为true,表示启用 【访问顺序】。而启用访问顺序只能使用一个特殊的构造方法:
我们先来测试一下,再来讲解。
output:
实现的原理就是,每次get的时候,将这个元素移到队列的末尾,从而,最不常访问的元素在队列的首部。
核心源码就是 recordAccess方法。这个方法在HashMap中是空的,LinkedHashMap 对这个方法进行了重写。每当调用get 和 put时发现key已存在的情况下就会触发这个方法。
同理,putAll其实也会触发这个方法,不过putAll不过是顺着传入的参数的迭代器一个个put,所以和put是一样的。
这种顺序的典型应用就是LRU算法。LRU是Least Recently Used 近期最少使用算法。关于操作系统的内存管理,如何节省利用容量不大的内存为最多的进程提供资源,一直是研究的重要方向。而内存的虚拟存储管理,是现在最通用,最成功的方式—— 在内存有限的情况下,扩展一部分外存作为虚拟内存,真正的内存只存储当前运行时所用得到信息。这无疑极大地扩充了内存的功能,极大地提高了计算机的并发度。虚拟页式存储管理,则是将进程所需空间划分为多个页面,内存中只存放当前所需页面,其余页面放入外存的管理方式。
然而,有利就有弊,虚拟页式存储管理减少了进程所需的内存空间,却也带来了运行时间变长这一缺点:进程运行过程中,不可避免地要把在外存中存放的一些信息和内存中已有的进行交换,由于外存的低速,这一步骤所花费的时间不可忽略。
为了尽量减少与理想算法的差距,产生了各种精妙的算法,最少使用页面置换算法便是其中一个。LRU算法的提出,是基于这样一个事实:在前面几条指令中使用频繁的页面很可能在后面的几条指令中频繁使用。反过来说,已经很久没有使用的页面很可能在未来较长的一段时间内不会被用到。这个,就是著名的局部性原理——比内存速度还要快的cache,也是基于同样的原理运行的。因此,我们只需要在每次调换时,找到最少使用的那个页面调出内存。这就是LRU算法的全部内容。
那么,如果要在每次添加新的条目的时候,移除最不常用的条目怎么实现呢? 我觉得说明文档写的很清楚,我直接粘贴过来。
可以重写 removeEldestEntry(Map.Entry) 方法来实施策略,以便在将新映射关系添加到映射时自动移除旧的映射关系。如果此映射移除其最旧的条目,则返回 true。在将新条目插入到映射后, put 和 putAll 将调用此方法。此方法可以提供在每次添加新条目时移除最旧条目的实现程序。如果映射表示缓存,则此方法非常有用:它允许映射通过删除旧条目来减少内存损耗。
示例用法:此重写允许映射增加到 100 个条目,然后每次添加新条目时删除最旧的条目,始终维持 100 个条目的稳定状态。
此方法通常不以任何方式修改映射,相反允许映射在其返回值的指引下进行自我修改。使用此方法直接修改映射是 允许的,但是如果它执行了此操作,则一定 返回 false(表示该映射不应进行任何进一步的修改)。在此方法中修改映射后是否返回 true 是不确定的。
所以,在LinkedHashMap中,次方法声明为protected本就是为了让子类来重写的。
(1)Map 接口的哈希表和链接列表实现,具有可预知的迭代顺序。此实现与 HashMap 的不同之处在于,后者维护着一个运行于所有条目的双重链接列表。此链接列表定义了迭代顺序,该迭代顺序通常就是将键插入到映射中的顺序(插入顺序)。
(2)注意,如果在映射中重新插入 键,则插入顺序不受影响。(如果在调用 m.put(k, v) 前 m.containsKey(k) 返回了 true,则调用时会将键 k 重新插入到映射 m 中。)
(3)此实现可以让客户避免未指定的、由 HashMap(及 Hashtable)所提供的通常为杂乱无章的排序工作,同时无需增加与 TreeMap 相关的成本。使用它可以生成一个与原来顺序相同的映射副本,而与原映射的实现无关:
void foo(Map m) {
Map copy = new LinkedHashMap(m);
...
}
如果模块通过输入得到一个映射,复制这个映射,然后返回由此副本确定其顺序的结果,这种情况下这项技术特别有用。(客户通常期望返回的内容与其出现的顺序相同。)
(4)提供特殊的构造方法来创建链接哈希映射,该哈希映射的迭代顺序就是最后访问其条目的顺序,从近期访问最少到近期访问最多的顺序(访问顺序)。这种映射很适合构建 LRU 缓存。调用 put 或 get 方法将会访问相应的条目(假定调用完成后它还存在)。putAll 方法以指定映射的条目集迭代器提供的键-值映射关系的顺序,为指定映射的每个映射关系生成一个条目访问。任何其他方法均不生成条目访问。特别是,collection 视图上的操作不 影响底层映射的迭代顺序。
可以重写 removeEldestEntry(Map.Entry) 方法来实施策略,以便在将新映射关系添加到映射时自动移除旧的映射关系。
package Map;

import java.util.HashMap;
import java.util.LinkedHashMap;
import java.util.Map;

public class MapTest {
public static void main(String[] args) {
HashMap<Integer, String> hMap = new HashMap<Integer, String>(2, 0.3f);
LinkedHashMap<Integer, String> lMap = new LinkedHashMap<Integer, String>(2, 0.3f);

for(int i=0; i<50; i++){
hMap.put(i, "#"+i);
lMap.put(i, "@"+i);
}

System.out.println("****** Print HashMap ******");
int count = 0;
for (Map.Entry<Integer, String> entry : hMap.entrySet()) {
String value = entry.getValue();
System.out.printf("%-5s, ",value);
count++;
if(count == 10){
System.out.println();
count = 0;
}
}

System.out.println("\n****** Print LinkedHashMap ******");
count = 0;
for (Map.Entry<Integer, String> entry : lMap.entrySet()) {
String value = entry.getValue();
System.out.printf("%-5s, ",value);
count++;
if(count == 10){
System.out.println();
count = 0;
}
}
}
}
output:
****** Print HashMap ******
#0   , #1   , #2   , #3   , #4   , #5   , #6   , #7   , #8   , #9   ,
#10  , #11  , #12  , #13  , #14  , #15  , #17  , #16  , #19  , #18  ,
#21  , #20  , #23  , #22  , #25  , #24  , #27  , #26  , #29  , #28  ,
#31  , #30  , #34  , #35  , #32  , #33  , #38  , #39  , #36  , #37  ,
#42  , #43  , #40  , #41  , #46  , #47  , #44  , #45  , #49  , #48  ,

****** Print LinkedHashMap ******
@0   , @1   , @2   , @3   , @4   , @5   , @6   , @7   , @8   , @9   ,
@10  , @11  , @12  , @13  , @14  , @15  , @16  , @17  , @18  , @19  ,
@20  , @21  , @22  , @23  , @24  , @25  , @26  , @27  , @28  , @29  ,
@30  , @31  , @32  , @33  , @34  , @35  , @36  , @37  , @38  , @39  ,
@40  , @41  , @42  , @43  , @44  , @45  , @46  , @47  , @48  , @49  ,
1 (数组+链表) + 双向循环链表
public class LinkedHashMap<K,V>
extends HashMap<K,V>
implements Map<K,V>
{
/**
* The head of the doubly linked list.
*/
private transient Entry<K,V> header;

public LinkedHashMap(int initialCapacity, float loadFactor) {
super(initialCapacity, loadFactor);
accessOrder = false;
}
看到这里,我们只能发现LinkedHashMap是HashMap的子类,它的构造方法也仅仅是调用了父类的构造方法,那么双链表体现在哪儿呢?
首先,HashMap的构造方法都要调用一个方法 init(),而LinkedHashMap对这个方法进行了重写:
public HashMap(int initialCapacity, float loadFactor) {
if (initialCapacity < 0)
throw new IllegalArgumentException("Illegal initial capacity: " +
initialCapacity);
if (initialCapacity > MAXIMUM_CAPACITY)
initialCapacity = MAXIMUM_CAPACITY;
if (loadFactor <= 0 || Float.isNaN(loadFactor))
throw new IllegalArgumentException("Illegal load factor: " +
loadFactor);

this.loadFactor = loadFactor;
threshold = initialCapacity;
----->  init();
}
@Override
void init() {
header = new Entry<>(-1, null, null, null);
header.before = header.after = header;
}如果已经熟悉过HashMap,那么你一定可以发现,这里的Entry<>已经和HashMap中的Entry内部类不一样了,所以,LinkedHashMap重写了HashMap中最基本的单元Entry:
/**
* LinkedHashMap entry.
*/
private static class Entry<K,V> extends HashMap.Entry<K,V> {
// These fields comprise the doubly linked list used for iteration.
Entry<K,V> before, after;

Entry(int hash, K key, V value, HashMap.Entry<K,V> next) {
super(hash, key, value, next);
}

private void remove() {
before.after = after;
after.before = before;
}

private void addBefore(Entry<K,V> existingEntry) {
after  = existingEntry;
before = existingEntry.before;
before.after = this;
after.before = this;
}

void recordAccess(HashMap<K,V> m) {
LinkedHashMap<K,V> lm = (LinkedHashMap<K,V>)m;
if (lm.accessOrder) {
lm.modCount++;
remove();
addBefore(lm.header);
}
}

void recordRemoval(HashMap<K,V> m) {
remove();
}
}
看到这段内部类的代码,我们可以总结出两个重要的特性:
(1)这里的 before 和 after 是增加的。此处的Entry它继承了HashMap.Entry,所以它的成员变量有:
hash值(这个容易被忽略)
key 和 value 两个变量
用于维护哈希表的 next
用于维护双向循环链表的 before 和 after
(3)LinkedHashMap中依然在使用 【桶+链表】 的典型哈希表结构。这一点从它复用的HashMap中的代码可以看出。所以,它依然会有resize,使用的是链表来维护顺序,所以,resize并不会破坏这个顺序的维护。
分析到这里,双链表的特性已经暴露无遗。在接下来分析其他特性的时候,对这个特性的理解会进一步加强,因为这是LinkedHashMap的根本。
2 插入
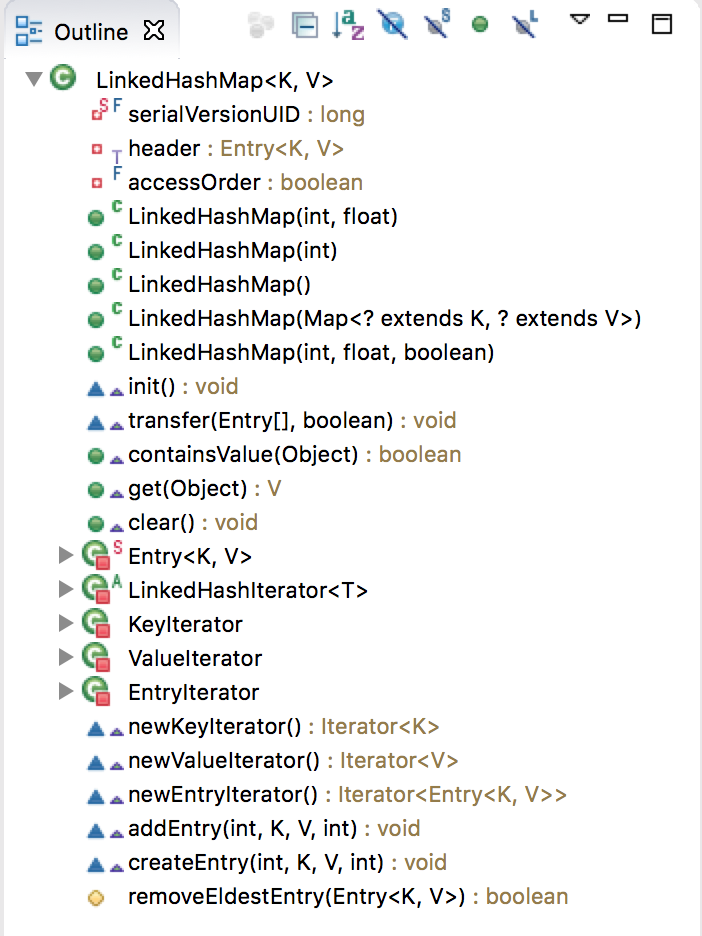
想要分析这个性质,大家打开LinkedHashMap的Outline,一定会发现,put在哪儿呢? 难道它直接调用HahsMap的put方法?那么怎么会有所不同呢?大家思考一下…………好吧,不卖关子了。其实跟上面的构造方法采用的是同一种方式,所以有一点tricky。
首先,LinkedHashMap确实是调用HashMap的put方法。该方法会调用addEntry方法,addEntry方法会调用createEntry方法。而LinkedHashMap重写这两个方法,而不是直接重写put方法:
//HashMap的put方法
public V put(K key, V value) {
if (table == EMPTY_TABLE) {
inflateTable(threshold);
}
if (key == null)
return putForNullKey(value);
int hash = hash(key);
int i = indexFor(hash, table.length);
for (Entry<K,V> e = table[i]; e != null; e = e.next) {
Object k;
if (e.hash == hash && ((k = e.key) == key || key.equals(k))) {
V oldValue = e.value;
e.value = value;
e.recordAccess(this);
return oldValue;
}
}

modCount++;
//hash值,k-v对,index,四个参数
//之所以已经知道了index还要传递hash值是因为,如果需要resize,就不必再次计算hash值了,直接根据hash从新计算index就好
------> addEntry(hash, key, value, i);
return null;
}

//addEntry的主要作用是检查是不是需要resize,真的插入操作在createEntry中
void addEntry(int hash, K key, V value, int bucketIndex) {
if ((size >= threshold) && (null != table[bucketIndex])) {
resize(2 * table.length);
hash = (null != key) ? hash(key) : 0;
bucketIndex = indexFor(hash, table.length);
}

createEntry(hash, key, value, bucketIndex);
}
啰嗦地提一下HashMap中的put操作,它会先通过hash找到要放入的桶,然后遍历桶中所有元素(如果有的话),看看要插入的节点是否已经存在;如果不存在,则插入到桶的首部,将该节点的next指向旧的桶的首节点
//LinkedHashMap 中

//此处的addEntry除了负责resize之外,还负责支持LRU,这一点在后面会讲解
void addEntry(int hash, K key, V value, int bucketIndex) {
super.addEntry(hash, key, value, bucketIndex);

// Remove eldest entry if instructed
Entry<K,V> eldest = header.after;
if (removeEldestEntry(eldest)) {
removeEntryForKey(eldest.key);
}
}

void createEntry(int hash, K key, V value, int bucketIndex) {
//old是要放入的桶中,原本的第一个元素
HashMap.Entry<K,V> old = table[bucketIndex];
//根据要插入的数据新建的一个entry,但不仅仅是新建一个节点哦:
//**它还将这个要插入的节点的next指向了old: e.next = old**
Entry<K,V> e = new Entry<>(hash, key, value, old);
table[bucketIndex] = e;
//上面的操作已经完成了哈希表的所有维护工作
//接下来的addBefore则是维护双向循环链表的操作
-----> e.addBefore(header);
size++;
}
//e.addBefore(header)
//典型的,将 e 这个节点插入到双向循环链表的header之前,也就是队尾
private void addBefore(Entry<K,V> existingEntry) {
after = existingEntry;
before = existingEntry.before;
before.after = this;
after.before = this;
}3 put 已经加入过的key
public static void main(String[] args) {
LinkedHashMap<Integer, String> lMap = new LinkedHashMap<Integer, String>(2, 0.3f);

for(int i=0; i<10; i++){
lMap.put(i, "@"+i);
}
for (Map.Entry<Integer, String> entry : lMap.entrySet()) {
String value = entry.getValue();
System.out.printf("%-4s",value);
}

String old = lMap.put(3,"##");
System.out.println("\n\nThe old value is: "+old);
for (Map.Entry<Integer, String> entry : lMap.entrySet()) {
String value = entry.getValue();
System.out.printf("%-4s",value);
}

}
output:
@0  @1  @2  @3  @4  @5  @6  @7  @8  @9

The old value is: @3
@0  @1  @2  ##  @4  @5  @6  @7  @8  @9
上面的例子说明,如果使用的是默认的插入顺序,再次put之前已经添加过的key,会改变这个key对应的值,但是不会改变整个序列的顺序。这一点可以从 HashMap 的 put 方法看出:
public V put(K key, V value) {
if (table == EMPTY_TABLE) {
inflateTable(threshold);
}
if (key == null)
return putForNullKey(value);
int hash = hash(key);
int i = indexFor(hash, table.length);
for (Entry<K,V> e = table[i]; e != null; e = e.next) {
Object k;
if (e.hash == hash && ((k = e.key) == key || key.equals(k))) {
V oldValue = e.value;
e.value = value;
e.recordAccess(this);
return oldValue;
}
}

modCount++;
addEntry(hash, key, value, i);
return null;
}
也就是说,如果put的key是已经存在的(这种表述不严谨,但可以这么理解),它在调用父类HashMap的put方法中就 return oldValue 了,不会有下面的 addEntry 等一系列操作。
4 accessOrder
这个accessOrder在前面的源码中几乎到处都是,但是我先忽略这一部分代码,在这里讲解。accessOrder是一个boolean变量,它在初始化的时候为false,这时,就是默认的 【插入顺序】;如果为true,表示启用 【访问顺序】。而启用访问顺序只能使用一个特殊的构造方法:
public LinkedHashMap(int initialCapacity,
float loadFactor,
boolean accessOrder) {
super(initialCapacity, loadFactor);
this.accessOrder = accessOrder;
}
我们先来测试一下,再来讲解。
public static void main(String[] args) {
LinkedHashMap<Integer, String> lMap = new LinkedHashMap<Integer, String>(2, 0.3f, true);

for (int i = 0; i < 10; i++) {
lMap.put(i, "@" + i);
}
System.out.println("**** 初始顺序:****");
for (Map.Entry<Integer, String> entry : lMap.entrySet()) {
String value = entry.getValue();
System.out.printf("%-5s", value);
}

// 依次访问8,1,4,7,3
lMap.get(8);
lMap.get(1);
lMap.get(4);
lMap.get(7);
lMap.get(3);

System.out.println("\n\n**** 访问过后的顺序:****");
for (Map.Entry<Integer, String> entry : lMap.entrySet()) {
String value = entry.getValue();
System.out.printf("%-5s", value);
}

// put 新值
lMap.put(11, "@" + 11);
lMap.put(12, "@" + 12);
lMap.put(13, "@" + 13);
System.out.println("\n\n**** 插入新k-v后的顺序:****");
for (Map.Entry<Integer, String> entry : lMap.entrySet()) {
String value = entry.getValue();
System.out.printf("%-5s", value);
}

// put 旧值
lMap.put(0, "new" + 0);
lMap.put(2, "new" + 2);
lMap.put(4, "new" + 4);

System.out.println("\n\n**** 插入旧k后的顺序:****");
for (Map.Entry<Integer, String> entry : lMap.entrySet()) {
String value = entry.getValue();
System.out.printf("%-5s", value);
}

}
output:
**** 初始顺序:****
@0   @1   @2   @3   @4   @5   @6   @7   @8   @9

**** 访问过后的顺序:****
@0   @2   @5   @6   @9   @8   @1   @4   @7   @3

**** 插入新k-v后的顺序:****
@0   @2   @5   @6   @9   @8   @1   @4   @7   @3   @11  @12  @13

**** 插入旧k后的顺序:****
@5   @6   @9   @8   @1   @7   @3   @11  @12  @13  new0 new2 new4
实现的原理就是,每次get的时候,将这个元素移到队列的末尾,从而,最不常访问的元素在队列的首部。
核心源码就是 recordAccess方法。这个方法在HashMap中是空的,LinkedHashMap 对这个方法进行了重写。每当调用get 和 put时发现key已存在的情况下就会触发这个方法。
/**
* This method is invoked by the superclass whenever the value
* of a pre-existing entry is read by Map.get or modified by Map.set.
* If the enclosing Map is access-ordered, it moves the entry
* to the end of the list; otherwise, it does nothing.
*/
void recordAccess(HashMap<K,V> m) {
LinkedHashMap<K,V> lm = (LinkedHashMap<K,V>)m;
if (lm.accessOrder) {
lm.modCount++;
remove();
addBefore(lm.header);
}
}
同理,putAll其实也会触发这个方法,不过putAll不过是顺着传入的参数的迭代器一个个put,所以和put是一样的。
这种顺序的典型应用就是LRU算法。LRU是Least Recently Used 近期最少使用算法。关于操作系统的内存管理,如何节省利用容量不大的内存为最多的进程提供资源,一直是研究的重要方向。而内存的虚拟存储管理,是现在最通用,最成功的方式—— 在内存有限的情况下,扩展一部分外存作为虚拟内存,真正的内存只存储当前运行时所用得到信息。这无疑极大地扩充了内存的功能,极大地提高了计算机的并发度。虚拟页式存储管理,则是将进程所需空间划分为多个页面,内存中只存放当前所需页面,其余页面放入外存的管理方式。
然而,有利就有弊,虚拟页式存储管理减少了进程所需的内存空间,却也带来了运行时间变长这一缺点:进程运行过程中,不可避免地要把在外存中存放的一些信息和内存中已有的进行交换,由于外存的低速,这一步骤所花费的时间不可忽略。
为了尽量减少与理想算法的差距,产生了各种精妙的算法,最少使用页面置换算法便是其中一个。LRU算法的提出,是基于这样一个事实:在前面几条指令中使用频繁的页面很可能在后面的几条指令中频繁使用。反过来说,已经很久没有使用的页面很可能在未来较长的一段时间内不会被用到。这个,就是著名的局部性原理——比内存速度还要快的cache,也是基于同样的原理运行的。因此,我们只需要在每次调换时,找到最少使用的那个页面调出内存。这就是LRU算法的全部内容。
那么,如果要在每次添加新的条目的时候,移除最不常用的条目怎么实现呢? 我觉得说明文档写的很清楚,我直接粘贴过来。
可以重写 removeEldestEntry(Map.Entry) 方法来实施策略,以便在将新映射关系添加到映射时自动移除旧的映射关系。如果此映射移除其最旧的条目,则返回 true。在将新条目插入到映射后, put 和 putAll 将调用此方法。此方法可以提供在每次添加新条目时移除最旧条目的实现程序。如果映射表示缓存,则此方法非常有用:它允许映射通过删除旧条目来减少内存损耗。
示例用法:此重写允许映射增加到 100 个条目,然后每次添加新条目时删除最旧的条目,始终维持 100 个条目的稳定状态。
private static final int MAX_ENTRIES = 100;

protected boolean removeEldestEntry(Map.Entry eldest) {
return size() > MAX_ENTRIES;
}
此方法通常不以任何方式修改映射,相反允许映射在其返回值的指引下进行自我修改。使用此方法直接修改映射是 允许的,但是如果它执行了此操作,则一定 返回 false(表示该映射不应进行任何进一步的修改)。在此方法中修改映射后是否返回 true 是不确定的。
所以,在LinkedHashMap中,次方法声明为protected本就是为了让子类来重写的。

相关文章推荐
- java对世界各个时区(TimeZone)的通用转换处理方法(转载)
- java-注解annotation
- java-模拟tomcat服务器
- java-用HttpURLConnection发送Http请求.
- java-WEB中的监听器Lisener
- Android IPC进程间通讯机制
- Android Native 绘图方法
- Android java 与 javascript互访(相互调用)的方法例子
- 介绍一款信息管理系统的开源框架---jeecg
- 聚类算法之kmeans算法java版本
- java实现 PageRank算法
- PropertyChangeListener简单理解
- c语言实现hashmap(转载)
- c++11 + SDL2 + ffmpeg +OpenAL + java = Android播放器
- 插入排序
- 冒泡排序
- 堆排序
- 快速排序