electron调用C++动态链接库
2016-03-07 15:09
609 查看
1、实验环境

wget http://nodejs.org/dist/latest-v5.x/node-v5.7.1-linux-x64.tar.gztar zxvf node-v5.7.1-linux-x64.tar.gzmv node-v5.7.1-linux-x64/usr/local/node配置NODE_HOME,进入profile编辑环境变量
vim /etc/profile#set for nodejsexport NODE_HOME=/usr/local/nodeexport PATH=$NODE_HOME/bin:$PATH:wq保存并退出,编译/etc/profile使配置生效
source /etc/profile验证是否安装配置成功
node -v输出 v5.7.1表示配置成功
npm模块安装路径
/usr/local/node/bin/npm
mkdir /root/testcd /root/test4.1、配置文件binding.gyp(一定要叫这个名字)
简单的配置如下:
{ "targets": [ { "target_name": "test", "sources":[ "test.cc" ] } ]}4.2、js文件test.js,hello接受两个参数,一个字符串,一个回调函数:
var test = require('./build/Release/test');test.hello('test', function(data) { console.log(data);});4.3、cc文件test.cc,文件应用两个头部node.h和v8.h,整体结构和node的module非常相似,都是先定义Function/Object,然后export:
#include <node.h>#include <v8.h> using namespace v8; // 传入了两个参数,args[0]字符串,args[1] 回调函数void hello(const FunctionCallbackInfo<Value>& args) { // 使用 HandleScope 来管理生命周期 Isolate* isolate =Isolate::GetCurrent(); HandleScopescope(isolate); // 判断参数格式和格式 if (args.Length() < 2|| !args[0]->IsString()) { isolate->ThrowException(Exception::TypeError( String::NewFromUtf8(isolate, "Wrong arguments"))); return; } // callback, 使用Cast方法来转换 Local<Function>callback = Local<Function>::Cast(args[1]); Local<Value>argv[1] = { // 拼接String String::Concat(Local<String>::Cast(args[0]),String::NewFromUtf8(isolate, " apexsoft")) }; // 调用回调, 参数: 当前上下文,参数个数,参数列表 callback->Call(isolate->GetCurrentContext()->Global(), 1,argv);} // 相当于在 exports 对象中添加 { hello: hello }void init(Handle<Object> exports) { NODE_SET_METHOD(exports,"hello", hello);} // 将 export 对象暴露出去// 原型`NODE_MODULE(module_name, Initialize)`NODE_MODULE(test, init);4.4、编译和使用安装node-gyp
npm install node-gyp -g在项目根目录下使用:
node-gyp configure node-gyp build
varhttp = require("http"); http.createServer(function(req,res) { res.writeHead( 200 ,{"Content-Type":"text/html"}); var test = require('./build/Release/test'); var data01; test.hello('hello', function(data) { data01=data; }); res.write(data01); res.end("<p>apexsoft.com.cn</p>");}).listen(3000);console.log("HTTP server is listening at port 3000."); 5.2、main.jsvim main.js
'use strict'; const electron = require('electron');// Module to control application life.const app = electron.app;// Module to create native browser window.const BrowserWindow = electron.BrowserWindow; // Keep a global reference of the window object, if you don't,the window will// be closed automatically when the JavaScript object is garbagecollected.let mainWindow; function createWindow () { // Create the browserwindow. mainWindow = newBrowserWindow({width: 800, height: 600}); // and load theindex.html of the app. //mainWindow.loadURL('file://' + __dirname + '/index.html');mainWindow.loadURL("http:192.168.1.172:3000"); // Open the DevTools. mainWindow.webContents.openDevTools(); // Emitted when thewindow is closed. mainWindow.on('closed',function() { // Dereference thewindow object, usually you would store windows // in an array if yourapp supports multi windows, this is the time // when you shoulddelete the corresponding element. mainWindow = null; });} // This method will be called when Electron has finished// initialization and is ready to create browser windows.app.on('ready', createWindow); // Quit when all windows are closed.app.on('window-all-closed', function () { // On OS X it is commonfor applications and their menu bar // to stay active untilthe user quits explicitly with Cmd + Q if (process.platform !=='darwin') { app.quit(); }}); app.on('activate', function () { // On OS X it's commonto re-create a window in the app when the // dock icon is clickedand there are no other windows open. if (mainWindow === null){ createWindow(); }});5.3、package.jsonvim package.json
{ "name":"electron-quick-start", "version": "1.0.0", "description": "A minimalElectron application", "main": "main.js", "scripts": { "start": "electronmain.js" }, "repository": { "type": "git", "url":"git+https://github.com/atom/electron-quick-start.git" }, "keywords": [ "Electron", "quick", "start", "tutorial" ], "author": "GitHub", "license": "CC0-1.0", "bugs": { "url": "https://github.com/atom/electron-quick-start/issues" }, "homepage":"https://github.com/atom/electron-quick-start#readme", "devDependencies": { "electron-prebuilt":"^0.36.0" }}
node test.js窗口二:启动electron
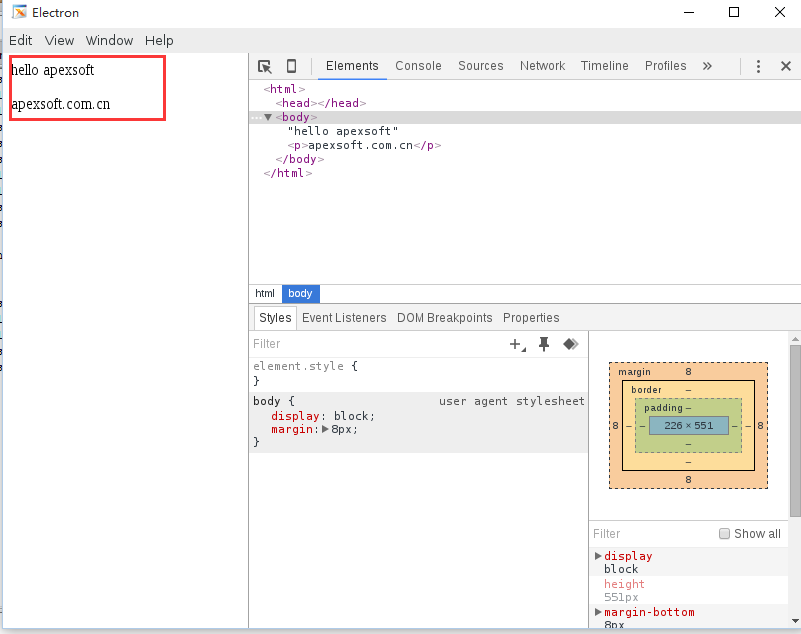
electron /root/test运行效果
npm install -g asar打包你的工程目录
asar pack test test.asar生成app.asar。在windows下,可以将app.asar直接拉入electron.exe下就可以用了。
2、centOS下安装nodejs
下载已经编译好的node.jswget http://nodejs.org/dist/latest-v5.x/node-v5.7.1-linux-x64.tar.gztar zxvf node-v5.7.1-linux-x64.tar.gzmv node-v5.7.1-linux-x64/usr/local/node配置NODE_HOME,进入profile编辑环境变量
vim /etc/profile#set for nodejsexport NODE_HOME=/usr/local/nodeexport PATH=$NODE_HOME/bin:$PATH:wq保存并退出,编译/etc/profile使配置生效
source /etc/profile验证是否安装配置成功
node -v输出 v5.7.1表示配置成功
npm模块安装路径
/usr/local/node/bin/npm
3、安装electron
# mkdir /usr/local/electron# cd /usr/local/electron# wget https://npm.taobao.org/mirrors/electron/0.36.9/electron-v0.36.9-linux-x64.zip# unzipelectron-v0.36.9-linux-x64.zip# vim /etc/profileexport ELECTRON=/usr/local/electronexport PATH=$ELECTRON:$PATH# source /etc/profile4、编写node.js调用C/C++例子
从一个简单的例子开始,说明JavaScript调用C/C++的流程。示例函数包含3部分:配置文件、js文件、cc文件mkdir /root/testcd /root/test4.1、配置文件binding.gyp(一定要叫这个名字)
简单的配置如下:
{ "targets": [ { "target_name": "test", "sources":[ "test.cc" ] } ]}4.2、js文件test.js,hello接受两个参数,一个字符串,一个回调函数:
var test = require('./build/Release/test');test.hello('test', function(data) { console.log(data);});4.3、cc文件test.cc,文件应用两个头部node.h和v8.h,整体结构和node的module非常相似,都是先定义Function/Object,然后export:
#include <node.h>#include <v8.h> using namespace v8; // 传入了两个参数,args[0]字符串,args[1] 回调函数void hello(const FunctionCallbackInfo<Value>& args) { // 使用 HandleScope 来管理生命周期 Isolate* isolate =Isolate::GetCurrent(); HandleScopescope(isolate); // 判断参数格式和格式 if (args.Length() < 2|| !args[0]->IsString()) { isolate->ThrowException(Exception::TypeError( String::NewFromUtf8(isolate, "Wrong arguments"))); return; } // callback, 使用Cast方法来转换 Local<Function>callback = Local<Function>::Cast(args[1]); Local<Value>argv[1] = { // 拼接String String::Concat(Local<String>::Cast(args[0]),String::NewFromUtf8(isolate, " apexsoft")) }; // 调用回调, 参数: 当前上下文,参数个数,参数列表 callback->Call(isolate->GetCurrentContext()->Global(), 1,argv);} // 相当于在 exports 对象中添加 { hello: hello }void init(Handle<Object> exports) { NODE_SET_METHOD(exports,"hello", hello);} // 将 export 对象暴露出去// 原型`NODE_MODULE(module_name, Initialize)`NODE_MODULE(test, init);4.4、编译和使用安装node-gyp
npm install node-gyp -g在项目根目录下使用:
node-gyp configure node-gyp build
5、让Electron去识别C/C++
5.1、修改test.jsvim test.jsvarhttp = require("http"); http.createServer(function(req,res) { res.writeHead( 200 ,{"Content-Type":"text/html"}); var test = require('./build/Release/test'); var data01; test.hello('hello', function(data) { data01=data; }); res.write(data01); res.end("<p>apexsoft.com.cn</p>");}).listen(3000);console.log("HTTP server is listening at port 3000."); 5.2、main.jsvim main.js
'use strict'; const electron = require('electron');// Module to control application life.const app = electron.app;// Module to create native browser window.const BrowserWindow = electron.BrowserWindow; // Keep a global reference of the window object, if you don't,the window will// be closed automatically when the JavaScript object is garbagecollected.let mainWindow; function createWindow () { // Create the browserwindow. mainWindow = newBrowserWindow({width: 800, height: 600}); // and load theindex.html of the app. //mainWindow.loadURL('file://' + __dirname + '/index.html');mainWindow.loadURL("http:192.168.1.172:3000"); // Open the DevTools. mainWindow.webContents.openDevTools(); // Emitted when thewindow is closed. mainWindow.on('closed',function() { // Dereference thewindow object, usually you would store windows // in an array if yourapp supports multi windows, this is the time // when you shoulddelete the corresponding element. mainWindow = null; });} // This method will be called when Electron has finished// initialization and is ready to create browser windows.app.on('ready', createWindow); // Quit when all windows are closed.app.on('window-all-closed', function () { // On OS X it is commonfor applications and their menu bar // to stay active untilthe user quits explicitly with Cmd + Q if (process.platform !=='darwin') { app.quit(); }}); app.on('activate', function () { // On OS X it's commonto re-create a window in the app when the // dock icon is clickedand there are no other windows open. if (mainWindow === null){ createWindow(); }});5.3、package.jsonvim package.json
{ "name":"electron-quick-start", "version": "1.0.0", "description": "A minimalElectron application", "main": "main.js", "scripts": { "start": "electronmain.js" }, "repository": { "type": "git", "url":"git+https://github.com/atom/electron-quick-start.git" }, "keywords": [ "Electron", "quick", "start", "tutorial" ], "author": "GitHub", "license": "CC0-1.0", "bugs": { "url": "https://github.com/atom/electron-quick-start/issues" }, "homepage":"https://github.com/atom/electron-quick-start#readme", "devDependencies": { "electron-prebuilt":"^0.36.0" }}
6、使用方法
窗口一:启动test.jsnode test.js窗口二:启动electron
electron /root/test运行效果
7、打包
使用命令完成打包工具命令行的安装npm install -g asar打包你的工程目录
asar pack test test.asar生成app.asar。在windows下,可以将app.asar直接拉入electron.exe下就可以用了。

相关文章推荐
- 使用C++实现JNI接口需要注意的事项
- 关于指针的一些事情
- c++ primer 第五版 笔记前言
- share_ptr的几个注意点
- Lua中调用C++函数示例
- Lua教程(一):在C++中嵌入Lua脚本
- Lua教程(二):C++和Lua相互传递数据示例
- C++联合体转换成C#结构的实现方法
- C++高级程序员成长之路
- C++编写简单的打靶游戏
- C++ 自定义控件的移植问题
- C++变位词问题分析
- C/C++数据对齐详细解析
- C++基于栈实现铁轨问题
- C++中引用的使用总结
- 使用Lua来扩展C++程序的方法
- C++中调用Lua函数实例
- Lua和C++的通信流程代码实例
- C与C++之间相互调用实例方法讲解
- 解析C++中派生的概念以及派生类成员的访问属性