Spring MVC配置
2016-02-18 22:58
471 查看
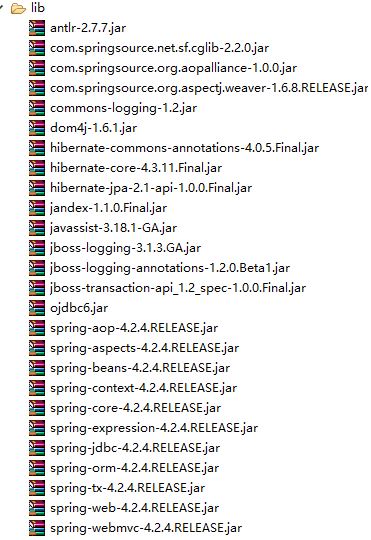
1,添加相关jar包
2,配置web.xml
3,配置springmvc-servlet.xml
4,前台页面,发送请求 index.jsp
5,创建控制器类 HelloWorld.java
6,处理返回信息的页面 success.jsp 所在目录即springmvc-servlet.xml视图解析器前缀,习惯为/WEB-INF/views/,只有服务器内部程序可以访问,安全性高.
7,其他:用于演示的实体类 User.java Bumen.java
2,配置web.xml
<?xml version="1.0" encoding="UTF-8"?>
<web-app xmlns:xsi="http://www.w3.org/2001/XMLSchema-instance" xmlns="http://java.sun.com/xml/ns/javaee" xsi:schemaLocation="http://java.sun.com/xml/ns/javaee http://java.sun.com/xml/ns/javaee/web-app_3_0.xsd" id="WebApp_ID" version="3.0">

<!-- 过滤器,将浏览器的POST请求转化为PUT/DELETE -->
<filter>
<filter-name>hf</filter-name>
<filter-class>org.springframework.web.filter.HiddenHttpMethodFilter</filter-class>
</filter>
<filter-mapping>
<filter-name>hf</filter-name>
<url-pattern>/*</url-pattern>
</filter-mapping>

<!-- 配置springDispatcherServlet -->
<servlet>
<servlet-name>springmvc</servlet-name>
<servlet-class>org.springframework.web.servlet.DispatcherServlet</servlet-class>
<!-- 配置文件的路径和名称;也可以不配置,则默认名称为:上面servlet-name值后加"-servlet.xml"默认位置:WEB-INF文件夹下 -->
<!--
<init-param>
<param-name>contextConfigLocation</param-name>
<param-value>classpath:springmvc.xml</param-value>
</init-param>
-->
<!-- 启动时自动加载 -->
<load-on-startup>1</load-on-startup>
</servlet>

<!-- 配置请求路径 -->
<servlet-mapping>
<servlet-name>springmvc</servlet-name>
<url-pattern>/</url-pattern>
</servlet-mapping>

</web-app>
3,配置springmvc-servlet.xml
<?xml version="1.0" encoding="UTF-8"?>
<beans xmlns="http://www.springframework.org/schema/beans"
xmlns:xsi="http://www.w3.org/2001/XMLSchema-instance"
xmlns:context="http://www.springframework.org/schema/context"
xmlns:mvc="http://www.springframework.org/schema/mvc"
xsi:schemaLocation="http://www.springframework.org/schema/beans http://www.springframework.org/schema/beans/spring-beans.xsd http://www.springframework.org/schema/context http://www.springframework.org/schema/context/spring-context-4.2.xsd http://www.springframework.org/schema/mvc http://www.springframework.org/schema/mvc/spring-mvc-4.2.xsd">
<!-- 扫描器 -->
<context:component-scan base-package="com.hanqi"></context:component-scan>

<!-- 视图解析器 -->
<bean class="org.springframework.web.servlet.view.InternalResourceViewResolver">
<!-- 前缀 -->
<property name="prefix" value="/WEB-INF/views/"></property>
<!-- 后缀 -->
<property name="suffix" value=".jsp"></property>
</bean>

</beans>
4,前台页面,发送请求 index.jsp
<%@ page language="java" contentType="text/html; charset=UTF-8"
pageEncoding="UTF-8"%>
<!DOCTYPE html PUBLIC "-//W3C//DTD HTML 4.01 Transitional//EN" "http://www.w3.org/TR/html4/loose.dtd">
<html>
<head>
<meta http-equiv="Content-Type" content="text/html; charset=UTF-8">
<title>主页</title>
</head>
<body>

<a href="hanqi/hello">发送请求</a>

<form action="hanqi/hello" method="post">

<input type="submit" value="提交POST请求">
</form>
<!-- REST风格 put/delete动作加隐藏域实现 -->
<form action="hanqi/helloDelete/123" method="post">
<input type="hidden" name="_method" value="DELETE">
<input type="submit" value="提交DELETE请求">
</form>

<!-- 属性自动装入对象,并支持级联 -->
<form action="hanqi/hellouser" method="post">
用户ID:<input type="text" name="id"><br>
用户名称:<input type="text" name="username"><br>

部门ID:<input type="text" name="bumen.bumenid"><br>
部门名称:<input type="text" name="bumen.bumenmc">

<input type="submit" value="提交user信息">
</form>
<br>

<div>
<a href="hanqi/helloP?id=123&name=hh">发送带参数的请求</a>
</div>

<div>
<a href="hanqi/helloP?id=123">发送带选参数的请求</a>
</div>

<div>
<a href="hanqi/helloS/123">发送带占位符参数的请求</a>
</div>

</body>
</html>
5,创建控制器类 HelloWorld.java
package com.hanqi;

import org.springframework.stereotype.Controller;
import org.springframework.web.bind.annotation.PathVariable;
import org.springframework.web.bind.annotation.RequestMapping;
import org.springframework.web.bind.annotation.RequestMethod;
import org.springframework.web.bind.annotation.RequestParam;

//请求处理类 控制器类
@Controller
@RequestMapping("/hanqi")
public class HelloWorld {

@RequestMapping(value="/hello")//前台请求路径
public String sayHello()
{
System.out.println("hello!world!");

return "success";//返回的页面
}

@RequestMapping(value="/helloP")
public String sayHelloP(@RequestParam("id") int id, @RequestParam(value="name",required=false,defaultValue="ttt") String username)
{
System.out.println("hello!参数:id="+id+"name="+username);

return "success";
}

//接收Spring servlet自动装配好的对象
@RequestMapping(value="/hellouser", method=RequestMethod.POST)
public String sayHellouser(User user)
{
System.out.println("hello!参数:id="+user);

return "success";
}

@RequestMapping(value="/helloS/{id}", method=RequestMethod.POST)
public String sayHelloS(@PathVariable("id") int id)
{
System.out.println("hello!参数:id="+id);

return "success";
}

//占位符 REST风格
@RequestMapping(value="/helloDelete/{id}", method=RequestMethod.DELETE)
public String sayHelloD(@PathVariable("id") int id)
{
System.out.println("hello!delete参数:id="+id);

return "success";
}

@RequestMapping(value="/hello", method=RequestMethod.POST)
public String sayHelloPost()
{
System.out.println("hello!POST");

return "success";
}

}
6,处理返回信息的页面 success.jsp 所在目录即springmvc-servlet.xml视图解析器前缀,习惯为/WEB-INF/views/,只有服务器内部程序可以访问,安全性高.
<%@ page language="java" contentType="text/html; charset=UTF-8"
pageEncoding="UTF-8"%>
<!DOCTYPE html PUBLIC "-//W3C//DTD HTML 4.01 Transitional//EN" "http://www.w3.org/TR/html4/loose.dtd">
<html>
<head>
<meta http-equiv="Content-Type" content="text/html; charset=UTF-8">
<title>成功</title>
</head>
<body>
返回成功!
</body>
</html>
7,其他:用于演示的实体类 User.java Bumen.java
package com.hanqi;

public class User {

private int id;
private String username;
private Bumen bumen;

@Override
public String toString() {
return "User [id=" + id + ", username=" + username + ", bumen=" + bumen + "]";
}
public int getId() {
return id;
}
public void setId(int id) {
this.id = id;
}
public String getUsername() {
return username;
}
public void setUsername(String username) {
this.username = username;
}
public Bumen getBumen() {
return bumen;
}
public void setBumen(Bumen bumen) {
this.bumen = bumen;
}

}
package com.hanqi;
public class Bumen {
private int bumenid;
private String bumenmc;
@Override
public String toString() {
return "Bumen [bumenid=" + bumenid + ", bumenmc=" + bumenmc + "]";
}
public int getBumenid() {
return bumenid;
}
public void setBumenid(int bumenid) {
this.bumenid = bumenid;
}
public String getBumenmc() {
return bumenmc;
}
public void setBumenmc(String bumenmc) {
this.bumenmc = bumenmc;
}
}

相关文章推荐
- 第五章 SpringMVC之ViewResolver和View解析
- Java [Leetcode 125]Valid Palindrome
- Eclipse下 快速找到类对应的包
- java日期格式
- 六种常用的设计模式java实现(四)模板模式
- Eclipse包与类的显示和查找小技巧
- 对JAVA的初步相识
- Simple-Java—Collections(二)Java中如何把数组转换为ArrayList
- 【004】Mac下命令行terminal安装jdk
- LeetCode_1_TwoSum(Java Code)
- java学习之JDBC
- Java 入门 之 AWT 与 Swing 的比较
- Java中JSON操作
- Spring事务的来龙去脉
- spring hibernate4整合问题
- Java byte数据类型详解
- Servlet生命周期
- Eclipse导出JavaDoc中文乱码问题解决
- 01、数据类型初阶(Java的基本数据类型)
- 简单的java Socket 例子