Apache Thrift - java开发详解
2016-02-16 13:38
435 查看
1、添加依赖 jar
2、编写IDL文件 Hello.thrift
namespace java service.demo
service Hello {
string helloString(1:string para)
i32 helloInt(1:i32 para)
bool helloBoolean(1:bool para)
void helloVoid()
string helloNull()
}
3、生成代码
生成代码缩略图:

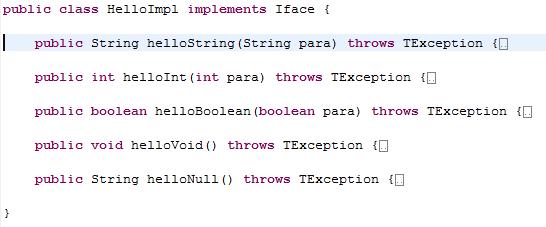
4、编写实现类、实现Hello.Iface:
缩略图:
5、编写服务端,发布(阻塞式IO + 多线程处理)服务。
[java]
view plain
copy
/**
* 阻塞式、多线程处理
*
* @param args
*/
@SuppressWarnings({ "unchecked", "rawtypes" })
public static void main(String[] args) {
try {
//设置传输通道,普通通道
TServerTransport serverTransport = new TServerSocket(7911);
//使用高密度二进制协议
TProtocolFactory proFactory = new TCompactProtocol.Factory();
//设置处理器HelloImpl
TProcessor processor = new Hello.Processor(new HelloImpl());
//创建服务器
TServer server = new TThreadPoolServer(
new Args(serverTransport)
.protocolFactory(proFactory)
.processor(processor)
);
System.out.println("Start server on port 7911...");
server.serve();
} catch (Exception e) {
e.printStackTrace();
}
}
6、编写客户端,调用(阻塞式IO + 多线程处理)服务:
[java]
view plain
copy
public static void main(String[] args) throws Exception {
// 设置传输通道 - 普通IO流通道
TTransport transport = new TSocket("localhost", 7911);
transport.open();
//使用高密度二进制协议
TProtocol protocol = new TCompactProtocol(transport);
//创建Client
Hello.Client client = new Hello.Client(protocol);
long start = System.currentTimeMillis();
for(int i=0; i<10000; i++){
client.helloBoolean(false);
client.helloInt(111);
client.helloNull();
client.helloString("dongjian");
client.helloVoid();
}
System.out.println("耗时:" + (System.currentTimeMillis() - start));
//关闭资源
transport.close();
}
现在已完成整个开发过程,超级无敌简单。
其中服务端使用的协议需要与客户端保持一致。
-------------------------------------------------------------------------------------------------------------------
上面展示了普通且常用的服务端和客户端,下面请看非阻塞IO,即java中的NIO:
基于非阻塞IO(NIO)的服务端:
[java]
view plain
copy
public static void main(String[] args) {
try {
//传输通道 - 非阻塞方式
TNonblockingServerTransport serverTransport = new TNonblockingServerSocket(7911);
//异步IO,需要使用TFramedTransport,它将分块缓存读取。
TTransportFactory transportFactory = new TFramedTransport.Factory();
//使用高密度二进制协议
TProtocolFactory proFactory = new TCompactProtocol.Factory();
//设置处理器 HelloImpl
TProcessor processor = new Hello.Processor(new HelloImpl());
//创建服务器
TServer server = new TThreadedSelectorServer(
new Args(serverTransport)
.protocolFactory(proFactory)
.transportFactory(transportFactory)
.processor(processor)
);
System.out.println("Start server on port 7911...");
server.serve();
} catch (Exception e) {
e.printStackTrace();
}
}
调用非阻塞IO(NIO)服务的客户端:
[java]
view plain
copy
public static void main(String[] args) throws Exception {
//设置传输通道,对于非阻塞服务,需要使用TFramedTransport,它将数据分块发送
TTransport transport = new TFramedTransport(new TSocket("localhost", 7911));
transport.open();
//使用高密度二进制协议
TProtocol protocol = new TCompactProtocol(transport);
//创建Client
Hello.Client client = new Hello.Client(protocol);
long start = System.currentTimeMillis();
for(int i=0; i<10000; i++){
client.helloBoolean(false);
client.helloInt(111);
client.helloNull();
client.helloString("360buy");
client.helloVoid();
}
System.out.println("耗时:" + (System.currentTimeMillis() - start));
//关闭资源
transport.close();
}
-----------------------------------------------------------------------------------------------------------------------------------
客户端异步调用:
[java]
view plain
copy
/** 调用[非阻塞IO]服务,异步 */
public static void main(String[] args) {
try {
//异步调用管理器
TAsyncClientManager clientManager = new TAsyncClientManager();
//设置传输通道,调用非阻塞IO。
final TNonblockingTransport transport = new TNonblockingSocket("localhost", 7911);
//设置协议
TProtocolFactory protocol = new TCompactProtocol.Factory();
//创建Client
final Hello.AsyncClient client = new Hello.AsyncClient(protocol, clientManager, transport);
// 调用服务
System.out.println("开始:" + System.currentTimeMillis());
client.helloBoolean(false, new AsyncMethodCallback<Hello.AsyncClient.helloBoolean_call>() {
public void onError(Exception exception) {
System.out.println("错误1: " + System.currentTimeMillis());
}
public void onComplete(helloBoolean_call response) {
System.out.println("完成1: " + System.currentTimeMillis());
try {
client.helloBoolean(false, new AsyncMethodCallback<Hello.AsyncClient.helloBoolean_call>() {
public void onError(Exception exception) {
System.out.println("错误2: " + System.currentTimeMillis());
}
public void onComplete(helloBoolean_call response) {
System.out.println("完成2: " + System.currentTimeMillis());
transport.close();
}
});
} catch (TException e) {
e.printStackTrace();
}
}
});
System.out.println("结束:" + System.currentTimeMillis());
Thread.sleep(5000);
} catch (Exception e) {
e.printStackTrace();
}
}
-----------------------------------------------------------------------------------------------------------------------------------
使用SSL的服务端:

调用基于SSL服务端的客户端:

1、添加依赖 jar
<dependency>
<groupId>org.apache.thrift</groupId>
<artifactId>libthrift</artifactId>
<version>0.8.0</version>
</dependency>
<dependency>
<groupId>org.slf4j</groupId>
<artifactId>slf4j-log4j12</artifactId>
<version>1.6.1</version>
</dependency>
2、编写IDL文件 Hello.thrift
namespace java service.demo
service Hello {
string helloString(1:string para)
i32 helloInt(1:i32 para)
bool helloBoolean(1:bool para)
void helloVoid()
string helloNull()
}
3、生成代码
thrift -o <output directory> -gen java Hello.thrift
生成代码缩略图:
4、编写实现类、实现Hello.Iface:
缩略图:
5、编写服务端,发布(阻塞式IO + 多线程处理)服务。
[java]
view plain
copy
/**
* 阻塞式、多线程处理
*
* @param args
*/
@SuppressWarnings({ "unchecked", "rawtypes" })
public static void main(String[] args) {
try {
//设置传输通道,普通通道
TServerTransport serverTransport = new TServerSocket(7911);
//使用高密度二进制协议
TProtocolFactory proFactory = new TCompactProtocol.Factory();
//设置处理器HelloImpl
TProcessor processor = new Hello.Processor(new HelloImpl());
//创建服务器
TServer server = new TThreadPoolServer(
new Args(serverTransport)
.protocolFactory(proFactory)
.processor(processor)
);
System.out.println("Start server on port 7911...");
server.serve();
} catch (Exception e) {
e.printStackTrace();
}
}
6、编写客户端,调用(阻塞式IO + 多线程处理)服务:
[java]
view plain
copy
public static void main(String[] args) throws Exception {
// 设置传输通道 - 普通IO流通道
TTransport transport = new TSocket("localhost", 7911);
transport.open();
//使用高密度二进制协议
TProtocol protocol = new TCompactProtocol(transport);
//创建Client
Hello.Client client = new Hello.Client(protocol);
long start = System.currentTimeMillis();
for(int i=0; i<10000; i++){
client.helloBoolean(false);
client.helloInt(111);
client.helloNull();
client.helloString("dongjian");
client.helloVoid();
}
System.out.println("耗时:" + (System.currentTimeMillis() - start));
//关闭资源
transport.close();
}
现在已完成整个开发过程,超级无敌简单。
其中服务端使用的协议需要与客户端保持一致。
-------------------------------------------------------------------------------------------------------------------
上面展示了普通且常用的服务端和客户端,下面请看非阻塞IO,即java中的NIO:
基于非阻塞IO(NIO)的服务端:
[java]
view plain
copy
public static void main(String[] args) {
try {
//传输通道 - 非阻塞方式
TNonblockingServerTransport serverTransport = new TNonblockingServerSocket(7911);
//异步IO,需要使用TFramedTransport,它将分块缓存读取。
TTransportFactory transportFactory = new TFramedTransport.Factory();
//使用高密度二进制协议
TProtocolFactory proFactory = new TCompactProtocol.Factory();
//设置处理器 HelloImpl
TProcessor processor = new Hello.Processor(new HelloImpl());
//创建服务器
TServer server = new TThreadedSelectorServer(
new Args(serverTransport)
.protocolFactory(proFactory)
.transportFactory(transportFactory)
.processor(processor)
);
System.out.println("Start server on port 7911...");
server.serve();
} catch (Exception e) {
e.printStackTrace();
}
}
调用非阻塞IO(NIO)服务的客户端:
[java]
view plain
copy
public static void main(String[] args) throws Exception {
//设置传输通道,对于非阻塞服务,需要使用TFramedTransport,它将数据分块发送
TTransport transport = new TFramedTransport(new TSocket("localhost", 7911));
transport.open();
//使用高密度二进制协议
TProtocol protocol = new TCompactProtocol(transport);
//创建Client
Hello.Client client = new Hello.Client(protocol);
long start = System.currentTimeMillis();
for(int i=0; i<10000; i++){
client.helloBoolean(false);
client.helloInt(111);
client.helloNull();
client.helloString("360buy");
client.helloVoid();
}
System.out.println("耗时:" + (System.currentTimeMillis() - start));
//关闭资源
transport.close();
}
-----------------------------------------------------------------------------------------------------------------------------------
客户端异步调用:
[java]
view plain
copy
/** 调用[非阻塞IO]服务,异步 */
public static void main(String[] args) {
try {
//异步调用管理器
TAsyncClientManager clientManager = new TAsyncClientManager();
//设置传输通道,调用非阻塞IO。
final TNonblockingTransport transport = new TNonblockingSocket("localhost", 7911);
//设置协议
TProtocolFactory protocol = new TCompactProtocol.Factory();
//创建Client
final Hello.AsyncClient client = new Hello.AsyncClient(protocol, clientManager, transport);
// 调用服务
System.out.println("开始:" + System.currentTimeMillis());
client.helloBoolean(false, new AsyncMethodCallback<Hello.AsyncClient.helloBoolean_call>() {
public void onError(Exception exception) {
System.out.println("错误1: " + System.currentTimeMillis());
}
public void onComplete(helloBoolean_call response) {
System.out.println("完成1: " + System.currentTimeMillis());
try {
client.helloBoolean(false, new AsyncMethodCallback<Hello.AsyncClient.helloBoolean_call>() {
public void onError(Exception exception) {
System.out.println("错误2: " + System.currentTimeMillis());
}
public void onComplete(helloBoolean_call response) {
System.out.println("完成2: " + System.currentTimeMillis());
transport.close();
}
});
} catch (TException e) {
e.printStackTrace();
}
}
});
System.out.println("结束:" + System.currentTimeMillis());
Thread.sleep(5000);
} catch (Exception e) {
e.printStackTrace();
}
}
-----------------------------------------------------------------------------------------------------------------------------------
使用SSL的服务端:
调用基于SSL服务端的客户端:

相关文章推荐
- java.lang.NoSuchMethodError: org.apache.commons.io.FileUtils.getTempDirectory()Ljava/io/File;
- Zend Studio 如何配置本地apache服务器使用xdebug调试php脚本
- 将 Shiro 作为应用的权限基础 五:SpringMVC+Apache Shiro+JPA(hibernate)整合配置
- 在 FreeBSD 10.2 上如何通过配置 Apache 和 SSL 安装 Bugzilla
- Spark1.6.0使用apache-maven-3.3.9编译详细记录
- Exception:Request processing failed; nested exception is org.apache.ibatis.binding.BindingException
- Apache commons-dbutils
- PHP-Apache2.4虚拟目录配置
- Ubuntu 12.04 安装和卸载Apache
- Apache配置虚拟主机
- 安装wxPHP后,apache无法启动
- org.apache.hadoop.ipc.Client: Retrying connect to server
- org.apache.commons.lang3.StringUtils中常用方法
- mvc路由htaccess,基本是apache服务,php命名空间
- 使用Apache Commons-fileupload组件上传文件案例
- PHP学习之Apache修改默认站点的目录
- 五种开源协议(GPL,LGPL,BSD,MIT,Apache)
- linux apache配置虚拟主机
- windows系统 配置apache2.2+php5.2+mysql5.5
- 2.0 Apache日志切割