Android百度地图定位后获取周边位置的实现代码
2016-01-27 16:50
1036 查看
本文实例讲解Android百度地图定位后获取周边位置的实现代码,分享给大家供大家参考,具体内容如下
效果图:
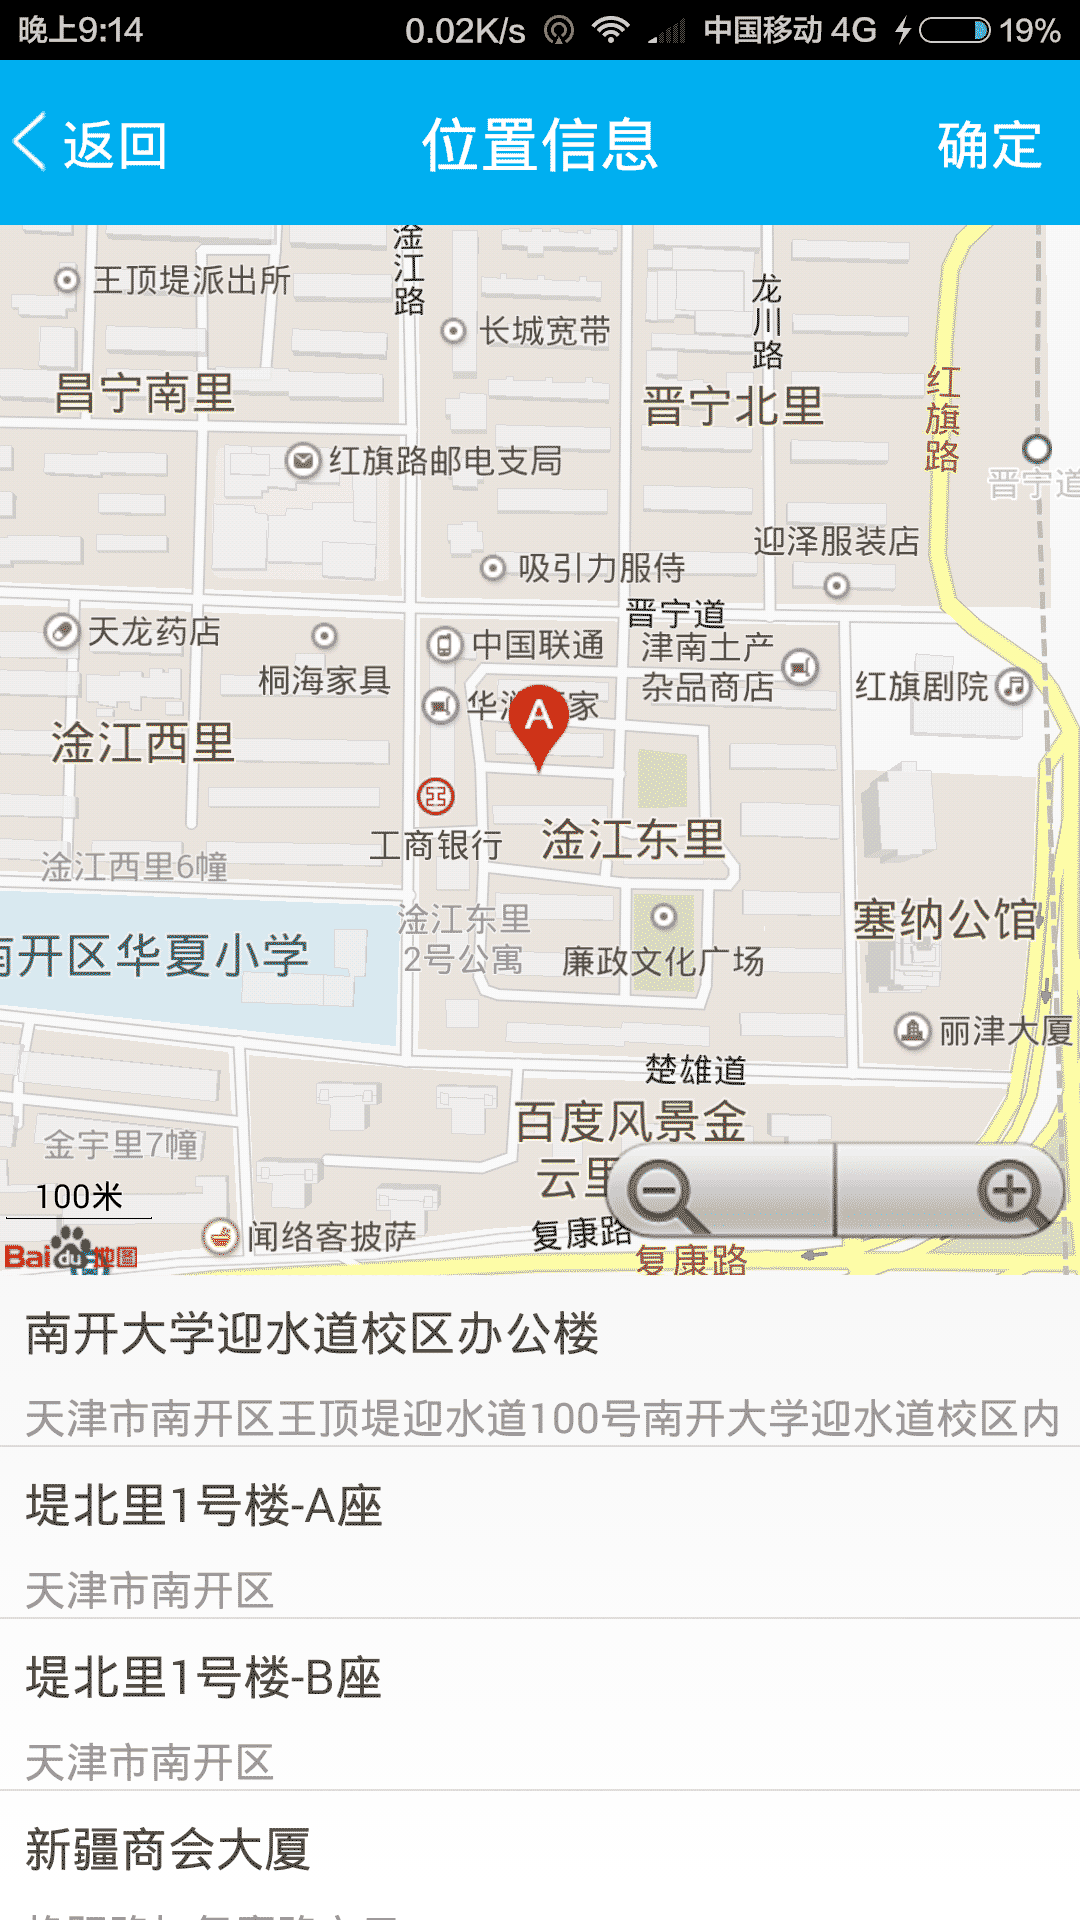
具体代码:
1.布局文件
<?xml version="1.0" encoding="utf-8"?>
<LinearLayout xmlns:android="http://schemas.android.com/apk/res/android"
android:orientation="vertical"
android:layout_width="match_parent"
android:layout_height="match_parent">
<RelativeLayout
android:layout_width="match_parent"
android:layout_height="@dimen/height_top_bar"
android:background="@color/common_top_bar_dark"
android:gravity="center_vertical">
<Button
android:id="@+id/btn_location_back"
android:layout_width="wrap_content"
android:layout_height="match_parent"
android:drawableLeft="@drawable/back"
android:text="@string/top_back"
style="@style/btn_title_bar"
android:layout_alignParentLeft="true"
android:onClick="back"
/>
<TextView
android:layout_width="wrap_content"
android:layout_height="wrap_content"
android:layout_centerInParent="true"
android:text="@string/location_message"
style="@style/txt_titlebar_message"/>
<Button
android:id="@+id/btn_location_ok"
android:layout_width="52dp"
android:layout_height="match_parent"
android:layout_alignParentRight="true"
android:background="@drawable/common_tab_bg"
android:text="@string/txt_queding"
style="@style/btn_title_bar"/>
</RelativeLayout>
<com.baidu.mapapi.map.MapView
android:layout_weight="2"
android:id="@+id/mapview_location"
android:layout_width="fill_parent"
android:layout_height="match_parent"
android:clickable="true" />
<ListView
android:layout_weight="3"
android:id="@+id/lv_location_nearby"
android:layout_width="match_parent"
android:layout_height="match_parent"/>
</LinearLayout>

布局文件就是上面是一个百度地图的mapview,下面是一个显示周边位置的ListView,很简单。
1、自动定位
我们先看一下根据自己的地理位置实现定位
1.首先初始化要用到的组件
/**
* 初始化组件
*/
private void initView() {
btnLocationBack = (Button) findViewById(R.id.btn_location_back);
btnLocationBack.setOnClickListener(this);
btnLocationOk = (Button) findViewById(R.id.btn_location_ok);
btnLocationOk.setOnClickListener(this);
mapViewLocation = (MapView) findViewById(R.id.mapview_location);
lvLocNear = (ListView) findViewById(R.id.lv_location_nearby);
nearList = new ArrayList<PoiInfo>();
adapter = new LocNearAddressAdapter(context, nearList, isSelected);
lvLocNear.setAdapter(adapter);
}
2.初始化LocationClient类,该类需要在主线程中声明
public LocationClient mLocationClient = null;
public BDLocationListener myListener = new MyLocationListener();
public void onCreate() {
mLocationClient = new LocationClient(getApplicationContext());   //声明LocationClient类
mLocationClient.registerLocationListener( myListener );  //注册监听函数
}
3.配置定位SDK参数
设置定位参数包括:定位模式(高精度定位模式,低功耗定位模式和仅用设备定位模式),返回坐标类型,是否打开GPS,是否返回地址信息、位置语义化信息、POI信息等等。
LocationClientOption类,该类用来设置定位SDK的定位方式
private void initLocation(){
LocationClientOption option = new LocationClientOption();
option.setLocationMode(LocationMode.Hight_Accuracy
);//可选,默认高精度,设置定位模式,高精度,低功耗,仅设备
option.setCoorType("bd09ll");//可选,默认gcj02,设置返回的定位结果坐标系
int span=1000;
option.setScanSpan(span);//可选,默认0,即仅定位一次,设置发起定位请求的间隔需要大于等于1000ms才是有效的
option.setIsNeedAddress(true);//可选,设置是否需要地址信息,默认不需要
option.setOpenGps(true);//可选,默认false,设置是否使用gps
option.setLocationNotify(true);//可选,默认false,设置是否当gps有效时按照1S1次频率输出GPS结果
option.setIsNeedLocationDescribe(true);//可选,默认false,设置是否需要位置语义化结果,可以在BDLocation.getLocationDescribe里得到,结果类似于“在北京天安门附近”
option.setIsNeedLocationPoiList(true);//可选,默认false,设置是否需要POI结果,可以在BDLocation.getPoiList里得到
option.setIgnoreKillProcess(false);//可选,默认false,定位SDK内部是一个SERVICE,并放到了独立进程,设置是否在stop的时候杀死这个进程,默认杀死
option.SetIgnoreCacheException(false);//可选,默认false,设置是否收集CRASH信息,默认收集
option.setEnableSimulateGps(false);//可选,默认false,设置是否需要过滤gps仿真结果,默认需要
mLocationClient.setLocOption(option);
}
4.实现BDLocationListener接口
/**
* 监听函数,有新位置的时候,格式化成字符串,输出到屏幕中
*/
public class MyLocationListenner implements BDLocationListener {
@Override
public void onReceiveLocation(BDLocation location) {
if (location == null) {
return;
}
Log.d("map", "On location change received:" + location);
Log.d("map", "addr:" + location.getAddrStr());
if (progressDialog != null) {
progressDialog.dismiss();
}
if (lastLocation != null) {
if (lastLocation.getLatitude() == location.getLatitude() && lastLocation.getLongitude() == location.getLongitude()) {
Log.d("map", "same location, skip refresh");
// mMapView.refresh(); //need this refresh?
return;
}
}
lastLocation = location;
mBaiduMap.clear();
mCurrentLantitude = lastLocation.getLatitude();
mCurrentLongitude = lastLocation.getLongitude();
Log.e(">>>>>>>", mCurrentLantitude + "," + mCurrentLongitude);
LatLng llA = new LatLng(lastLocation.getLatitude(), lastLocation.getLongitude());
CoordinateConverter converter = new CoordinateConverter();
converter.coord(llA);
converter.from(CoordinateConverter.CoordType.COMMON);
LatLng convertLatLng = converter.convert();
OverlayOptions ooA = new MarkerOptions().position(convertLatLng).icon(BitmapDescriptorFactory
.fromResource(R.drawable.icon_marka))
.zIndex(4).draggable(true);
mCurrentMarker = (Marker) mBaiduMap.addOverlay(ooA);
MapStatusUpdate u = MapStatusUpdateFactory.newLatLngZoom(convertLatLng, 16.0f);
mBaiduMap.animateMapStatus(u);
new Thread(new Runnable() {
@Override
public void run() {
searchNeayBy();
}
}).start();
}
public void onReceivePoi(BDLocation poiLocation) {
if (poiLocation == null) {
return;
}
}
}
这里接受到的BDLocation中包含好多参数,相信总有一个对你有用的。
2、根据经纬度定位
这种方法不需要自动定位,就是根据经纬度来显示地图上的位置
/*
* 显示经纬度的位置
* */
private void showMap(double latitude, double longtitude, String address) {
//    sendButton.setVisibility(View.GONE);
LatLng llA = new LatLng(latitude, longtitude);
CoordinateConverter converter = new CoordinateConverter();
converter.coord(llA);
converter.from(CoordinateConverter.CoordType.COMMON);
LatLng convertLatLng = converter.convert();
OverlayOptions ooA = new MarkerOptions().position(convertLatLng).icon(BitmapDescriptorFactory.fromResource(R.drawable.icon_marka))
.zIndex(4).draggable(true);
markerA = (Marker) (mBaiduMap.addOverlay(ooA));
u = MapStatusUpdateFactory.newLatLngZoom(convertLatLng, 16.0f);
mBaiduMap.animateMapStatus(u);
new Thread(new Runnable() {
@Override
public void run() {
searchNeayBy();
}
}).start();
}
3、获取周边地理位置
最后看一下怎么获取周边的地理位置,这里需要用到SDK中的一个类PoiNearbySearchOption,我们可以看一下类参考:
- PoiNearbySearchOption keyword(java.lang.String key)
- 检索关键字
- PoiNearbySearchOption location(LatLng location)
- 检索位置
- PoiNearbySearchOption pageCapacity(int pageCapacity)
- 设置每页容量,默认为每页10条
- PoiNearbySearchOption pageNum(int pageNum)
- 分页编号
- PoiNearbySearchOption radius(int radius)
- 设置检索的半径范围
- PoiNearbySearchOption sortType(PoiSortType sortType)
- 搜索结果排序规则,可选,默认
这里是它的一些方法,我们可以看到我们只需要设置一下关键字、周边位置半径、检索位置、排序规则、分页号、每页数量等。然后我们实现OnGetPoiSearchResultListener这个接口,获取周边地理位置结果。
/**
* 搜索周边地理位置
*/
private void searchNeayBy() {
PoiNearbySearchOption option = new PoiNearbySearchOption();
option.keyword("写字楼");
option.sortType(PoiSortType.distance_from_near_to_far);
option.location(new LatLng(mCurrentLantitude, mCurrentLongitude));
if (radius != 0) {
option.radius(radius);
} else {
option.radius(1000);
}
option.pageCapacity(20);
mPoiSearch.searchNearby(option);
}
/*
* 接受周边地理位置结果
* @param poiResult
*/
@Override
public void onGetPoiResult(PoiResult poiResult) {
if (poiResult != null) {
if (poiResult.getAllPoi()!=null&&poiResult.getAllPoi().size()>0){
nearList.addAll(poiResult.getAllPoi());
if (nearList != null && nearList.size() > 0) {
for (int i = 0; i < nearList.size(); i++) {
isSelected.put(i, false);
}
}
Message msg = new Message();
msg.what = 0;
handler.sendMessage(msg);
}
}
}
获取完数据之后更新适配器显示周边位置就OK了,最后再实现一个小小的功能,就是点击列表中的每个位置,显示位置的小图标根据位置的改变而改变
/**
* 周边地理位置列表点击事件
*/
lvLocNear.setOnItemClickListener(new AdapterView.OnItemClickListener() {
@Override
public void onItemClick(AdapterView<?> adapterView, View view, int i, long l) {
adapter.setSelected(i);
adapter.notifyDataSetChanged();
PoiInfo ad = (PoiInfo) adapter.getItem(i);
u = MapStatusUpdateFactory.newLatLng(ad.location);
mBaiduMap.animateMapStatus(u);
if (!isLoc) {
mCurrentMarker.setPosition(ad.location);
} else {
markerA.setPosition(ad.location);
}
}
});
好了,很简单有用的一个小功能,会给用户带来很好的体验效果。
希望大家会喜欢这篇文章。
您可能感兴趣的文章:

相关文章推荐
- 使用C++实现JNI接口需要注意的事项
- Android IPC进程间通讯机制
- Android Manifest 用法
- [转载]Activity中ConfigChanges属性的用法
- Android之获取手机上的图片和视频缩略图thumbnails
- Android之使用Http协议实现文件上传功能
- Android学习笔记(二九):嵌入浏览器
- android string.xml文件中的整型和string型代替
- i-jetty环境搭配与编译
- android之定时器AlarmManager
- android wifi 无线调试
- Android Native 绘图方法
- Android java 与 javascript互访(相互调用)的方法例子
- android 代码实现控件之间的间距
- android FragmentPagerAdapter的“标准”配置
- Android"解决"onTouch和onClick的冲突问题
- android:installLocation简析
- android searchView的关闭事件
- SourceProvider.getJniDirectories