利用celery+django 在admin后台设置定时任务
2016-01-21 17:36
796 查看
经常用python开发web应用时,会涉及到定时任务的脚本,以前用linux自带的crontab来操作,但是感觉不太接地气,后来发现用celery+django 可以方便的实现!
安装软件环境如下:
python 2.7.5
Django==1.8.2
celery==3.1.18
celery-with-redis==3.0
django-celery==3.1.16
MySQL-python==1.2.3
supervisor==3.1.3
使用pip方式安装完以上软件,并且默认系统已经安装了redis和mysql服务器!
一 首先创建project:
django-admin.py createproject picha
然后创建名称为demo的app:
django-admin.py startapp demo
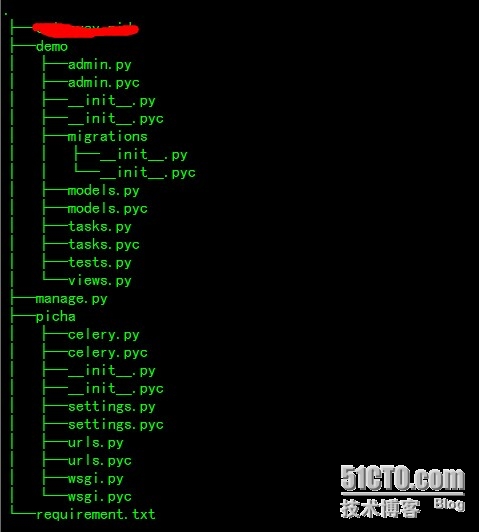
项目的目录结构为:
二 下面在settings文件中配置celery相关的配置:
在和settings.py同级目录中编辑文件 |__init__.py
然后修改市区:
另外,我们还需要在创建一个celery.py文件,他会自动发现我们app下面的task!
现在我们在demo的app下面创建测试用的task!
到这里,django和celery部分已经安装完成!
三 我现在开始配置supervisor,用来启动相关celery程序:
1)初始化supervisor配置文件!
echo_supervisord_conf > /etc/supervisord.conf
2)然后在supervisord.conf文件末尾添加如下配置:
四 现在我们需要把celery相关的库文件同步到mysql中,我们使用命令:
python manage.py syncdb
然后创建superuser
django-admin manage.py createsuperuser
启动supervisor:
supervisord -d
查看服务是否启动成功,使用命令supervisorctl status
djangoproject.celerybeat RUNNING pid 3061, uptime 1:03:27
djangoproject.celerycam RUNNING pid 3063, uptime 1:03:27
djangoproject.celeryd RUNNING pid 3062, uptime 1:03:27
然后我们进入到django-admin后台,
现在我们启动django:
python manage.py runserver 0.0.0.0:8008
进入后台后,点击“Periodic tasks”:
可以看到写在tasks.py下面的方法,在下拉菜单中都出现了,我们只用选择对应的时间即可!
现在,我们开始选择计划任务的时间:
我们创建一个定时任务,没10s,print一个数值,放在在日志文件中查看:
我们查看日志文件:
符合我们在web后台的设置!
我们在设置一个加法运算,每隔15s运行一次,而且我们可以在web平台后端动态的修改所传的参数,
第一次,我们传入参数9和5,结果应该为14,我们看下设置和日志:

我再看下日志:
然后我们在web后台修改传入参数为10和7,不重启服务,计算的结果动态变化为17!
我们发现,结果数据已经动态变化!
我们如果启动了 supervisor脚本中的:/usr/local/coding/pythoner/picha/manage.py celerycam --frequency=10.0
就可以在admin后台查看 woker是不是在线:

celery-django相关的配置就完成了!
PS:配置过程中计划任务的结果只能日志中查看,不知道怎么在admin的后台中显示,如果大家知道,可以告诉我,3Q!
本文出自 “shine_forever的博客” 博客,请务必保留此出处http://shineforever.blog.51cto.com/1429204/1737323
安装软件环境如下:
python 2.7.5
Django==1.8.2
celery==3.1.18
celery-with-redis==3.0
django-celery==3.1.16
MySQL-python==1.2.3
supervisor==3.1.3
使用pip方式安装完以上软件,并且默认系统已经安装了redis和mysql服务器!
一 首先创建project:
django-admin.py createproject picha
然后创建名称为demo的app:
django-admin.py startapp demo
项目的目录结构为:
二 下面在settings文件中配置celery相关的配置:
# CELERY STUFF
import djcelery
djcelery.setup_loader()
BROKER_URL = 'redis://localhost:6379'
CELERYBEAT_SCHEDULER = 'djcelery.schedulers.DatabaseScheduler' # 定时任务
CELERY_RESULT_BACKEND = 'djcelery.backends.database:DatabaseBackend'
CELERY_RESULT_BACKEND = 'redis://localhost:6379'
CELERY_ACCEPT_CONTENT = ['application/json']
CELERY_TASK_SERIALIZER = 'json'
CELERY_RESULT_SERIALIZER = 'json'
CELERY_TIMEZONE = 'Asia/Shanghai'
INSTALLED_APPS = (
'django.contrib.admin',
'django.contrib.auth',
'django.contrib.contenttypes',
'django.contrib.sessions',
'django.contrib.messages',
'django.contrib.staticfiles',
'demo',
'djcelery',
)
在和settings.py同级目录中编辑文件 |__init__.py
#! /usr/bin/env python
# coding: utf-8

from __future__ import absolute_import

# This will make sure the app is always imported when
# Django starts so that shared_task will use this app.
from .celery import app as celery_app
然后修改市区:
TIME_ZONE = 'Asia/Shanghai'市区不对,计划任务是不会按时间执行的!
另外,我们还需要在创建一个celery.py文件,他会自动发现我们app下面的task!
#! /usr/bin/env python
# coding: utf-8

from __future__ import absolute_import
import os
from celery import Celery
from django.conf import settings

# set the default Django settings module for the 'celery' program.
os.environ.setdefault('DJANGO_SETTINGS_MODULE', 'picha.settings')
app = Celery('picha')

# Using a string here means the worker will not have to
# pickle the object when using Windows.
app.config_from_object('django.conf:settings')
app.autodiscover_tasks(lambda: settings.INSTALLED_APPS)

@app.task(bind=True)
def debug_task(self):
print('Request: {0!r}'.format(self.request))
现在我们在demo的app下面创建测试用的task!
from __future__ import absolute_import
from celery import shared_task,task

@shared_task()
def add(x,y):
# return x + y
print x + y

@shared_task()
def mul(x,y):
print "%d * %d = %d" %(x,y,x*y)
return x*y

@shared_task()
def sub(x,y):
print "%d - %d = %d"%(x,y,x-y)
return x - y

@task(ignore_result=True,max_retries=1,default_retry_delay=10)
def just_print():
print "Print from celery task"
到这里,django和celery部分已经安装完成!
三 我现在开始配置supervisor,用来启动相关celery程序:
1)初始化supervisor配置文件!
echo_supervisord_conf > /etc/supervisord.conf
2)然后在supervisord.conf文件末尾添加如下配置:
[program:djangoproject.celeryd]
command=/usr/local/pyenv/shims/python /usr/local/coding/pythoner/picha/manage.py celeryd --concurrency=1
user=root
numprocs=1
directory=/usr/local/coding/pythoner/picha
stdout_logfile=/var/log/celery_worker.log
stderr_logfile=/var/log/celery_worker.log
autostart=true
autorestart=true
startsecs=10
stopwaitsecs = 120
priority=998

[program:djangoproject.celerybeat]
command=/usr/local/pyenv/shims/python /usr/local/coding/pythoner/picha/manage.py celery beat --schedule=/tmp/celerybeat-schedule --pidfile=/tmp/django_celerybeat.pid --loglevel=INFO
user=root
numprocs=1
directory=/usr/local/coding/pythoner/picha
stdout_logfile=/var/log/celery_beat.log
stderr_logfile=/var/log/celery_beat.log
autostart=true
autorestart=true
startsecs=10
stopwaitsecs = 120
priority=998

[program:djangoproject.celerycam]
command=/usr/local/pyenv/shims/python /usr/local/coding/pythoner/picha/manage.py celerycam --frequency=10.0
user=root
numprocs=1
directory=/usr/local/coding/pythoner/picha
stdout_logfile=/var/log/celerycam.log
stderr_logfile=/var/log/celerycam.log
autostart=true
autorestart=true
startsecs=10
stopwaitsecs = 120
priority=998
四 现在我们需要把celery相关的库文件同步到mysql中,我们使用命令:
python manage.py syncdb
然后创建superuser
django-admin manage.py createsuperuser
启动supervisor:
supervisord -d
查看服务是否启动成功,使用命令supervisorctl status
djangoproject.celerybeat RUNNING pid 3061, uptime 1:03:27
djangoproject.celerycam RUNNING pid 3063, uptime 1:03:27
djangoproject.celeryd RUNNING pid 3062, uptime 1:03:27
然后我们进入到django-admin后台,
现在我们启动django:
python manage.py runserver 0.0.0.0:8008
进入后台后,点击“Periodic tasks”:
可以看到写在tasks.py下面的方法,在下拉菜单中都出现了,我们只用选择对应的时间即可!
现在,我们开始选择计划任务的时间:
我们创建一个定时任务,没10s,print一个数值,放在在日志文件中查看:
我们查看日志文件:
符合我们在web后台的设置!
我们在设置一个加法运算,每隔15s运行一次,而且我们可以在web平台后端动态的修改所传的参数,
第一次,我们传入参数9和5,结果应该为14,我们看下设置和日志:
我再看下日志:
然后我们在web后台修改传入参数为10和7,不重启服务,计算的结果动态变化为17!
我们发现,结果数据已经动态变化!
我们如果启动了 supervisor脚本中的:/usr/local/coding/pythoner/picha/manage.py celerycam --frequency=10.0
就可以在admin后台查看 woker是不是在线:
celery-django相关的配置就完成了!
PS:配置过程中计划任务的结果只能日志中查看,不知道怎么在admin的后台中显示,如果大家知道,可以告诉我,3Q!
本文出自 “shine_forever的博客” 博客,请务必保留此出处http://shineforever.blog.51cto.com/1429204/1737323

相关文章推荐
- 用 Zoho Reports分析Google Analytics数据
- uva11292----Dragon of Loowater
- CodeForces 440A Forgotten Episode
- Django
- Codeforces 230A Dragons
- Django安装
- go语言让windows发出声音,或者播放音乐
- JUnit + Mockito 单元测试(二)(good)
- Golang初级系列教程-接口2
- 分水岭算法(Watershed Algorithm)
- .NET平台开发Mongo基础知识
- WebRTC
- google perftools分析程序性能
- 启动hbase 出现问题 没有HRegonServer
- golang内存分配
- HDU-5512-Pagodas【2015沈阳赛区】
- Django安装和启动
- 一键编译go文件命令.bat
- 安装go语言,配置环境及IDE,只需3步
- 一周学会go语言并应用 by王奇疏