C# 制作不规则窗体的几种解决方案
2015-12-21 17:52
661 查看
制作不规则窗体,本例采用图片背景形式,这也是通常的思路。以前也做过类似的案例,但都不深入,这次项目中需要用到,顺便理了下思路,找到另一种比较简单的方法,下面介绍下三种解决方案。
第一种:也是大家管用的一种方法,实现步骤如下
①:准备一张bmp的图片,图片的背景最好为一种简单纯色,方便窗体指定透明色,例如下面图片:
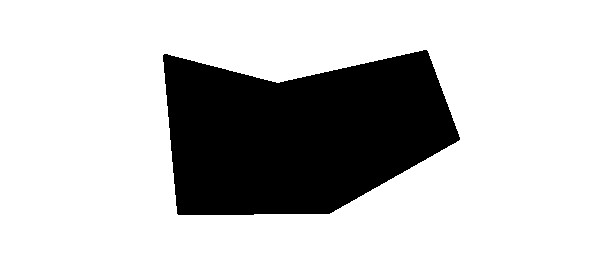
(图片背景为白色,边框是园子的css效果,不能传bmp,jpg代替)
②:在VS里面新建窗体,窗体FormBorderStyle:None
③:找到窗体的TansparencyKey,将它设置为你背景图片的背景色(如白色)
OK,第一种设置到这里就可以了,运行效果如下:
没有任何问题,能够打到不规则窗体的的效果,但是你会发现,如果你的图片背景颜色和图片主内容很接近,或者存在共同颜色的时候,难免会出现锯齿,部分地方透明模糊等情况,那么如何解决这个问题呢,看第二种解决方案。
第二种解决方案:(采用透明Png图片格式)
上一种方法用的是bmp格式,这次采用png格式,大家知道png是支持图片背景透明的。准备图片如下:
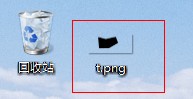
(为了好看一点,直接接了个图标,证明是png格式,而且背景是透明的,呵呵)
①:同样创建一个窗体背景图片指定png格式的图片
②:同样设置窗体的FormBorderStyle:None
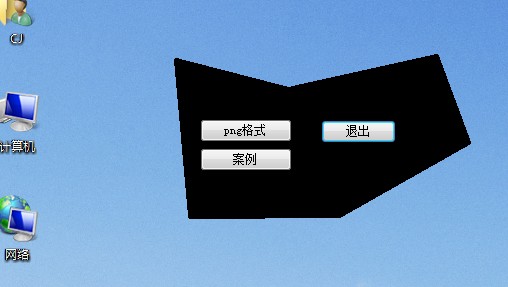
③:不同点来了哈,这里指定好了图片png后,窗体的大小可以随 便设置(当然你要保证能显示出全部png图片),之后设定窗体的BackColor:Control(这是默认的,当然你也能修改),最后设定 TansparencyKey等于你的BackColor的颜色即可,这样就可以完整的显示出png图片了
可以看的出,两种解决方案其实大同小异,不同的是第二种方案灵活性比较高一点,能够实现些很好的效果,而不会影响图片质量(毛边等)。
Show一下花了一天做的一个图片。

第三种解决方案:使用代码的方式
C#无边框拖动代码:
protected override void WndProc(ref Message
m)
{
if (m.Msg == 163 && this.ClientRectangle.Contains(this.PointToClient(new Point(m.LParam.ToInt32())))&& m.WParam.ToInt32() == 2)
m.WParam = (IntPtr)1;
base.WndProc(ref m);
if (m.Msg == 132 && m.Result.ToInt32() == 1)
m.Result = (IntPtr)2;
}
第一种:也是大家管用的一种方法,实现步骤如下
①:准备一张bmp的图片,图片的背景最好为一种简单纯色,方便窗体指定透明色,例如下面图片:
(图片背景为白色,边框是园子的css效果,不能传bmp,jpg代替)
②:在VS里面新建窗体,窗体FormBorderStyle:None
③:找到窗体的TansparencyKey,将它设置为你背景图片的背景色(如白色)
OK,第一种设置到这里就可以了,运行效果如下:
没有任何问题,能够打到不规则窗体的的效果,但是你会发现,如果你的图片背景颜色和图片主内容很接近,或者存在共同颜色的时候,难免会出现锯齿,部分地方透明模糊等情况,那么如何解决这个问题呢,看第二种解决方案。
第二种解决方案:(采用透明Png图片格式)
上一种方法用的是bmp格式,这次采用png格式,大家知道png是支持图片背景透明的。准备图片如下:
(为了好看一点,直接接了个图标,证明是png格式,而且背景是透明的,呵呵)
①:同样创建一个窗体背景图片指定png格式的图片
②:同样设置窗体的FormBorderStyle:None
③:不同点来了哈,这里指定好了图片png后,窗体的大小可以随 便设置(当然你要保证能显示出全部png图片),之后设定窗体的BackColor:Control(这是默认的,当然你也能修改),最后设定 TansparencyKey等于你的BackColor的颜色即可,这样就可以完整的显示出png图片了
可以看的出,两种解决方案其实大同小异,不同的是第二种方案灵活性比较高一点,能够实现些很好的效果,而不会影响图片质量(毛边等)。
Show一下花了一天做的一个图片。
第三种解决方案:使用代码的方式
using System;
using System.Drawing;
using System.Drawing.Drawing2D;
using System.Windows.Forms;
namespace MYLOVE
{
///

/// Summary description for BitmapRegion.
///
public class BitmapRegion
{
public BitmapRegion()
{ }

///
/// Create and apply the region on the supplied control
/// 创建支持位图区域的控件(目前有button和form)
///
/// The Control object to apply the region to控件
/// The Bitmap object to create the region from位图
public static void CreateControlRegion(Control control, Bitmap bitmap)
{
// Return if control and bitmap are null
//判断是否存在控件和位图
if (control == null || bitmap == null)
return;
// Set our control''s size to be the same as the bitmap
//设置控件大小为位图大小
control.Width = bitmap.Width;
control.Height = bitmap.Height;
// Check if we are dealing with Form here
//当控件是form时
if (control is System.Windows.Forms.Form)
{
// Cast to a Form object
//强制转换为FORM
Form form = (Form)control;
// Set our form''s size to be a little larger that the bitmap just
// in case the form''s border style is not set to none in the first place
//当FORM的边界FormBorderStyle不为NONE时,应将FORM的大小设置成比位图大小稍大一点
form.Width = control.Width;
form.Height = control.Height;
// No border
//没有边界
form.FormBorderStyle = FormBorderStyle.None;
// Set bitmap as the background image
//将位图设置成窗体背景图片
form.BackgroundImage = bitmap;
// Calculate the graphics path based on the bitmap supplied
//计算位图中不透明部分的边界
GraphicsPath graphicsPath = CalculateControlGraphicsPath(bitmap);
// Apply new region
//应用新的区域
form.Region = new Region(graphicsPath);
}
// Check if we are dealing with Button here
//当控件是button时
else if (control is System.Windows.Forms.Button)
{
// Cast to a button object
//强制转换为 button
Button button = (Button)control;
// Do not show button text
//不显示button text
button.Text = "";
// Change cursor to hand when over button
//改变 cursor的style
button.Cursor = Cursors.Hand;
// Set background image of button
//设置button的背景图片
button.BackgroundImage = bitmap;
// Calculate the graphics path based on the bitmap supplied
//计算位图中不透明部分的边界
GraphicsPath graphicsPath = CalculateControlGraphicsPath(bitmap);
// Apply new region
//应用新的区域
button.Region = new Region(graphicsPath);
}
}
///
/// Calculate the graphics path that representing the figure in the bitmap
/// excluding the transparent color which is the top left pixel.
/// //计算位图中不透明部分的边界
///
/// The Bitmap object to calculate our graphics path from
/// Calculated graphics path
private static GraphicsPath CalculateControlGraphicsPath(Bitmap bitmap)
{
// Create GraphicsPath for our bitmap calculation
//创建 GraphicsPath
GraphicsPath graphicsPath = new GraphicsPath();
// Use the top left pixel as our transparent color
//使用左上角的一点的颜色作为我们透明色
Color colorTransparent = bitmap.GetPixel(0, 0);
// This is to store the column value where an opaque pixel is first found.
// This value will determine where we start scanning for trailing opaque pixels.
//第一个找到点的X
int colOpaquePixel = 0;
// Go through all rows (Y axis)
// 偏历所有行(Y方向)
for (int row = 0; row < bitmap.Height; row++)
{
// Reset value
//重设
colOpaquePixel = 0;
// Go through all columns (X axis)
//偏历所有列(X方向)
for (int col = 0; col < bitmap.Width; col++)
{
// If this is an opaque pixel, mark it and search for anymore trailing behind
//如果是不需要透明处理的点则标记,然后继续偏历
if (bitmap.GetPixel(col, row) != colorTransparent)
{
// Opaque pixel found, mark current position
//记录当前
colOpaquePixel = col;
// Create another variable to set the current pixel position
//建立新变量来记录当前点
int colNext = col;
// Starting from current found opaque pixel, search for anymore opaque pixels
// trailing behind, until a transparent   pixel is found or minimum width is reached
///从找到的不透明点开始,继续寻找不透明点,一直到找到或则达到图片宽度
for (colNext = colOpaquePixel; colNext < bitmap.Width; colNext++)
if (bitmap.GetPixel(colNext, row) == colorTransparent)
break;
// Form a rectangle for line of opaque   pixels found and add it to our graphics path
//将不透明点加到graphics path
graphicsPath.AddRectangle(new Rectangle(colOpaquePixel, row, colNext - colOpaquePixel, 1));
// No need to scan the line of opaque pixels just found
col = colNext;
}
}
}
// Return calculated graphics path
return graphicsPath;
}
}
}

调用方法:
//初始化调用不规则窗体生成代码
BitmapRegion BitmapRegion = new BitmapRegion();//此为生成不规则窗体和控件的类
BitmapRegion.CreateControlRegion(this, new Bitmap(Properties.Resources.Loveheart));
C#无边框拖动代码:
protected override void WndProc(ref Message
m)
{
if (m.Msg == 163 && this.ClientRectangle.Contains(this.PointToClient(new Point(m.LParam.ToInt32())))&& m.WParam.ToInt32() == 2)
m.WParam = (IntPtr)1;
base.WndProc(ref m);
if (m.Msg == 132 && m.Result.ToInt32() == 1)
m.Result = (IntPtr)2;
}

相关文章推荐
- c# 异步编程demo (async await)
- 问题:C# ToString("P");结果:c#中的常用ToString()方法总结
- C#用正则判断字符串含有数字,并且将数字的颜色更改
- c#中如何判断字符串是否为数字
- c#范型List的Sort方法详解
- C# WinForm UserControl模拟Form的AcceptButton功能
- C#基础精华02(静态类,值类型,引用类型,枚举,结构,ref与out)
- C#基础精华02(静态类,值类型,引用类型,枚举,结构,ref与out)
- 【小方法】 判断是否经过事件
- C#基础——密码加密
- this.Invoke参数计数不匹配
- C# 将文件转化成byte[]数组
- C# 中基础函数
- c#winform将全局异常抛出,不用大量写try()catch()
- c#基础精华01(强调代码规范,虚方法,抽象方法,接口)
- c#基础精华01(强调代码规范,虚方法,抽象方法,接口)
- c#面向对象基础 类、方法、方法重载
- c#删除转义字符的方法,删除\0后所有字符串(菜鸟级别)
- c#_index_1
- C# Expression表达式笔记