kickstart +dhcp +tftpd+apache2 自动安装ubuntu环境搭建
2015-11-12 13:12
471 查看
准备工作
1.安装KICKSTART
star@Ubuntu:~$ sudo apt-get install system-config-kickstart -y
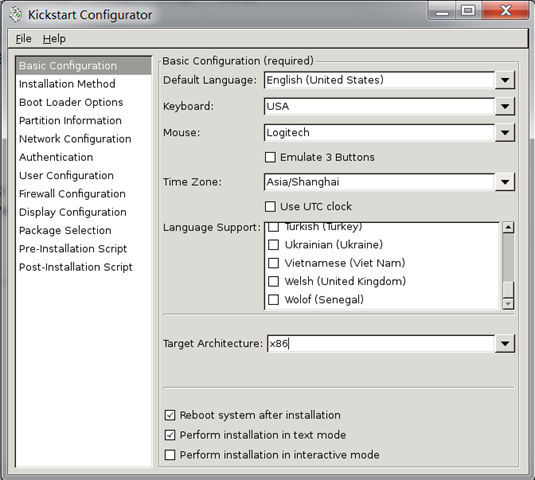
1.1在 “应用程序\系统工具”中打开kickstart
基本的配置:

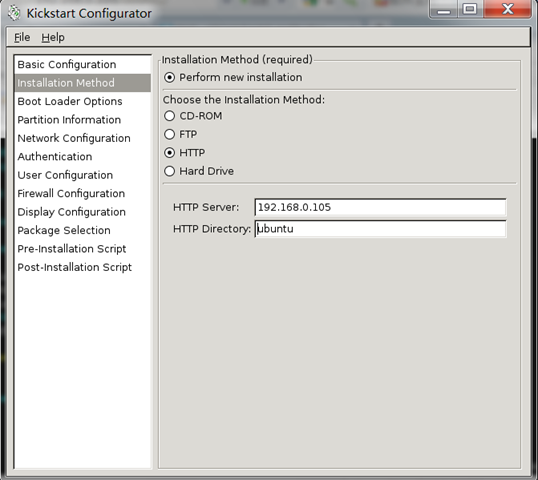
安装模式:这里选择http

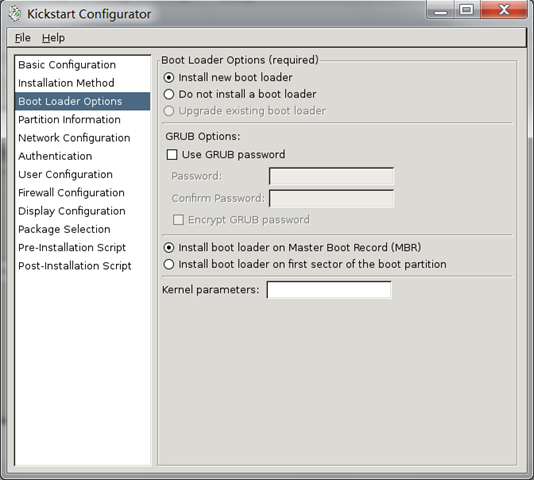
引导启动选项:默认即可

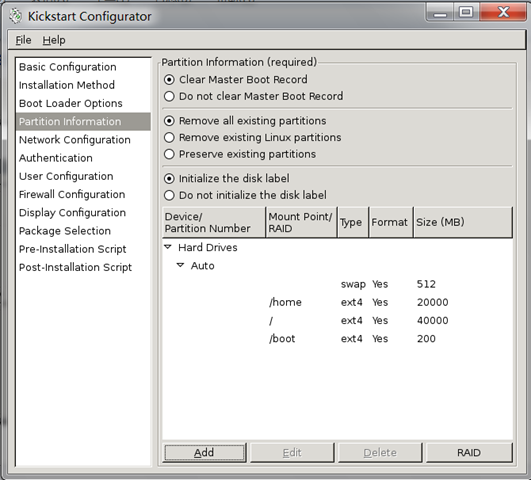
分区情况:您可以根据实际情况进行分区

网络配置:增加一网卡设置为dhcp获取ip

认证模式可以按默认即可
用户设置:

防火墙和显示器的配置都可以根据需要设置,或按默认即可
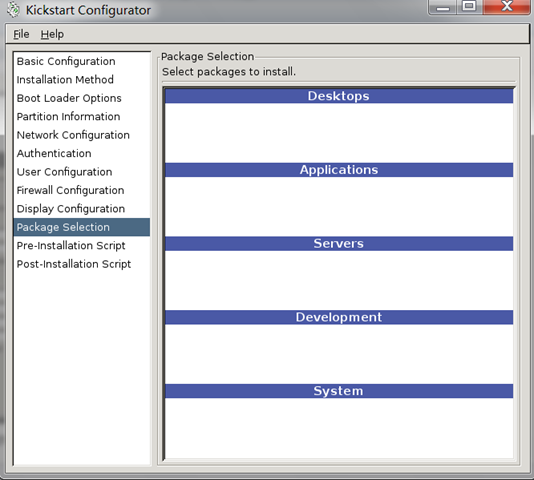
软件包的选择:这里应该是ubuntu中kickstart的bug吧,没有显示可选的软件包,一会生成ks.cfg文件我们根据需要添加

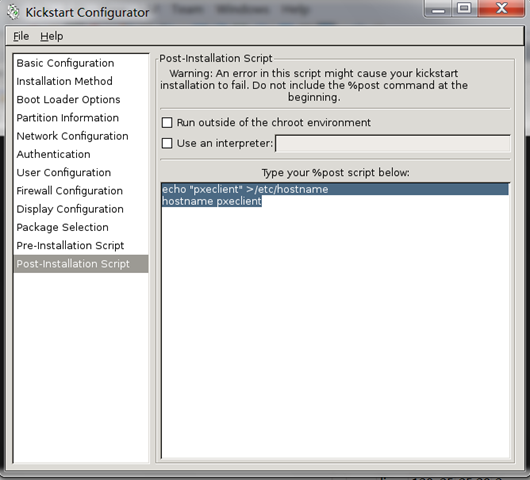
安装前后预处理脚本,可以根据需要定制,这里简单举个例子:系统安装完之后把主机名改为 pxeclient

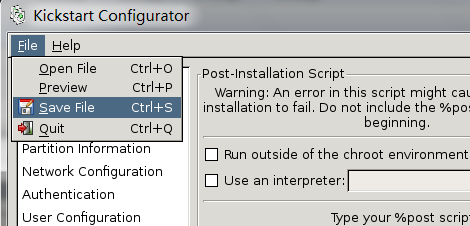
保存ks.cfg文件:

修改ks.cfg文件
在skipx后加入
%packages #这是server version的没有桌面
#@ubuntu-desktop #这是ubuntu桌面版的,如果要安装的话把#去掉
注意:alternate 既有桌面版也支持server版,所以叫做二选一
最后把ks.cfg文件移到/var/www/html目录下
#mv ks.cfg /var/www/html/
#我的配置文件内容
#Generated by Kickstart Configurator
#platform=AMD64 or Intel EM64T
#System language
lang en_US
#Language modules to install
langsupport en_US
#System keyboard
keyboard us
#System mouse
mouse
#System timezone
timezone Asia/Shanghai
#Root password
rootpw --iscrypted $1$gieKLFiM$jv5agaxq4QpX3lxpHR3UE1
#Initial user
user linux --fullname "linux" --iscrypted --password $1$y6kFWox0$S1OjQi4EbddMLnTbKoNiP0
#Reboot after installation
reboot
#Use text mode install
text
#Install OS instead of upgrade
install
#Use Web installation
url --url http://192.168.1.156/ubuntu12
#System bootloader configuration
bootloader --location=mbr
#Clear the Master Boot Record
zerombr yes
#Partition clearing information
clearpart --all --initlabel
#Disk partitioning information
#Disk partitioning information
part /boot --fstype ext4 --size 256
part swap --size 1024
part / --fstype ext4 --size 1 --grow
#part / --fstype ext4 --size 1 --grow
#System authorization infomation
auth --useshadow --enablemd5
#Network information
#network --bootproto=dhcp --device=eth0
network --bootproto=dhcp --device=eth0 \
--gateway=192.168.1.1 --nameserver=8.8.8.8
#Firewall configuration
firewall --disabled
#X Window System configuration information
xconfig --depth=8 --resolution=800x600 --defaultdesktop=GNOME --startxonboot
@ubuntu-desktop
设置好以后,保存配置文件为ks.cfg
2 安装DHCP
sudo apt-get install dhcp3-server
2.1配置DHCP,配置文件如下
vi /etc/dhcp/dhcpd.conf
subnet 192.168.1.156 netmask 255.255.255.0 {
range 192.168.1.30 192.168.1.254;
option routers 192.168.1.1;
option domain-name-servers 8.8.8.8;
default-lease-time 600;
max-lease-time 7200;
next-server 192.168.1.156;
filename "pxelinux.0";
}
3.安装TFTP服务器
注意:必须使用TFTP-HPA这个软件包,使用TFTPD会出现问题导致不能导引导系统
star@Ubuntu:/$ sudo apt-get install tftpd-hpa tftp-hpa
配置tftp
# vim /etc/default/tftpd-hpa
增加以下两行:
RUN_DAEMON="yes"
OPTIONS="-l -s /var/lib/tftpboot"
netboot 下载网址:http://cdimage.ubuntu.com/netboot/14.04/
下载那个netboot.tar.gz 即可
cd /var/lib/tftpboot
wget -r http://archive.ubuntu.com/ubuntu/dists/trusty-updates/main/installer-amd64/current/images/netboot/netboot.tar.gz
或者 从server版本中拷贝 install下的netboot文件到tftpboot下
vim /var/lib/tftpboot/ubuntu-installer/amd64/boot-screens/txt.cfg
default install
label install
menu label ^Install
menu default
kernel ubuntu-installer/amd64/linux
append ks= http://192.168.1.156/ks.cfg\
vga=788 initrd=ubuntu-installer/amd64/initrd.gz -- quiet
label cli
menu label ^Command-line install
kernel ubuntu-installer/amd64/linux
append tasks=standard pkgsel/language-pack-patterns= pkgsel/install-language
-support=false vga=788 initrd=ubuntu-installer/amd64/initrd.gz -- quiet
DHCP 拿不到IP
dhcp未启动 或者物理网络设置的不对
service isc-dhcp-server start
tftp 超时 tftp服务未启动
sudo service tftpd-hpa restart
安装过程中卡住
http服务不好使了 无法访问www下的文件了
apache2 重启
/etc/init.d/apache2 restart
AH00558: apache2: Could not reliably determine the server's fully qualified domain name, using 127.0
vim
/etc/apache2/apache2.conf
apache2 默认服务目录 /var/www/html 目录 ks.cfg 和ubuntu镜像 要放在这个目录 /var/www/html 里
将镜像复制到 /var/www/html
这里用的是ubuntu-12.04.5-alternate-amd64
mkdir /var/www/html/ubuntu12
cp /media/linux/镜像名字/* /var/www/ubuntu12/ -rf
添加网络启动的菜单选项:
/var/lib/tftpboot/ubuntu-installer/amd64/boot-screens/txt.cfg
添加菜单选项
label net
menu label ^Net ks
menu default
kernel ubuntu-installer/amd64/linux
append ks= http://192.168.1.156/ks.cfg vga=788 initrd=ubuntu-installer/amd64/initrd.gz -- quiet
#在vm中新建一个虚拟机,这里需要注意虚拟机的网络设置,一定要和服务器在同一个网络中,否则下载不了ks.cfg文件和系统
卡在安装界面不自动安装 是因为默认等待时间 0 防止局域网内其他机器自动被重装系统

解决方法:
#vim /var/lib/tftpboot/pxelinux.cfg/default
timeout 1 #即设置1秒后自动选择install选项
1.安装KICKSTART
star@Ubuntu:~$ sudo apt-get install system-config-kickstart -y
1.1在 “应用程序\系统工具”中打开kickstart
基本的配置:
安装模式:这里选择http
引导启动选项:默认即可
分区情况:您可以根据实际情况进行分区
网络配置:增加一网卡设置为dhcp获取ip

认证模式可以按默认即可
用户设置:

防火墙和显示器的配置都可以根据需要设置,或按默认即可
软件包的选择:这里应该是ubuntu中kickstart的bug吧,没有显示可选的软件包,一会生成ks.cfg文件我们根据需要添加
安装前后预处理脚本,可以根据需要定制,这里简单举个例子:系统安装完之后把主机名改为 pxeclient
保存ks.cfg文件:
修改ks.cfg文件
在skipx后加入
%packages #这是server version的没有桌面
#@ubuntu-desktop #这是ubuntu桌面版的,如果要安装的话把#去掉
注意:alternate 既有桌面版也支持server版,所以叫做二选一
最后把ks.cfg文件移到/var/www/html目录下
#mv ks.cfg /var/www/html/
#我的配置文件内容
#Generated by Kickstart Configurator
#platform=AMD64 or Intel EM64T
#System language
lang en_US
#Language modules to install
langsupport en_US
#System keyboard
keyboard us
#System mouse
mouse
#System timezone
timezone Asia/Shanghai
#Root password
rootpw --iscrypted $1$gieKLFiM$jv5agaxq4QpX3lxpHR3UE1
#Initial user
user linux --fullname "linux" --iscrypted --password $1$y6kFWox0$S1OjQi4EbddMLnTbKoNiP0
#Reboot after installation
reboot
#Use text mode install
text
#Install OS instead of upgrade
install
#Use Web installation
url --url http://192.168.1.156/ubuntu12
#System bootloader configuration
bootloader --location=mbr
#Clear the Master Boot Record
zerombr yes
#Partition clearing information
clearpart --all --initlabel
#Disk partitioning information
#Disk partitioning information
part /boot --fstype ext4 --size 256
part swap --size 1024
part / --fstype ext4 --size 1 --grow
#part / --fstype ext4 --size 1 --grow
#System authorization infomation
auth --useshadow --enablemd5
#Network information
#network --bootproto=dhcp --device=eth0
network --bootproto=dhcp --device=eth0 \
--gateway=192.168.1.1 --nameserver=8.8.8.8
#Firewall configuration
firewall --disabled
#X Window System configuration information
xconfig --depth=8 --resolution=800x600 --defaultdesktop=GNOME --startxonboot
@ubuntu-desktop
设置好以后,保存配置文件为ks.cfg
2 安装DHCP
sudo apt-get install dhcp3-server
2.1配置DHCP,配置文件如下
vi /etc/dhcp/dhcpd.conf
subnet 192.168.1.156 netmask 255.255.255.0 {
range 192.168.1.30 192.168.1.254;
option routers 192.168.1.1;
option domain-name-servers 8.8.8.8;
default-lease-time 600;
max-lease-time 7200;
next-server 192.168.1.156;
filename "pxelinux.0";
}
3.安装TFTP服务器
注意:必须使用TFTP-HPA这个软件包,使用TFTPD会出现问题导致不能导引导系统
star@Ubuntu:/$ sudo apt-get install tftpd-hpa tftp-hpa
配置tftp
# vim /etc/default/tftpd-hpa
增加以下两行:
RUN_DAEMON="yes"
OPTIONS="-l -s /var/lib/tftpboot"
netboot 下载网址:http://cdimage.ubuntu.com/netboot/14.04/
下载那个netboot.tar.gz 即可
cd /var/lib/tftpboot
wget -r http://archive.ubuntu.com/ubuntu/dists/trusty-updates/main/installer-amd64/current/images/netboot/netboot.tar.gz
或者 从server版本中拷贝 install下的netboot文件到tftpboot下
vim /var/lib/tftpboot/ubuntu-installer/amd64/boot-screens/txt.cfg
default install
label install
menu label ^Install
menu default
kernel ubuntu-installer/amd64/linux
append ks= http://192.168.1.156/ks.cfg\
vga=788 initrd=ubuntu-installer/amd64/initrd.gz -- quiet
label cli
menu label ^Command-line install
kernel ubuntu-installer/amd64/linux
append tasks=standard pkgsel/language-pack-patterns= pkgsel/install-language
-support=false vga=788 initrd=ubuntu-installer/amd64/initrd.gz -- quiet
DHCP 拿不到IP
dhcp未启动 或者物理网络设置的不对
service isc-dhcp-server start
tftp 超时 tftp服务未启动
sudo service tftpd-hpa restart
安装过程中卡住
http服务不好使了 无法访问www下的文件了
apache2 重启
/etc/init.d/apache2 restart
AH00558: apache2: Could not reliably determine the server's fully qualified domain name, using 127.0
vim
/etc/apache2/apache2.conf
最后加入一句 ServerName localhost:80
apache2 默认服务目录 /var/www/html 目录 ks.cfg 和ubuntu镜像 要放在这个目录 /var/www/html 里
将镜像复制到 /var/www/html
这里用的是ubuntu-12.04.5-alternate-amd64
mkdir /var/www/html/ubuntu12
cp /media/linux/镜像名字/* /var/www/ubuntu12/ -rf
添加网络启动的菜单选项:
/var/lib/tftpboot/ubuntu-installer/amd64/boot-screens/txt.cfg
添加菜单选项
label net
menu label ^Net ks
menu default
kernel ubuntu-installer/amd64/linux
append ks= http://192.168.1.156/ks.cfg vga=788 initrd=ubuntu-installer/amd64/initrd.gz -- quiet
#在vm中新建一个虚拟机,这里需要注意虚拟机的网络设置,一定要和服务器在同一个网络中,否则下载不了ks.cfg文件和系统
卡在安装界面不自动安装 是因为默认等待时间 0 防止局域网内其他机器自动被重装系统
解决方法:
#vim /var/lib/tftpboot/pxelinux.cfg/default
timeout 1 #即设置1秒后自动选择install选项

相关文章推荐
- Apache MiNa 实现多人聊天室
- Apache Mina(二)
- 新接触Maven 就遇到报错could not resolve archetype org.apache.maven.archetypes:maven-archetype-quickstrat:1.1
- Apache Mina(一)
- ubuntu-apache多站点虚拟空间搭建
- 关于org.apache.catalina.session.StandardManager doLoad错误的解决
- Apache Pig 安装配置
- ERROR org.apache.pig.tools.grunt.Grunt - ERROR 2997: Encountered IOException. File or directory null
- 部署apache让局域网和外网都可以访问
- Apache Oozie 的执行模型理解
- php apache mysql服务器搭建学习笔记
- Apache Stratos初步探索
- Apache Commons 工具集使用简介
- 基于Apache在本地配置多个虚拟机
- Apache支持的虚拟主机数是一定的
- Apache HBase Configuration
- iis安装与FTP安装与配置与php安装apache
- Apache Logging service—Log4net的使用介绍
- Linux下安装Apache
- org.apache.commons.beanutils.BeanUtils;