UIMenuController的使用,对UILabel拷贝以及定制菜单
2015-11-03 10:44
731 查看
分类: ios开发2012-08-06 17:15 11961人阅读 评论(0) 收藏 举报
actionmenuuiview
1. Menu所处的View必须实现 – (BOOL)canBecomeFirstResponder, 且返回YES
2. Menu所处的View必须实现 – (BOOL)canPerformAction:withSender, 并根据需求返回YES或NO
3. 使Menu所处的View成为First Responder (becomeFirstResponder)
4. 定位Menu (- setTargetRect:inView:)
5. 展示Menu (- setMenuVisible:animated:)
[cpp] view plaincopyprint?
@implementation UICopyLabel
// default is NO
- (BOOL)canBecomeFirstResponder{
return YES;
}
//"反馈"关心的功能
-(BOOL)canPerformAction:(SEL)action withSender:(id)sender{
return (action == @selector(copy:));
}
//针对于copy的实现
-(void)copy:(id)sender{
UIPasteboard *pboard = [UIPasteboard generalPasteboard];
pboard.string = self.text;
}
//UILabel默认是不接收事件的,我们需要自己添加touch事件
-(void)attachTapHandler{
self.userInteractionEnabled = YES; //用户交互的总开关
UITapGestureRecognizer *touch = [[UITapGestureRecognizer alloc] initWithTarget:self action:@selector(handleTap:)];
touch.numberOfTapsRequired = 2;
[self addGestureRecognizer:touch];
[touch release];
}
//绑定事件
- (id)initWithFrame:(CGRect)frame
{
self = [super initWithFrame:frame];
if (self) {
[self attachTapHandler];
}
return self;
}
//同上
-(void)awakeFromNib{
[super awakeFromNib];
[self attachTapHandler];
}
-(void)handleTap:(UIGestureRecognizer*) recognizer{
[self becomeFirstResponder];
UIMenuController *menu = [UIMenuController sharedMenuController];
[menu setTargetRect:self.frame inView:self.superview];
[menu setMenuVisible:YES animated:YES];
}
@end
在view里添加一个UICopyLabel
现在可以使用UICopyLabel实现双击来对label的内容copy了
在你的view中
UICopyLabel *display = [[UICopyLabelalloc]initWithFrame:CGRectMake(30,100,250,30)];
awakeFromNib
在使用IB的时候才会涉及到此方法的使用,当.nib文件被加载的时候,会发送一个awakeFromNib的消息到.nib文件中的每个对象,每个对象都可以定义自己的awakeFromNib函数来响应这个消息,执行一些必要的操作。
看例子:
创建一个viewController with XIB
定义一个UIView的子类
打开xib,并把View的类型指定为上一步骤定义的子类
然后在TestView.m中加入 awakeFromNib方法,运行程序发现此方法被调用了!!!
下面我们来定制菜单
在[b]attachTapHandler中添加长按压手势[/b]
[cpp] view plaincopyprint?
-(void)attachTapHandler{
self.userInteractionEnabled = YES; //用户交互的总开关
//双击
UITapGestureRecognizer *touch = [[UITapGestureRecognizer alloc] initWithTarget:self action:@selector(handleTap:)];
touch.numberOfTapsRequired = 2;
[self addGestureRecognizer:touch];
[touch release];
//长按压
UILongPressGestureRecognizer *press = [[UILongPressGestureRecognizer alloc]initWithTarget:self action:@selector(longPress:)];
press.minimumPressDuration = 1.0;
[self addGestureRecognizer:press];
[press release];
}
添加方法longPress
[cpp] view plaincopyprint?
- (void)longPress:(UILongPressGestureRecognizer *)recognizer {
if (recognizer.state == UIGestureRecognizerStateBegan) {
// TSTableViewCell *cell = (TSTableViewCell *)recognizer.view;
[self becomeFirstResponder];
UIMenuItem *flag = [[UIMenuItem alloc] initWithTitle:@"Flag" action:@selector(flag:)];
UIMenuItem *approve = [[UIMenuItem alloc] initWithTitle:@"Approve" action:@selector(approve:)];
UIMenuItem *deny = [[UIMenuItem alloc] initWithTitle:@"Deny" action:@selector(deny:)];
UIMenuController *menu = [UIMenuController sharedMenuController];
[menu setMenuItems:[NSArray arrayWithObjects:flag, approve, deny, nil]];
[menu setTargetRect:self.frame inView:self.superview];
[menu setMenuVisible:YES animated:YES];
NSLog(@"menuItems:%@",menu.menuItems);
}
}
- (void)flag:(id)sender {
NSLog(@"Cell was flagged");
}
- (void)approve:(id)sender {
NSLog(@"Cell was approved");
}
- (void)deny:(id)sender {
NSLog(@"Cell was denied");
}
修改canPerformAction
[cpp] view plaincopyprint?
-(BOOL)canPerformAction:(SEL)action withSender:(id)sender{
// return (action == @selector(copy:));
if (action == @selector(copy:)||action == @selector(flag:)||action == @selector(approve:)||action == @selector(deny:)) {
return YES;
}
}
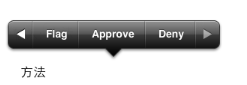
ok。。。效果如图


相关文章推荐
- UIView UIViewContentMode各类型效果
- EasyUI combotree 使用技巧
- 自定义 UIAlertView 之 BSYAlertView
- onContextItemSelected 与 onMenuItemSelected 的那些事
- UIBackgroundTaskIdentifier当进入后台后,继续完成long_running_task
- LeetCode—51.N-Queens
- Android中Looper的quit方法和quitSafely方法
- java中queue的使用
- VS2010编译错: #error : This file requires _WIN32_WINNT to be #defined at least to 0x0403...的解决方法
- Dispatcher.BeginInvoke()方法使用不当导致UI界面卡死的原因分析
- iOS的UI开发中Button的基本编写方法讲解
- 【iOS】如何移除UITableView顶部的空白
- iOS中分段控制器与UIScrollView结合使用
- iOS中分段控制器与UIScrollView结合使用
- Friend's Interview Question
- 使用工厂模式定制UITableViewCell
- hdu 1530 Maximum Clique
- 闪客工具:Mobile Angular UI
- down moncler mens jackets jacket male sequence
- easyUI datarid 实现局部刷新