iOS中 UIWebView加载网络数据 技术分享
2015-10-31 22:14
661 查看
直奔核心:
#import "TechnologyDetailViewController.h"
#define kScreenWidth [UIScreen mainScreen].bounds.size.width
#define kScreenHeight [UIScreen mainScreen].bounds.size.height
@interface TechnologyDetailViewController ()
@property (nonatomic,retain)UIWebView *webView;//显示详情页面
@end
懒加载UIWebView
核心代码如下:
//解析数据
- (void)readDataFromNetWork{
NSString *str = [NSString stringWithFormat:@"http://c.3g.163.com/nc/article/%@/full.html",self.ids];
NSURL *url = [NSURL URLWithString:str];
NSURLRequest *request = [NSURLRequest requestWithURL:url];
[NSURLConnection sendAsynchronousRequest:request queue:[NSOperationQueue mainQueue] completionHandler:^(NSURLResponse *response, NSData *data, NSError *connectionError) {
NSDictionary *dic = [NSJSONSerialization JSONObjectWithData:data options:0 error:nil];
NSString *body = dic[self.ids][@"body"];
NSString * title = dic[self.ids][@"title"];
NSString *digest = dic[self.ids][@"digest"];
NSString *ptime = dic[self.ids][@"ptime"];
NSString * source = dic[self.ids][@"source"];
NSArray * img = dic[self.ids][@"img" ] ;
// NSLog(@"%@",img);
if (img.count) {
for (int i = 0; i < img.count; i ++) {
NSString *imgString = [NSString stringWithFormat:@"<p style=\"text-align:center\"><img src=\"%@\" /></p>",img[i][@"src"]];
NSLog(@"imString = %@",imgString);
imgString = [imgString stringByReplacingOccurrencesOfString:@"<!--IMG#%d-->" withString:imgString];
body = [imgString stringByAppendingString:body];
}
}
// NSLog(@"body = %@",body);
//借助第三方进行排版
NSString *filePath = [[NSBundle mainBundle]pathForResource:@"topic_template" ofType:@"html"];
NSString *htmlString = [NSString stringWithContentsOfFile:filePath encoding:NSUTF8StringEncoding error:nil];
htmlString = [htmlString stringByReplacingOccurrencesOfString:@"__BODY__" withString:body];
htmlString = [htmlString stringByReplacingOccurrencesOfString:@"__TITLE__" withString:title];
htmlString = [htmlString stringByReplacingOccurrencesOfString:@"__AUTHOR__" withString:source];
htmlString = [htmlString stringByReplacingOccurrencesOfString:@"__DIGEST__" withString:digest];
htmlString = [htmlString stringByReplacingOccurrencesOfString:@"__TIME__" withString:ptime];
htmlString = [htmlString stringByReplacingOccurrencesOfString:@"__PTIME__" withString:ptime];
[self.webView loadHTMLString:htmlString baseURL:nil];
}];
}
======================================================================================================
实在看不懂再看下demol例子:
UIWebView的loadRequest可以用来加载一个url地址,它需要一个NSURLRequest参数。我们定义一个方法用来加载url。在UIWebViewDemoViewController中定义下面方法:
- (void)loadWebPageWithString:(NSString*)urlString
{
NSURL *url =[NSURL URLWithString:urlString];
NSLog(urlString);
NSURLRequest *request =[NSURLRequest requestWithURL:url];
[webView loadRequest:request];
}
在界面上放置3个控件,一个textfield、一个button、一个uiwebview,布局如下:
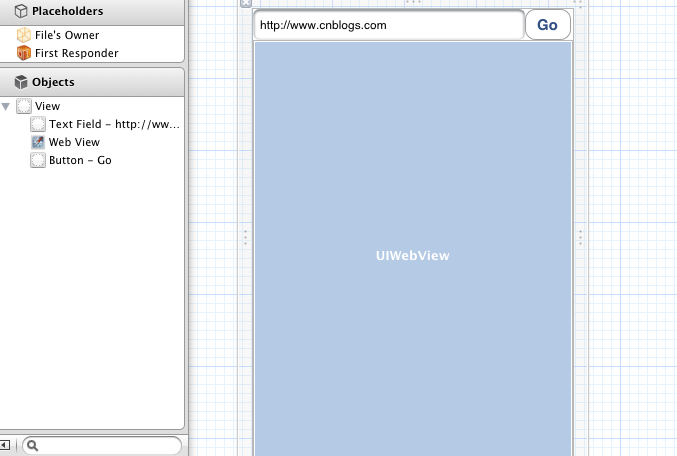
在代码中定义相关的控件:webView用于展示网页、textField用于地址栏、activityIndicatorView用于加载的动画、buttonPress用于按钮的点击事件。
@interface UIWebViewDemoViewController :UIViewController<UIWebViewDelegate> {
IBOutlet UIWebView *webView;
IBOutlet UITextField *textField;
UIActivityIndicatorView *activityIndicatorView;
}
- (IBAction)buttonPress:(id) sender;
- (void)loadWebPageWithString:(NSString*)urlString;
@end
使用IB关联他们。
设置UIWebView,初始化UIActivityIndicatorView:
- (void)viewDidLoad
{
[super viewDidLoad];
webView.scalesPageToFit =YES;
webView.delegate =self;
activityIndicatorView = [[UIActivityIndicatorView alloc]
initWithFrame : CGRectMake(0.0f, 0.0f, 32.0f, 32.0f)] ;
[activityIndicatorView setCenter: self.view.center] ;
[activityIndicatorView setActivityIndicatorViewStyle: UIActivityIndicatorViewStyleWhite] ;
[self.view addSubview : activityIndicatorView] ;
[self buttonPress:nil];
// Do any additional setup after loading the view from its nib.
}
UIWebView主要有下面几个委托方法:
1、- (void)webViewDidStartLoad:(UIWebView *)webView;开始加载的时候执行该方法。
2、- (void)webViewDidFinishLoad:(UIWebView *)webView;加载完成的时候执行该方法。
3、- (void)webView:(UIWebView *)webView didFailLoadWithError:(NSError *)error;加载出错的时候执行该方法。
我们可以将activityIndicatorView放置到前面两个委托方法中。
- (void)webViewDidStartLoad:(UIWebView *)webView
{
[activityIndicatorView startAnimating] ;
}
- (void)webViewDidFinishLoad:(UIWebView *)webView
{
[activityIndicatorView stopAnimating];
}
buttonPress方法很简单,调用我们开始定义好的loadWebPageWithString方法就行了:
- (IBAction)buttonPress:(id) sender
{
[textField resignFirstResponder];
[self loadWebPageWithString:textField.text];
}
当请求页面出现错误的时候,我们给予提示:
总结:本文通过实现一个简单的浏览器,说明了uiwebview的方法和属性,相信通过这个例子,应该明白uiwebview的使用了。
有疑问可通过新浪微博私信给我:http://weibo.com/hanjunqiang
#import "TechnologyDetailViewController.h"
#define kScreenWidth [UIScreen mainScreen].bounds.size.width
#define kScreenHeight [UIScreen mainScreen].bounds.size.height
@interface TechnologyDetailViewController ()
@property (nonatomic,retain)UIWebView *webView;//显示详情页面
@end
@implementation TechnologyDetailViewController
- (void)dealloc
{
self.webView = nil;
self.ids = nil;
[super dealloc];
}

- (void)viewDidLoad {
[super viewDidLoad];
//设置背景
self.view.backgroundColor = [UIColor yellowColor];
//调用请求网络数据
[self readDataFromNetWork];
//    self.automaticallyAdjustsScrollViewInsets = NO;
[self.view addSubview:self.webView];
}
懒加载UIWebView
//懒加载
- (UIWebView *)webView{
if (!_webView) {
self.webView = [[[UIWebView alloc]initWithFrame:CGRectMake(0,0, [UIScreen mainScreen].bounds.size.width, [UIScreen mainScreen].bounds.size.height)]autorelease];
self.webView.backgroundColor = [UIColor orangeColor];

}
return [[_webView retain ]autorelease];
}
核心代码如下:
//解析数据
- (void)readDataFromNetWork{
NSString *str = [NSString stringWithFormat:@"http://c.3g.163.com/nc/article/%@/full.html",self.ids];
NSURL *url = [NSURL URLWithString:str];
NSURLRequest *request = [NSURLRequest requestWithURL:url];
[NSURLConnection sendAsynchronousRequest:request queue:[NSOperationQueue mainQueue] completionHandler:^(NSURLResponse *response, NSData *data, NSError *connectionError) {
NSDictionary *dic = [NSJSONSerialization JSONObjectWithData:data options:0 error:nil];
NSString *body = dic[self.ids][@"body"];
NSString * title = dic[self.ids][@"title"];
NSString *digest = dic[self.ids][@"digest"];
NSString *ptime = dic[self.ids][@"ptime"];
NSString * source = dic[self.ids][@"source"];
NSArray * img = dic[self.ids][@"img" ] ;
// NSLog(@"%@",img);
if (img.count) {
for (int i = 0; i < img.count; i ++) {
NSString *imgString = [NSString stringWithFormat:@"<p style=\"text-align:center\"><img src=\"%@\" /></p>",img[i][@"src"]];
NSLog(@"imString = %@",imgString);
imgString = [imgString stringByReplacingOccurrencesOfString:@"<!--IMG#%d-->" withString:imgString];
body = [imgString stringByAppendingString:body];
}
}
// NSLog(@"body = %@",body);
//借助第三方进行排版
NSString *filePath = [[NSBundle mainBundle]pathForResource:@"topic_template" ofType:@"html"];
NSString *htmlString = [NSString stringWithContentsOfFile:filePath encoding:NSUTF8StringEncoding error:nil];
htmlString = [htmlString stringByReplacingOccurrencesOfString:@"__BODY__" withString:body];
htmlString = [htmlString stringByReplacingOccurrencesOfString:@"__TITLE__" withString:title];
htmlString = [htmlString stringByReplacingOccurrencesOfString:@"__AUTHOR__" withString:source];
htmlString = [htmlString stringByReplacingOccurrencesOfString:@"__DIGEST__" withString:digest];
htmlString = [htmlString stringByReplacingOccurrencesOfString:@"__TIME__" withString:ptime];
htmlString = [htmlString stringByReplacingOccurrencesOfString:@"__PTIME__" withString:ptime];
[self.webView loadHTMLString:htmlString baseURL:nil];
}];
}
======================================================================================================
实在看不懂再看下demol例子:
UIWebView的loadRequest可以用来加载一个url地址,它需要一个NSURLRequest参数。我们定义一个方法用来加载url。在UIWebViewDemoViewController中定义下面方法:
- (void)loadWebPageWithString:(NSString*)urlString
{
NSURL *url =[NSURL URLWithString:urlString];
NSLog(urlString);
NSURLRequest *request =[NSURLRequest requestWithURL:url];
[webView loadRequest:request];
}
在界面上放置3个控件,一个textfield、一个button、一个uiwebview,布局如下:
在代码中定义相关的控件:webView用于展示网页、textField用于地址栏、activityIndicatorView用于加载的动画、buttonPress用于按钮的点击事件。
@interface UIWebViewDemoViewController :UIViewController<UIWebViewDelegate> {
IBOutlet UIWebView *webView;
IBOutlet UITextField *textField;
UIActivityIndicatorView *activityIndicatorView;
}
- (IBAction)buttonPress:(id) sender;
- (void)loadWebPageWithString:(NSString*)urlString;
@end
使用IB关联他们。
设置UIWebView,初始化UIActivityIndicatorView:
- (void)viewDidLoad
{
[super viewDidLoad];
webView.scalesPageToFit =YES;
webView.delegate =self;
activityIndicatorView = [[UIActivityIndicatorView alloc]
initWithFrame : CGRectMake(0.0f, 0.0f, 32.0f, 32.0f)] ;
[activityIndicatorView setCenter: self.view.center] ;
[activityIndicatorView setActivityIndicatorViewStyle: UIActivityIndicatorViewStyleWhite] ;
[self.view addSubview : activityIndicatorView] ;
[self buttonPress:nil];
// Do any additional setup after loading the view from its nib.
}
UIWebView主要有下面几个委托方法:
1、- (void)webViewDidStartLoad:(UIWebView *)webView;开始加载的时候执行该方法。
2、- (void)webViewDidFinishLoad:(UIWebView *)webView;加载完成的时候执行该方法。
3、- (void)webView:(UIWebView *)webView didFailLoadWithError:(NSError *)error;加载出错的时候执行该方法。
我们可以将activityIndicatorView放置到前面两个委托方法中。
- (void)webViewDidStartLoad:(UIWebView *)webView
{
[activityIndicatorView startAnimating] ;
}
- (void)webViewDidFinishLoad:(UIWebView *)webView
{
[activityIndicatorView stopAnimating];
}
buttonPress方法很简单,调用我们开始定义好的loadWebPageWithString方法就行了:
- (IBAction)buttonPress:(id) sender
{
[textField resignFirstResponder];
[self loadWebPageWithString:textField.text];
}
当请求页面出现错误的时候,我们给予提示:
- (void)webView:(UIWebView *)webView didFailLoadWithError:(NSError *)error
{
UIAlertView *alterview = [[UIAlertView alloc] initWithTitle:@"" message:[error localizedDescription]  delegate:nil cancelButtonTitle:nil otherButtonTitles:@"OK", nil];
[alterview show];
[alterview release];
}
总结:本文通过实现一个简单的浏览器,说明了uiwebview的方法和属性,相信通过这个例子,应该明白uiwebview的使用了。
有疑问可通过新浪微博私信给我:http://weibo.com/hanjunqiang

相关文章推荐
- iOS中 UIWebView加载网络数据 技术分享
- 关于为何《优酷视频使用http协议,而不是使用Rtmp协议呢》的回答
- netty开发之tcp粘包拆包问题
- Xcode 7遇到 App Transport Security has blocked a cleartext HTTP 错误
- ng机器 神经网络 应用
- 简析TCP的三次握手与四次分手
- 软考路之计算机网络
- Java学习图形界面+网络编程案例---------网络简易通讯
- java http 发请求,结果转jsonobject解析
- Android学习之xUtils --- HttpUtils模块
- 如何获取网络资源?
- TCP/IP详解 卷1 笔记 第9章 IP选路
- HttpURLConnection的GET和POST用法
- 2012年第三届西安电子科技大学网络攻防 大赛暨网络渗透部分通关方案 V2.0
- HTTP 报文
- Linux 网络编程: echo Service
- DL:RBM 简介、网络结构
- 一些常见http状态码
- http方法
- http 事务