分享一个iOS下实现基本绘画板功能的简单方法
2015-10-30 10:07
1521 查看
代码部分
TouchView.h
#import <UIKit/UIKit.h>
@interface TouchView : UIView
{
NSMutableArray *points;
NSArray *points_all;
CGContextRef context;
UIColor *paint_clr;
}
@property (strong,nonatomic) NSMutableArray *points;
@property (strong,nonatomic) NSArray *points_all;
@property (strong,nonatomic) UIColor *paint_clr;
@end
TouchView.m
#import "TouchView.h"
@implementation TouchView
@synthesize points, points_all, paint_clr;
- (id)initWithFrame:(CGRect)frame
{
self = [super initWithFrame:frame];
if (self) {
// Initialization code
paint_clr = [UIColor greenColor];
}
return self;
}
// Only override drawRect: if you perform custom drawing.
// An empty implementation adversely affects performance during animation.
- (void)drawRect:(CGRect)rect
{
// Drawing code
if ((!self.points) || (self.points.count < 2)) {
return;
}
context = UIGraphicsGetCurrentContext();
//设置画笔粗细
CGContextSetLineWidth(context, 5.0f);
//设置画笔颜色
//[[UIColor blueColor]set ];
// [paint_clr set];
//CGContextSetStrokeColorWithColor(context, [[UIColor blueColor]CGColor]);
CGContextSetStrokeColorWithColor(context, [paint_clr CGColor]);
//画以前的轨迹
for (int j = 0 ; j < [self.points_all count]; j++) {
NSMutableArray *points_tmp = [points_all objectAtIndex:j];
for (int i = 0;i < [points_tmp count]-1;i++)
{
CGPoint point1 = [[points_tmp objectAtIndex:i] CGPointValue];
CGPoint point2 = [[points_tmp objectAtIndex:(i+1)] CGPointValue];
CGContextMoveToPoint(context, point1.x, point1.y);
CGContextAddLineToPoint(context, point2.x, point2.y);
CGContextStrokePath(context);
}
}
//画这次
for (int i=0; i < [self.points count]-1; i++) {
CGPoint point1 = [[self.points objectAtIndex:i] CGPointValue];
CGPoint point2 = [[self.points objectAtIndex:(i+1)] CGPointValue];
CGContextMoveToPoint(context, point1.x, point1.y);
CGContextAddLineToPoint(context, point2.x, point2.y);
CGContextStrokePath(context);
}
}
//不支持多点触摸
- (BOOL) isMultipleTouchEnabled
{
return NO;
}
//创建一个array,并且记录初始ponit
- (void) touchesBegan:(NSSet *) touches withEvent:(UIEvent *) event
{
self.points = [NSMutableArray array];
CGPoint pt = [[touches anyObject] locationInView:self];
[self.points addObject:[NSValue valueWithCGPoint:pt]];
}
//移动过程中记录这些points
//调用setNeedsDisplay,会触发drawRect方法的调用
- (void) touchesMoved:(NSSet *)touches withEvent:(UIEvent *)event
{
CGPoint pt = [[touches anyObject] locationInView:self];
[self.points addObject:[NSValue valueWithCGPoint:pt]];
[self setNeedsDisplay];
}
- (void) touchesEnded:(NSSet *)touches withEvent:(UIEvent *)event
{
NSMutableArray *points_tmp = [[NSMutableArray alloc] initWithArray:self.points];
if (self.points_all == nil) {
self.points_all = [[NSArray alloc] initWithObjects:points_tmp, nil];
}else {
self.points_all = [self.points_all arrayByAddingObject:points_tmp];
}
}
@end
ViewController.h
#import <UIKit/UIKit.h>
@class TouchView;
@interface ViewController : UIViewController
{
TouchView *tv;
}
@end
ViewController.m
#import "ViewController.h"
#import "TouchView.h"
@interface ViewController ()
@end
@implementation ViewController
- (void)viewDidLoad
{
[super viewDidLoad];
// Do any additional setup after loading the view, typically from a nib.
self.view.userInteractionEnabled = YES;
// TouchView *tv = [[TouchView alloc]initWithFrame:CGRectMake(0.0f, 0.0f, 260.0f, 260.0f)];
tv = [[TouchView alloc]initWithFrame:self.view.frame];
tv.backgroundColor = [UIColor blackColor];
[self.view addSubview:tv];
UISegmentedControl *seg = [[UISegmentedControl alloc] initWithItems:[@"White Red Blue Green Yellow" componentsSeparatedByString:@" "]];
seg.segmentedControlStyle = UISegmentedControlSegmentCenter;
seg.tintColor = [UIColor blackColor];
seg.center = CGPointMake(self.view.center.x, (self.view.bounds.size.height - seg.bounds.size.height));
[self.view addSubview:seg];
[seg addTarget:self action:@selector(colorChange:) forControlEvents:UIControlEventValueChanged];
}
- (void)viewDidUnload
{
[super viewDidUnload];
// Release any retained subviews of the main view.
}
- (BOOL)shouldAutorotateToInterfaceOrientation:(UIInterfaceOrientation)interfaceOrientation
{
return (interfaceOrientation != UIInterfaceOrientationPortraitUpsideDown);
}
- (void) colorChange: (UISegmentedControl *) seg
{
switch ([seg selectedSegmentIndex])
{
case 0:
tv.paint_clr = [UIColor whiteColor];
break;
case 1:
tv.paint_clr = [UIColor redColor];
break;
case 2:
tv.paint_clr = [UIColor blueColor];
break;
case 3:
tv.paint_clr = [UIColor greenColor];
break;
case 4:
tv.paint_clr = [UIColor yellowColor];
break;
default:
break;
}
}
@end
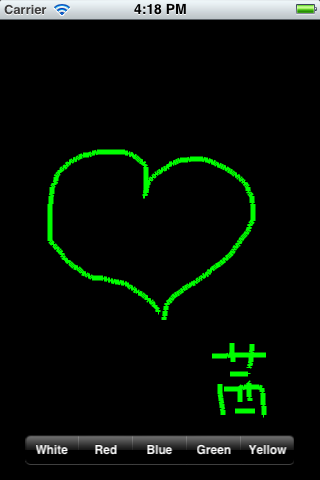
效果图
您可能感兴趣的文章:

相关文章推荐
- 峰回路转,Firefox 浏览器即将重返 iOS 平台
- 峰回路转,Firefox 浏览器即将重返 iOS 平台
- 不可修补的 iOS 漏洞可能导致 iPhone 4s 到 iPhone X 永久越狱
- iOS 12.4 系统遭黑客破解,漏洞危及数百万用户
- 每日安全资讯:NSO,一家专业入侵 iPhone 的神秘公司
- [转][源代码]Comex公布JailbreakMe 3.0源代码
- 讲解iOS开发中基本的定位功能实现
- js判断客户端是iOS还是Android等移动终端的方法
- IOS开发环境windows化攻略
- 检测iOS设备是否越狱的方法
- .net平台推送ios消息的实现方法
- 探讨Android与iOS,我们将何去何从?
- Android、iOS和Windows Phone中的推送技术详解
- IOS 改变键盘颜色代码
- 举例详解iOS开发过程中的沙盒机制与文件
- Android和IOS的浏览器中检测是否安装某个客户端的方法
- javascript实现阻止iOS APP中的链接打开Safari浏览器
- IOS开发第三方语音-微信语音
- 解析iOS开发中的FirstResponder第一响应对象