iOS纯代码实现界面建立、跳转、导航栏(无storyboard、无nib)(Objective-C)
2015-10-30 09:10
393 查看
如今的iOS开发,已经比以前有了很大的简便,尤其是界面设计方面。主要是因为使用了nib文件和storyboard。但是作为程序员,我们需要挑战一下自己,如果没有nib文件和storyboard,我们怎么来构建一个应用。该Demo我放在了 https://github.com/chenyufeng1991/JumpAndNavigationCode 中的03文件夹下 。
(1)新建一个iOS项目,直接删除Main.storyboard文件,然后在下面选项中删除Main...
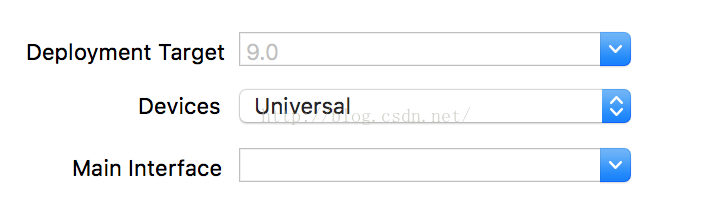
.
(2)在AppDelegate.m中实现如下:
#import "AppDelegate.h"
#import "ViewController.h"
#import "SecondViewController.h"
@interface AppDelegate ()
@end
@implementation AppDelegate
- (BOOL)application:(UIApplication *)application didFinishLaunchingWithOptions:(NSDictionary *)launchOptions {
self.window = [[UIWindow alloc] initWithFrame:[[UIScreen mainScreen] bounds]];
//这里加载第一个页面;
UINavigationController *navC = [[UINavigationController alloc]initWithRootViewController:[[ViewController alloc]init]];
self.window.backgroundColor = [UIColor whiteColor];
self.window.rootViewController = navC;
[self.window makeKeyAndVisible];
return YES;
}
@end
(3)在第一个界面中的ViewController.m中实现如下:
#import "ViewController.h"
#import "SecondViewController.h"
@interface ViewController ()
//@property(strong,nonatomic) UIButton *button;
@end
@implementation ViewController
- (void)viewDidLoad {
[super viewDidLoad];
}
- (void)viewDidAppear:(BOOL)animated{
[super viewDidAppear:animated];
UIButton *button = [[UIButton alloc] init];
button = [[UIButton alloc] initWithFrame:CGRectMake(50, 100, 50, 20)];
[button setTitle:@"跳转" forState:UIControlStateNormal];
[button setTitleColor:[UIColor blackColor] forState:UIControlStateNormal];
[self.view addSubview:button];
[button addTarget:self action:@selector(jump:) forControlEvents:UIControlEventTouchUpInside];
[self.navigationItem setTitle:@"首页"];
}
- (void)jump:(id)sender{
//如果没有导航栏,就进行这种跳转;
// [self presentViewController:[[SecondViewController alloc] init] animated:true completion:^{
//
// }];
[self.navigationController pushViewController:[[SecondViewController alloc] init] animated:true];
}
@end
(4)在第二个界面SecondViewController.h中实现如下:
#import <UIKit/UIKit.h>
@interface SecondViewController : UIViewController
@property(strong,nonatomic)UIWindow *window;
@end
(5)SecondViewController.m中实现如下:
#import "SecondViewController.h"
@interface SecondViewController ()
@end
@implementation SecondViewController
- (void)viewDidLoad {
[super viewDidLoad];
self.window = [[UIWindow alloc] initWithFrame:[UIScreen mainScreen].bounds];
UINavigationController *navi = [[UINavigationController alloc] init];
[navi addChildViewController:self];
[self.window makeKeyAndVisible];
//设置导航标题,这个时候的返回按钮的title就是上一级的navigationItem的title文字
[self.navigationItem setTitle:@"子页"];
}
@end
(6)运行程序,查看效果:
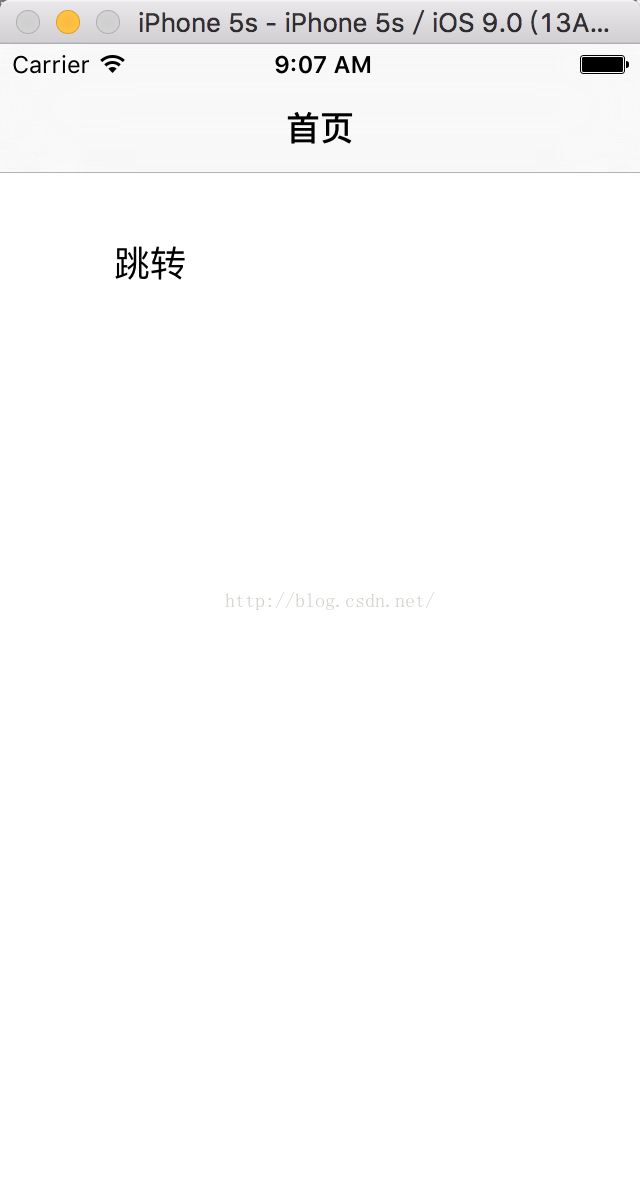
。
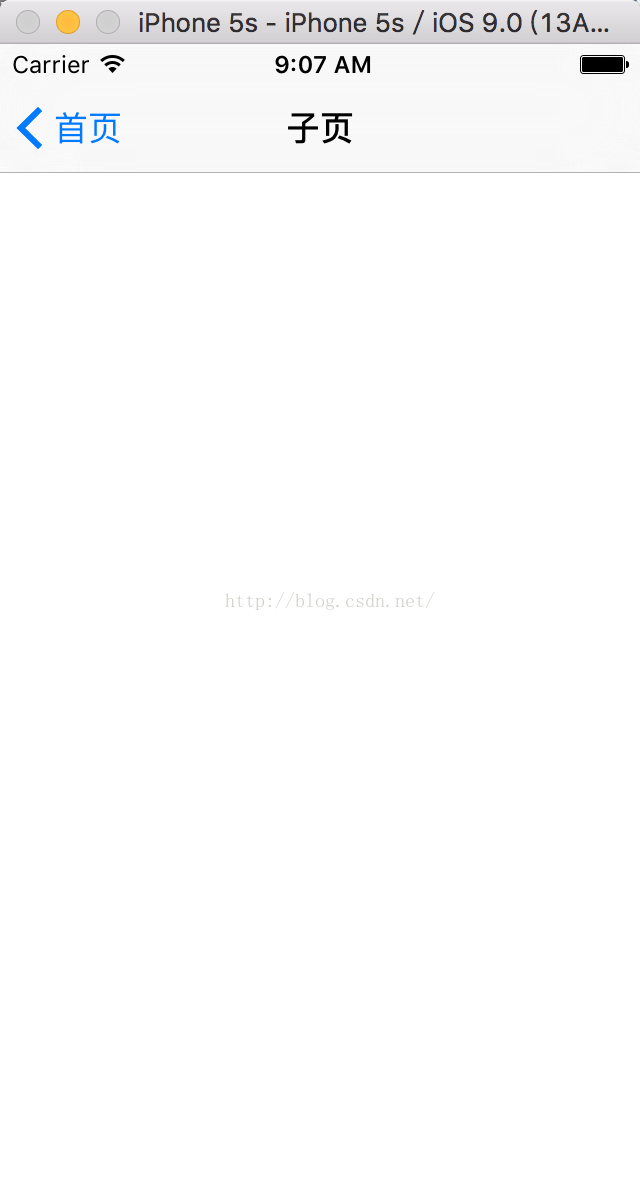
。
综上,我们既要能在nib和storyboard的帮助下快速构建一个应用,也需要在必要时能用代码来解决问题,让我们继续快乐的开发吧!(其实个人还是非常推荐使用xib的,使用代码实现各种UI看似很吊,但是效率也会很低下,如果是涉及Autolayout的话,那就更为麻烦了。)
github主页:https://github.com/chenyufeng1991 。欢迎大家访问!
(1)新建一个iOS项目,直接删除Main.storyboard文件,然后在下面选项中删除Main...
.
(2)在AppDelegate.m中实现如下:
#import "AppDelegate.h"
#import "ViewController.h"
#import "SecondViewController.h"
@interface AppDelegate ()
@end
@implementation AppDelegate
- (BOOL)application:(UIApplication *)application didFinishLaunchingWithOptions:(NSDictionary *)launchOptions {
self.window = [[UIWindow alloc] initWithFrame:[[UIScreen mainScreen] bounds]];
//这里加载第一个页面;
UINavigationController *navC = [[UINavigationController alloc]initWithRootViewController:[[ViewController alloc]init]];
self.window.backgroundColor = [UIColor whiteColor];
self.window.rootViewController = navC;
[self.window makeKeyAndVisible];
return YES;
}
@end
(3)在第一个界面中的ViewController.m中实现如下:
#import "ViewController.h"
#import "SecondViewController.h"
@interface ViewController ()
//@property(strong,nonatomic) UIButton *button;
@end
@implementation ViewController
- (void)viewDidLoad {
[super viewDidLoad];
}
- (void)viewDidAppear:(BOOL)animated{
[super viewDidAppear:animated];
UIButton *button = [[UIButton alloc] init];
button = [[UIButton alloc] initWithFrame:CGRectMake(50, 100, 50, 20)];
[button setTitle:@"跳转" forState:UIControlStateNormal];
[button setTitleColor:[UIColor blackColor] forState:UIControlStateNormal];
[self.view addSubview:button];
[button addTarget:self action:@selector(jump:) forControlEvents:UIControlEventTouchUpInside];
[self.navigationItem setTitle:@"首页"];
}
- (void)jump:(id)sender{
//如果没有导航栏,就进行这种跳转;
// [self presentViewController:[[SecondViewController alloc] init] animated:true completion:^{
//
// }];
[self.navigationController pushViewController:[[SecondViewController alloc] init] animated:true];
}
@end
(4)在第二个界面SecondViewController.h中实现如下:
#import <UIKit/UIKit.h>
@interface SecondViewController : UIViewController
@property(strong,nonatomic)UIWindow *window;
@end
(5)SecondViewController.m中实现如下:
#import "SecondViewController.h"
@interface SecondViewController ()
@end
@implementation SecondViewController
- (void)viewDidLoad {
[super viewDidLoad];
self.window = [[UIWindow alloc] initWithFrame:[UIScreen mainScreen].bounds];
UINavigationController *navi = [[UINavigationController alloc] init];
[navi addChildViewController:self];
[self.window makeKeyAndVisible];
//设置导航标题,这个时候的返回按钮的title就是上一级的navigationItem的title文字
[self.navigationItem setTitle:@"子页"];
}
@end
(6)运行程序,查看效果:
。
。
综上,我们既要能在nib和storyboard的帮助下快速构建一个应用,也需要在必要时能用代码来解决问题,让我们继续快乐的开发吧!(其实个人还是非常推荐使用xib的,使用代码实现各种UI看似很吊,但是效率也会很低下,如果是涉及Autolayout的话,那就更为麻烦了。)
github主页:https://github.com/chenyufeng1991 。欢迎大家访问!

相关文章推荐
- Objective-C的属性和成员变量用法及关系浅析
- 详谈OC(object-c)深浅复制/拷贝-什么情况下用retain和copy
- [Object C]_[初级]_[两个数组共有元素的提取,删除,数组的合并]
- iOS SDK开发时,有关OC和C++混编造成其它类错误的问题(Compile Sources As Objective-C++)
- [Objective-C]关联(objc_setAssociatedObject、objc_getAssociatedObject、objc_removeAssociatedObjects)
- iPhone How-to:解析URL中的键值对
- 《从C++到Objective-C》看Objective-C
- Objective-C学习笔记类目、协议
- Python Exception Objects
- 【Objective-C Runtime】之理解
- 一些常用的工具类方法
- objective学习笔记1
- Ljava.lang.Object;@ba8a1dc 问题
- Objective-c学习笔记之集合
- NSObject 排序
- 使用Objective-C的文档生成工具:appledoc
- django LazyObject类研究
- JsonObject&JSONArray
- JSONObject简介
- nib must contain exactly one top level object which must be a UITableViewCell instance