iOS 2D绘图详解(Quartz 2D)之Transform(CTM,Translate,Rotate,Scale)
2015-10-27 11:52
387 查看
原创Blog,转载请注明出处
http://blog.csdn.net/hello_hwc?viewmode=list
我的stackoverflow

前三篇基础博客路径
iOS 2D绘图详解(Quartz 2D)之概述
iOS 2D绘图详解(Quartz 2D)之路径(点,直线,虚线,曲线,圆弧,椭圆,矩形)
iOS 2D绘图详解(Quartz 2D)之路径(stroke,fill,clip,subpath,blend)
前言:Quartz默认采用设备无关的user space来进行绘图,当context(画板)建立之后,默认的坐标系原点以及方向也就确认了,可以通过CTM(current transformation matrix)来修坐标系的原点。从数组图像处理的角度来说,就是对当前context state乘以一个状态矩阵。其中的矩阵运算开发者可以不了解。
以下,会一一个Demo图解,坐标系的位移,旋转,sacle
调用
图解
代码
效果
代码中,我们是还是在(10,10)点绘制,但是要注意,当前坐标系的原点已经移了
代码
效果
这里不花坐标系了
代码
效果
代码
效果
CGAffineTransform
CGAffineTransformTranslate
CGAffineTransformMakeRotation
CGAffineTransformRotate
CGAffineTransformMakeScale
CGAffineTransformScale
http://blog.csdn.net/hello_hwc?viewmode=list
我的stackoverflow
前三篇基础博客路径
iOS 2D绘图详解(Quartz 2D)之概述
iOS 2D绘图详解(Quartz 2D)之路径(点,直线,虚线,曲线,圆弧,椭圆,矩形)
iOS 2D绘图详解(Quartz 2D)之路径(stroke,fill,clip,subpath,blend)
前言:Quartz默认采用设备无关的user space来进行绘图,当context(画板)建立之后,默认的坐标系原点以及方向也就确认了,可以通过CTM(current transformation matrix)来修坐标系的原点。从数组图像处理的角度来说,就是对当前context state乘以一个状态矩阵。其中的矩阵运算开发者可以不了解。
以下,会一一个Demo图解,坐标系的位移,旋转,sacle
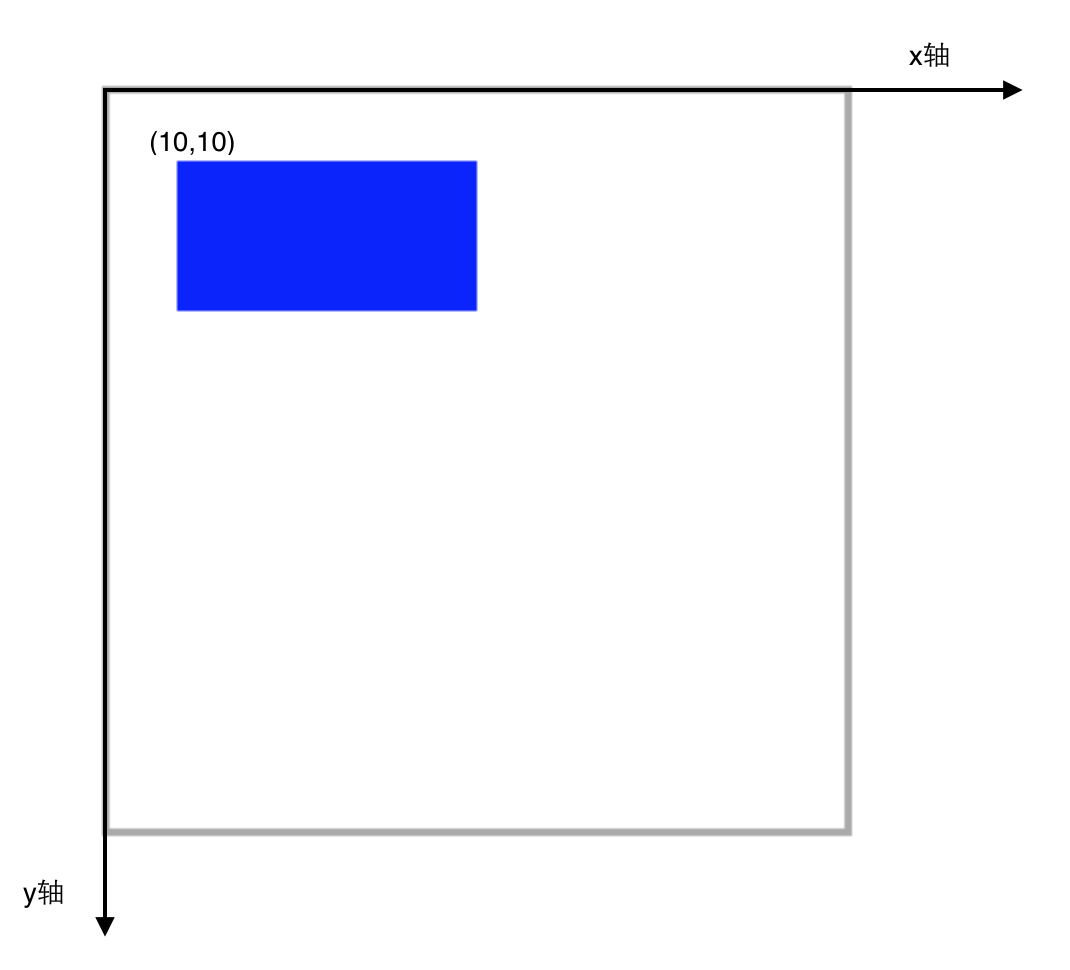
最初的状态和代码
新建一个CustomView,.m文件@implementation CustomView
- (void)drawRect:(CGRect)rect {
CGContextRef context = UIGraphicsGetCurrentContext();
CGContextAddRect(context, CGRectMake(10,10,40, 20));
CGContextSetFillColorWithColor(context,[UIColor blueColor].CGColor);
CGContextFillPath(context);
}
-(instancetype)initWithFrame:(CGRect)frame{
if (self = [super initWithFrame:frame]) {
self.opaque = NO;
self.layer.borderColor = [UIColor lightGrayColor].CGColor;
self.layer.borderWidth = 1.0;
}
return self;
}
@end调用
CustomView * customView = [[CustomView alloc] initWithFrame:CGRectMake(100, 100,100, 100)];
[self.view addSubview:customView];
图解
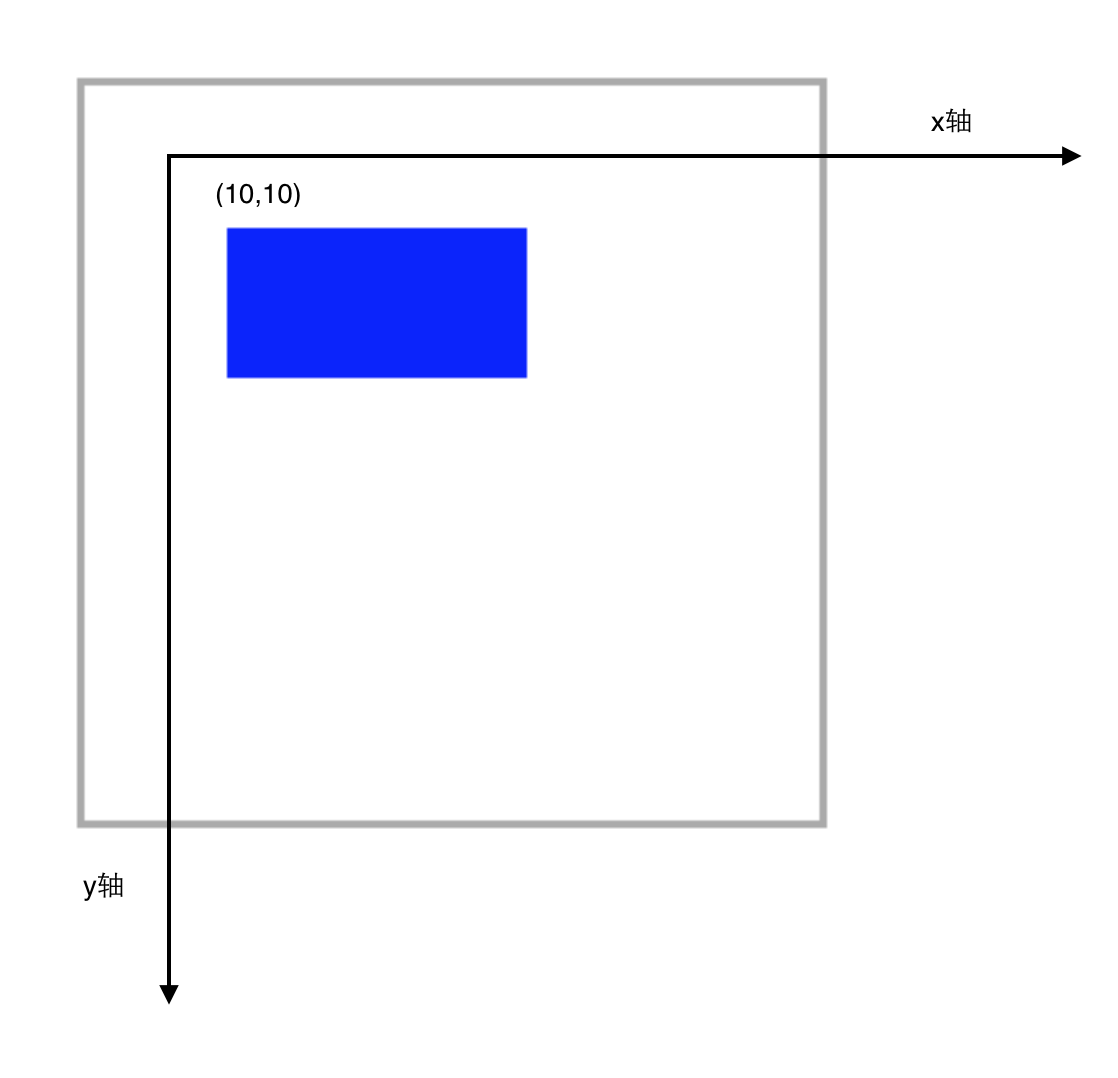
Translate
假如我们在绘制之前,进行坐标系移动会是什么效果呢?代码
- (void)drawRect:(CGRect)rect {
CGContextRef context = UIGraphicsGetCurrentContext();
CGContextTranslateCTM(context,10, 10);

CGContextAddRect(context, CGRectMake(10,10,40, 20));
CGContextSetFillColorWithColor(context,[UIColor blueColor].CGColor);
CGContextFillPath(context);
}
效果
代码中,我们是还是在(10,10)点绘制,但是要注意,当前坐标系的原点已经移了
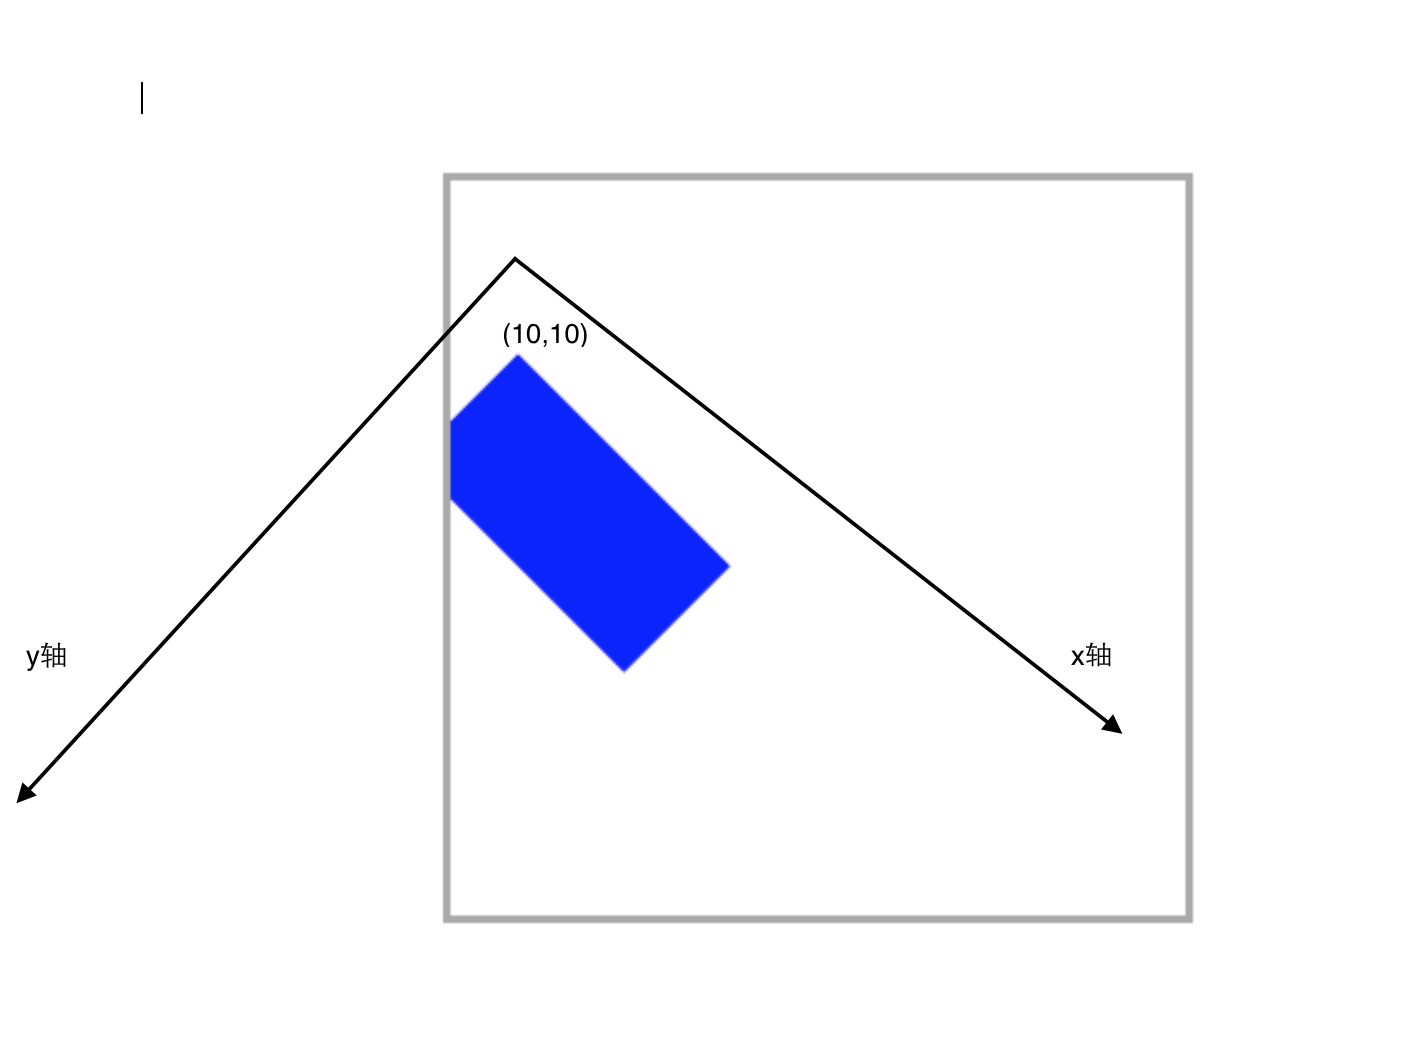
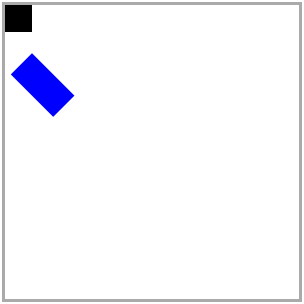
Rotate
在Transform的基础上我们再Rotate,45度,注意CGContextRotateCTM传入的参数是弧度
代码
- (void)drawRect:(CGRect)rect {
CGContextRef context = UIGraphicsGetCurrentContext();
CGContextTranslateCTM(context,10, 10);
CGContextRotateCTM(context,M_PI_4);
CGContextAddRect(context, CGRectMake(10,10,40, 20));
CGContextSetFillColorWithColor(context,[UIColor blueColor].CGColor);
CGContextFillPath(context);
}
效果
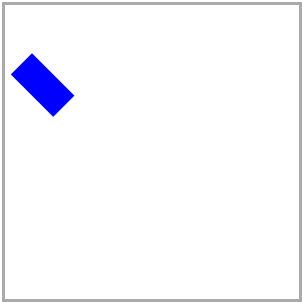
Scale
对于Scale相对来说,好理解一点,无非就是成比例放大缩小。这里不花坐标系了
代码
- (void)drawRect:(CGRect)rect {
CGContextRef context = UIGraphicsGetCurrentContext();
CGContextTranslateCTM(context,10, 10);
CGContextRotateCTM(context,M_PI_4);
CGContextScaleCTM(context,0.5, 0.5);
CGContextAddRect(context, CGRectMake(10,10,40, 20));
CGContextSetFillColorWithColor(context,[UIColor blueColor].CGColor);
CGContextFillPath(context);
}
效果
状态保存,恢复
在复杂的绘图中,我们可能只是想对一个subpath进行旋转移动,缩放。这时候,状态堆栈就起到作用了。代码
- (void)drawRect:(CGRect)rect {
CGContextRef context = UIGraphicsGetCurrentContext();
//保存状态,入栈
CGContextSaveGState(context);
CGContextTranslateCTM(context,10, 10);
CGContextRotateCTM(context,M_PI_4);
CGContextScaleCTM(context,0.5, 0.5);
CGContextAddRect(context, CGRectMake(10,10,40, 20));
CGContextSetFillColorWithColor(context,[UIColor blueColor].CGColor);
CGContextFillPath(context);
CGContextRestoreGState(context);// 推出栈顶部状态

//这里坐标系已经回到了最开始的状态
CGContextAddRect(context, CGRectMake(0, 0, 10, 10));
CGContextFillPath(context);
}
效果
Affine Transforms
可以通过以下方法先创建放射矩阵,然后然后再把放射矩阵映射到CTMCGAffineTransform
CGAffineTransformTranslate
CGAffineTransformMakeRotation
CGAffineTransformRotate
CGAffineTransformMakeScale
CGAffineTransformScale

相关文章推荐
- 峰回路转,Firefox 浏览器即将重返 iOS 平台
- 峰回路转,Firefox 浏览器即将重返 iOS 平台
- 不可修补的 iOS 漏洞可能导致 iPhone 4s 到 iPhone X 永久越狱
- iOS 12.4 系统遭黑客破解,漏洞危及数百万用户
- 每日安全资讯:NSO,一家专业入侵 iPhone 的神秘公司
- [转][源代码]Comex公布JailbreakMe 3.0源代码
- VB实现鼠标绘图实例代码
- Windows窗体的.Net框架绘图技术实现方法
- Delphi使用OpenGL2d绘图之画图片Bmp的方法
- php绘图中显示不出图片的原因及解决
- 讲解iOS开发中基本的定位功能实现
- js判断客户端是iOS还是Android等移动终端的方法
- IOS开发环境windows化攻略
- 检测iOS设备是否越狱的方法
- .net平台推送ios消息的实现方法
- php绘图之生成饼状图的方法
- php绘图之加载外部图片的方法
- php绘图之在图片上写中文和英文的方法