mac下安装nginx+php+mysql+xdebug
2015-10-16 23:10
567 查看
一,安装homebrew
就像linux下面有yum一样,mac也有个homebrew,管理软件非常便捷。
官网:http://brew.sh/index_zh-cn.html
上面有句命令,复制下来终端执行,如果命令返回404没找到,命令以官网最新为参考。
执行完后,就可以用 brew 安装php了。这里php有几个版本可以安装,具体可以执行 "brew search php" 查看一下有什么php版本可以安装,一般会有“php52、php53、php54”版本,我安装的是最新的php5.6版本。(php7.0尝试多次编译不过去放弃了。)
由于PHP5.4以上版本已经内嵌了 FPM,FastCGI Process Manager),在安装选项里标明就行,本人 php 的安装配置指令如下:
安装完后会出一段提示的。
更多的安装选项可以通过 "brew options php56" 查看。指令执行完后,php 跟 php-fpm 就安装好了。
由于是重装php,之前系统预装的php还没卸载,因此在终端调用php时,还是以之前系统的php版本做解析,所以这里需要修改path,指定 php 的解析路径。在~/.bash_profile(没有则创建)最后加入一行:
其实提示已经说的很清楚了。按步骤去敲上面标红的命令就行了。下面是我的环境变量文件 ~/.bash_profile
souce 有可能失败,不用管它,应该是服务没起来。
OK,php-fpm安装完成。

当然还没完,你需要告诉nginx使用php-fpm编译php文件。
vi /usr/local/etc/nginx/nginx.conf
location ~ \.php$ {
root /usr/local/var/www;#改一下你的网站根目录
fastcgi_pass 127.0.0.1:9000;
fastcgi_index index.php;
fastcgi_param SCRIPT_FILENAME $document_root$fastcgi_script_name; #这里/script改成$document_root
include fastcgi_params;
}
========================================
配置一个localhost:8081的项目,/User/XXX/www/test.com
下面是一个简单的配置
四、xdebug
brew install xdebug 各种报错,没找到tap之类的,网上找了很多方案,没解决。
所以打算直接编译xdebug好了。
所以直接官网http://xdebug.org/download.php
选择 source files/xdebug-2.3.3.tgz 下载下来
丢到/User/XXX/www/xdebug-2.3.3.tgz
解压
tar -xzf xdebug-2.3.3.tgz
cd xdebug-2.3.3
phpize
如果报错没安装autoconf的话就 执行 brew install autoconf
./configure --enable-xdebug
make
测试一下
make test

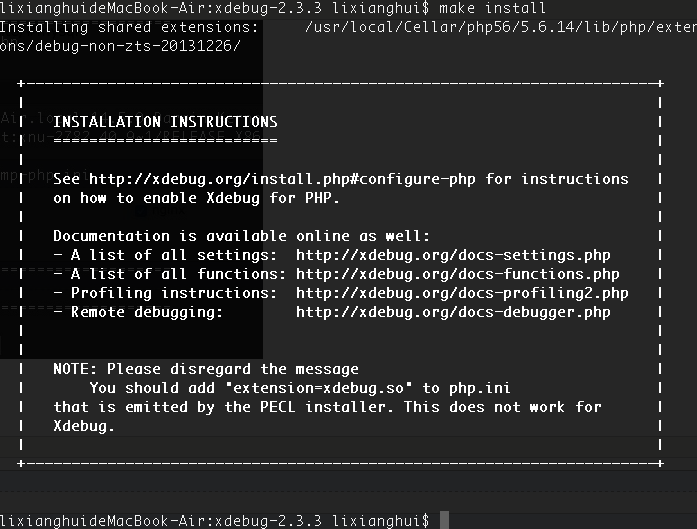
make install
php --ini 找到php.ini文件位置
php.ine末尾加入
[xdebug]
;zend_extension="/usr/local/Cellar/php56/5.6.14/lib/php/extensions/debug-non-zts-20131226/xdebug.so"
zend_extension="xdebug.so"
xdebug.remote_enable=1
xdebug.remote_host=localhost
xdebug.remote_port=9000
xdebug.remote_autostart=1

参考:http://blog.csdn.net/iamduoluo/article/details/38346291
http://coolestguidesontheplanet.com/get-apache-mysql-php-phpmyadmin-working-osx-10-10-yosemite/#mysql http://www.it165.net/os/html/201401/7076.html
就像linux下面有yum一样,mac也有个homebrew,管理软件非常便捷。
官网:http://brew.sh/index_zh-cn.html
上面有句命令,复制下来终端执行,如果命令返回404没找到,命令以官网最新为参考。
ruby -e "$(curl -fsSL https://raw.githubusercontent.com/Homebrew/install/master/install)"[/code]
任意键继续,可能需要输入你MAC的开机密码
漫长的等待。。。可以去洗个澡了再回来看
brew help可以看帮助
二,安装nginxbrew install nginx #重新加载配置|重启|停止|退出 nginx nginx -s reload|reopen|stop|quit #测试配置是否有语法错误 nginx -t
又是漫长的等待
nginx -v 查看版本
打开 nginx 后,默认的访问端口 8080,如果要改为常用的 80 端口,则要修改 "/usr/local/etc/nginx/nginx.conf" 下监听(listen)端口值。
默认的文件访问目录(root)是 "/usr/local/Cellar/nginx/1.8.0/html"(这里的1..8.0是安装的nginx的版本,文件夹名以安装的nginx版本为准)。
把 nginx 设置为开机启动运行:mkdir -p ~/Library/LaunchAgents cp /usr/local/Cellar/nginx/1.8.0/homebrew.mxcl.nginx.plist ~/Library/LaunchAgents/ launchctl load -w ~/Library/LaunchAgents/homebrew.mxcl.nginx.plist
不过试了一下,不是超级用户登陆,而是普通用户登陆,并且监听的端口在1024以下的(例如把默认的8080端口改为了80端口),nginx 开机是启动不了。因此,要 nginx 开机启动的话,需要给予它管理员权限:sudo chown root:wheel /usr/local/Cellar/nginx/1.8.0/bin/nginx sudo chmod u+s /usr/local/Cellar/nginx/1.8.0/bin/nginx
二,安装mysqlbrew install mysql
安装完之后登陆,报了个错,MySQL server through socket '/tmp/mysql.sock
启动一下mysql,在试一下
mysql.server restart
如果觉得很麻烦。直接到官网下个mac的dmg版mysql吧
记得卸载 brew remove mysql ,
下载mysql官网的mac dmg版安装即可,安装完之后,在偏好设置里面会出现mysql的图标,和java,flash一样,打开看下,下面的勾选开机启动cd ; nano .bash_profil 打开编辑这个文件export PATH="/usr/local/mysql/bin:$PATH" control+x 后回车退出source ~/.bash_profile mysql登陆,如果遇到 -bash: mysql: command not found
原因:这是由于系统默认会查找/usr/bin下的命令,如果这个命令不在这个目录下,当然会找不到命令,我们需要做的就是映射一个链接到/usr/bin目录下,相当于建立一个链接文件。
首先得知道mysql命令或mysqladmin命令的完整路径,比如mysql的路径是:/usr/local/mysql/bin/mysql,我们则可以这样执行命令:
# ln -s /usr/local/mysql/bin/mysql /usr/bin设置你的密码 /usr/local/mysql/bin/mysqladmin -u root password 'yourpasswordhere' mysql -uroot -pyourpasswordhere 登陆成功!
三、安装php-fpm
Mac是预装了php,不过很多扩展都没安装,目测最多只能在终端里执行下php指令,所以我选择重新安装php。由于 brew 默认是没有 php 安装,所以要使用 “brew tap” 来安装 brew 的第三方程序包,这里使用 josegonzalez 的php安装包,具体操作如下:


由于PHP5.4以上版本已经内嵌了 FPM,FastCGI Process Manager),在安装选项里标明就行,本人 php 的安装配置指令如下:
brew install php56 --with-debug --with-homebrew-curl --with-imap --with-homebrew-libressl --with-homebrew-libxslt --with-libmysql --without-apache --with-fpm
安装完后会出一段提示的。
The php.ini file can be found in:
/usr/local/etc/php/5.6/php.ini

✩✩✩✩ Extensions ✩✩✩✩

If you are having issues with custom extension compiling, ensure that
you are using the brew version, by placing /usr/local/bin before /usr/sbin in your PATH:

PATH="/usr/local/bin:$PATH"   //这个放在环境变量文件~/bash_profile的/usr/sbin/的前面,优先选择brew的php

PHP56 Extensions will always be compiled against this PHP. Please install them
using --without-homebrew-php to enable compiling against system PHP.

✩✩✩✩ PHP CLI ✩✩✩✩

If you wish to swap the PHP you use on the command line, you should add the following to ~/.bashrc,
~/.zshrc, ~/.profile or your shell's equivalent configuration file:

export PATH="$(brew --prefix homebrew/php/php56)/bin:$PATH"  //命令行执行后才能php -v查看最新的php安装的版本

✩✩✩✩ FPM ✩✩✩✩

To launch php-fpm on startup:
 mkdir -p ~/Library/LaunchAgents   //创建目录,有则忽略
cp /usr/local/opt/php56/homebrew.mxcl.php56.plist ~/Library/LaunchAgents/   //复制文件到系统目录
launchctl load -w ~/Library/LaunchAgents/homebrew.mxcl.php56.plist  //执行后 开机启动php-fpm

The control script is located at /usr/local/opt/php56/sbin/php56-fpm

OS X 10.8 and newer come with php-fpm pre-installed, to ensure you are using the brew version you need to make sure /usr/local/sbin is before /usr/sbin in your PATH:

 PATH="/usr/local/sbin:$PATH"   //更新安装,有则忽略,没有则加到~/.bash_profile

You may also need to edit the plist to use the correct "UserName".

Please note that the plist was called 'homebrew-php.josegonzalez.php56.plist' in old versions
of this formula.

To have launchd start josegonzalez/php/php56 at login:
ln -sfv /usr/local/opt/php56/*.plist ~/Library/LaunchAgents  //使用php
Then to load josegonzalez/php/php56 now:
launchctl load ~/Library/LaunchAgents/homebrew.mxcl.php56.plist //使用php
==> Summary
🍺  /usr/local/Cellar/php56/5.6.14: 309 files, 43M, built in 5.9 minutes
更多的安装选项可以通过 "brew options php56" 查看。指令执行完后,php 跟 php-fpm 就安装好了。
由于是重装php,之前系统预装的php还没卸载,因此在终端调用php时,还是以之前系统的php版本做解析,所以这里需要修改path,指定 php 的解析路径。在~/.bash_profile(没有则创建)最后加入一行:
其实提示已经说的很清楚了。按步骤去敲上面标红的命令就行了。下面是我的环境变量文件 ~/.bash_profile
OK,php-fpm安装完成。
当然还没完,你需要告诉nginx使用php-fpm编译php文件。
vi /usr/local/etc/nginx/nginx.conf
location ~ \.php$ {
root /usr/local/var/www;#改一下你的网站根目录
fastcgi_pass 127.0.0.1:9000;
fastcgi_index index.php;
fastcgi_param SCRIPT_FILENAME $document_root$fastcgi_script_name; #这里/script改成$document_root
include fastcgi_params;
}
========================================
配置一个localhost:8081的项目,/User/XXX/www/test.com
下面是一个简单的配置
server {
listen       8081;
server_name  localhost
root   /Users/lixianghui/www/test.com;
index index.php index.html;

location ~ \.php$ {
root   /Users/lixianghui/www/test.com;
fastcgi_pass   127.0.0.1:9000;
fastcgi_index  index.php;
fastcgi_param  SCRIPT_FILENAME  $document_root$fastcgi_script_name;
include        fastcgi_params;
}
}
四、xdebug
brew install xdebug 各种报错,没找到tap之类的,网上找了很多方案,没解决。
所以打算直接编译xdebug好了。
所以直接官网http://xdebug.org/download.php
选择 source files/xdebug-2.3.3.tgz 下载下来
丢到/User/XXX/www/xdebug-2.3.3.tgz
解压
tar -xzf xdebug-2.3.3.tgz
cd xdebug-2.3.3
phpize
如果报错没安装autoconf的话就 执行 brew install autoconf
./configure --enable-xdebug
make
测试一下
make test
make install
php --ini 找到php.ini文件位置
php.ine末尾加入
[xdebug]
;zend_extension="/usr/local/Cellar/php56/5.6.14/lib/php/extensions/debug-non-zts-20131226/xdebug.so"
zend_extension="xdebug.so"
xdebug.remote_enable=1
xdebug.remote_host=localhost
xdebug.remote_port=9000
xdebug.remote_autostart=1
参考:http://blog.csdn.net/iamduoluo/article/details/38346291
http://coolestguidesontheplanet.com/get-apache-mysql-php-phpmyadmin-working-osx-10-10-yosemite/#mysql http://www.it165.net/os/html/201401/7076.html

相关文章推荐
- Nginx错误解决小结
- nginx 403问题容易忽略的双防火墙问题
- Nginx添加header防止网页被iframe
- [转] nginx+FastCGI+c++
- [转] Nginx + CGI/FastCGI + C/Cpp
- Nginx 编译,添加未编译安装模块ngx_cache_purge
- apache 转 nginx .htaccess
- 使用 Nginx 的 X-Sendfile 机制控制文件访问权限(php版)
- 高性能高可用方案Nginx (三)Upstream(负载均衡)
- Nginx配置文件nginx.conf中文详解
- ngxin 启用 gzip
- PHP上传文件大小限制 (Nginx + PHP)
- Apache 和nginx支持跨域访问
- nginx分发到备站服务器导致登录失效
- Nginx个人调优见解
- nginx网站502与504错误分析
- Zabbix 监控 Nginx 状态
- awk统计nginx日志访问前一百的ip
- IE和Firefox下的Cookie兼容问题
- 使用 Nginx 静态化动态网站