iOS测试-GHUnit配置
2015-09-08 15:26
716 查看
前一段时间一直在看iOS测试相关的知识以及测试框架、测试工具的使用,现在拿来总结以下。
GHUnit 是iOS单元测试的一个开源框架,它与XCode集成的OCUnit测试框架有着很大的不同。OCUnit测试框架是集成在你的项目目录中的,而GHUnit测试框架是单独存在的一个target,可以独立运行,并且有UI界面;另外GHUnit是开源的,也意味着你可以根据测试计划自定义框架功能,提高你的测试效率。
那么首先我们先从GHUnit测试框架的配置入手:参考官方文档:http://gh-unit.github.io/gh-unit/docs/appledoc_include/guide_install_ios_7.html,官方文档中的开发环境是Xcode 5,现在已经更新的Xcode7,但是基本的配置步骤是没有太大的区别。
To use GHUnit in your project, you’ll need to create and configure a test target.
You’ll want to create a separate Test target. Select the project file for your app in the Project Navigator. From there, select the “Add Target…” button in the right window.
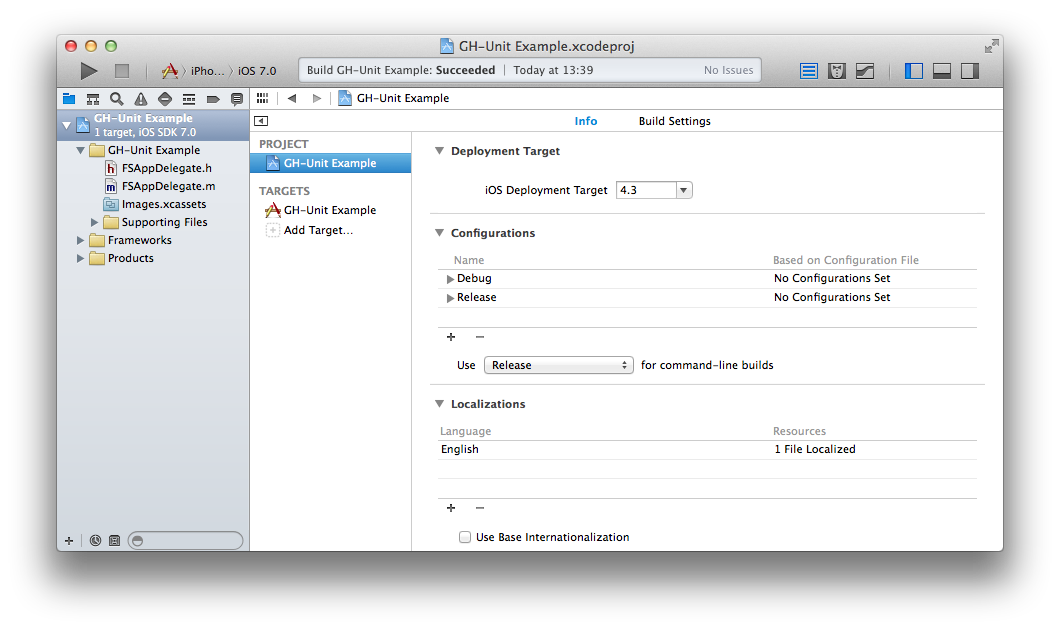
Select iOS, Application, Empty Application. Select Next.

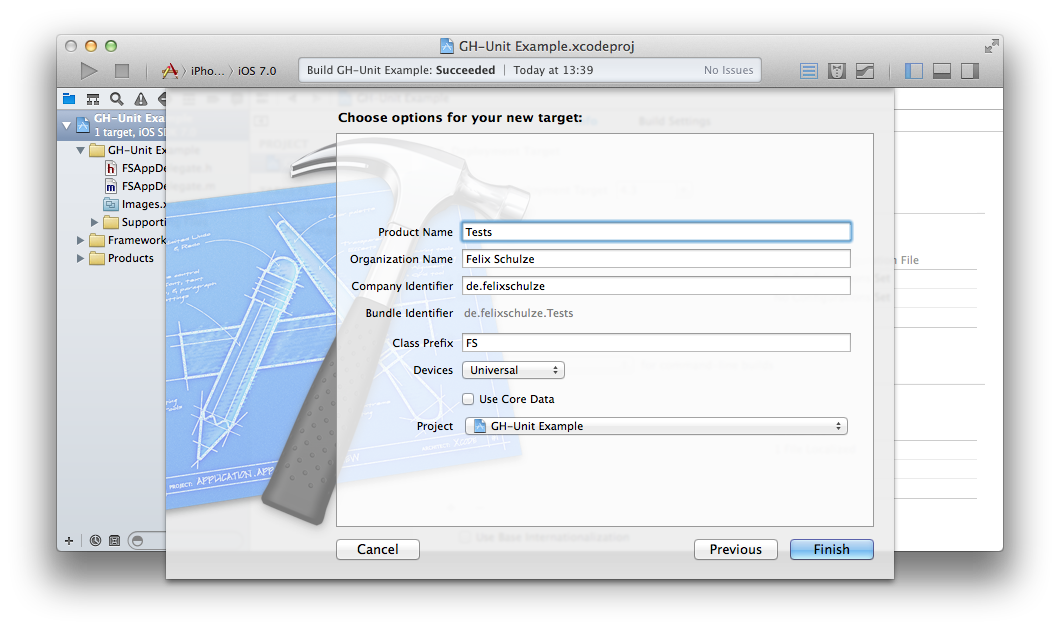
Name it Tests or something similar. Select Finish.
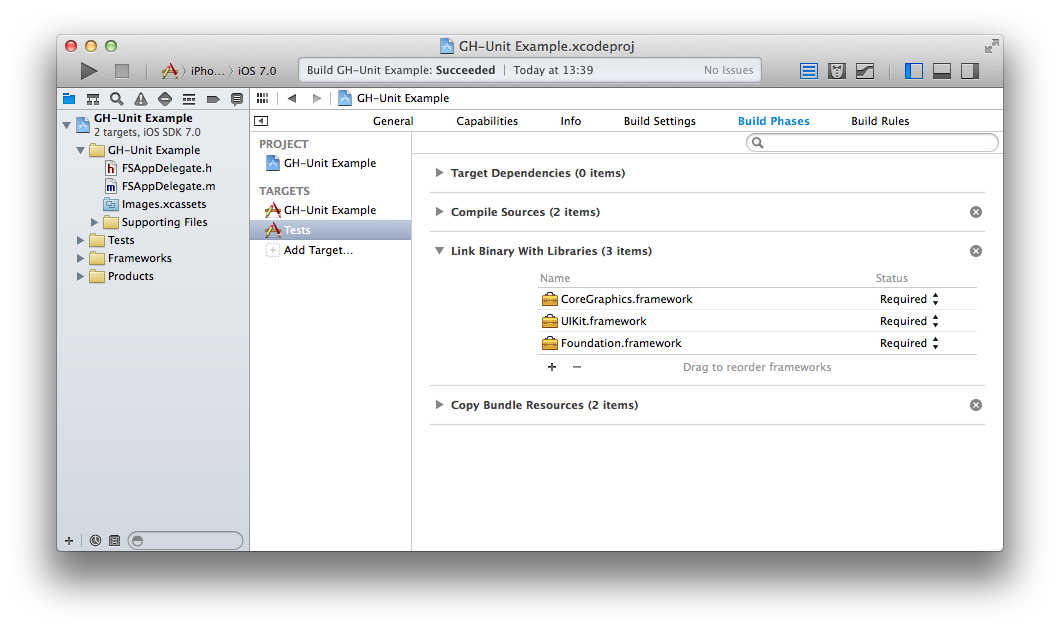
Select the created Test target and select the tab “Build Phases”. Open the “Link Binary With Libraries” option and click on the “+” button.
Select
Download GHUnitIOS.framework and unzip it in your Test Target directory (a subdirectory of your project directory).
Select the created Test target and select the tab “Build Phases”. Open the “Link Binary With Libraries” option and click on the “+” button.
Click “Add Other…”.
Select the
We want to enable use of Objective-C categories, which isn’t enabled for static libraries by default. In the Tests target, Build Settings, under Other Linker Flags, add
Select and delete the files from the existing Tests folder. Leave the Supporting Files folder. GHUnit will provide the application delegate below.
In Tests folder, in Supporting Files, main.m, replace the last argument of UIApplicationMain with
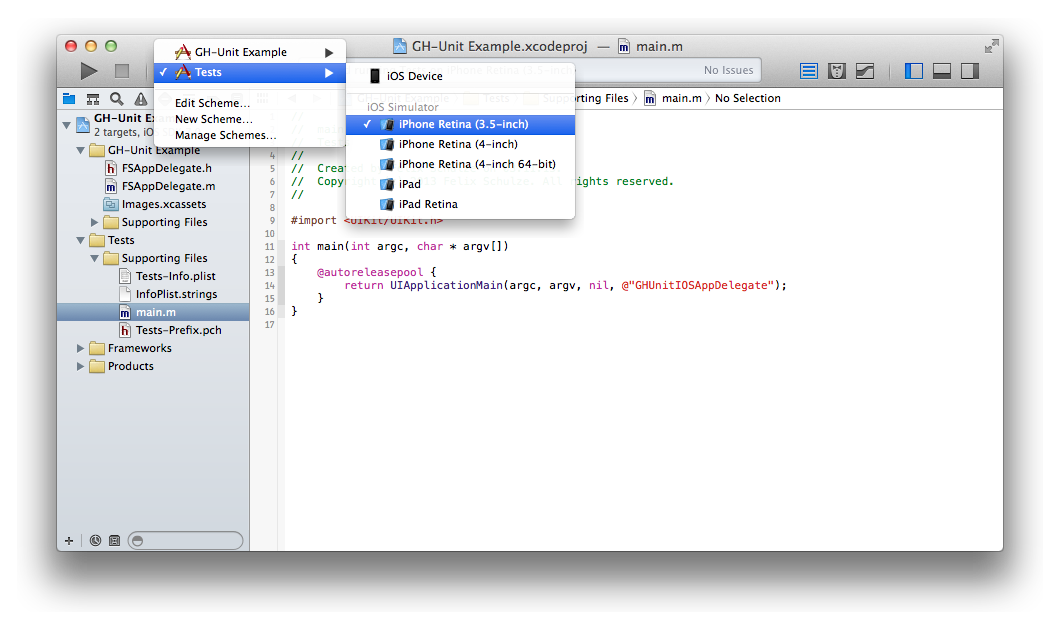
Select the Tests target, iPhone Simulator configuration:
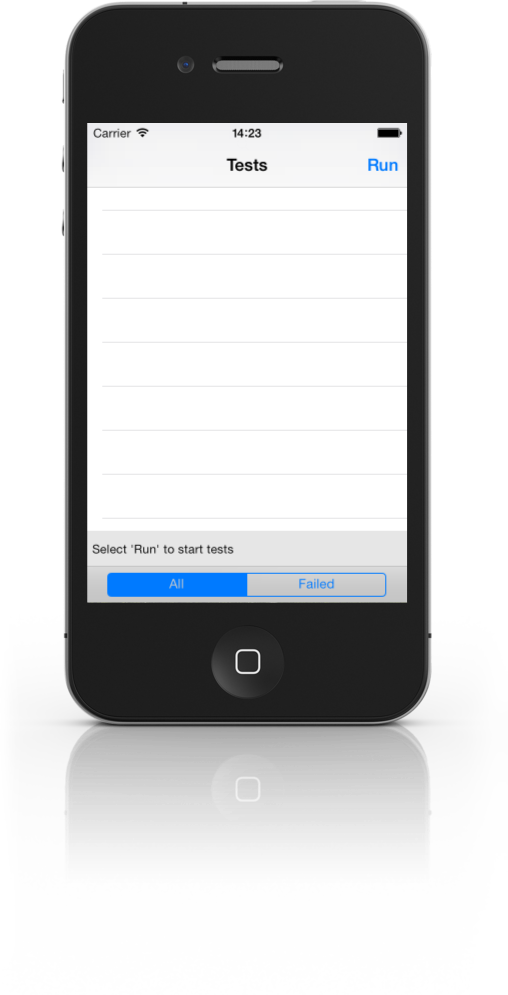
Hit Run, and you’ll hopefully see the test application running (but without any tests).
GHUnit 是iOS单元测试的一个开源框架,它与XCode集成的OCUnit测试框架有着很大的不同。OCUnit测试框架是集成在你的项目目录中的,而GHUnit测试框架是单独存在的一个target,可以独立运行,并且有UI界面;另外GHUnit是开源的,也意味着你可以根据测试计划自定义框架功能,提高你的测试效率。
那么首先我们先从GHUnit测试框架的配置入手:参考官方文档:http://gh-unit.github.io/gh-unit/docs/appledoc_include/guide_install_ios_7.html,官方文档中的开发环境是Xcode 5,现在已经更新的Xcode7,但是基本的配置步骤是没有太大的区别。
Installing in iOS (Xcode 5)
To use GHUnit in your project, you’ll need to create and configure a test target.
Create Test Target
You’ll want to create a separate Test target. Select the project file for your app in the Project Navigator. From there, select the “Add Target…” button in the right window.Select iOS, Application, Empty Application. Select Next.
Name it Tests or something similar. Select Finish.
Configure the Test Target
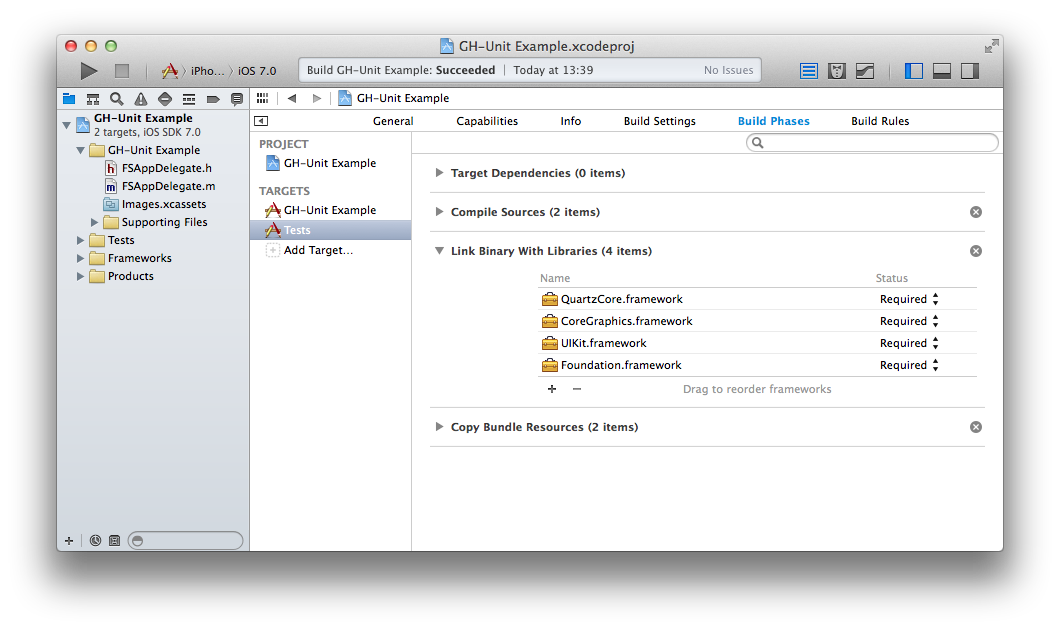
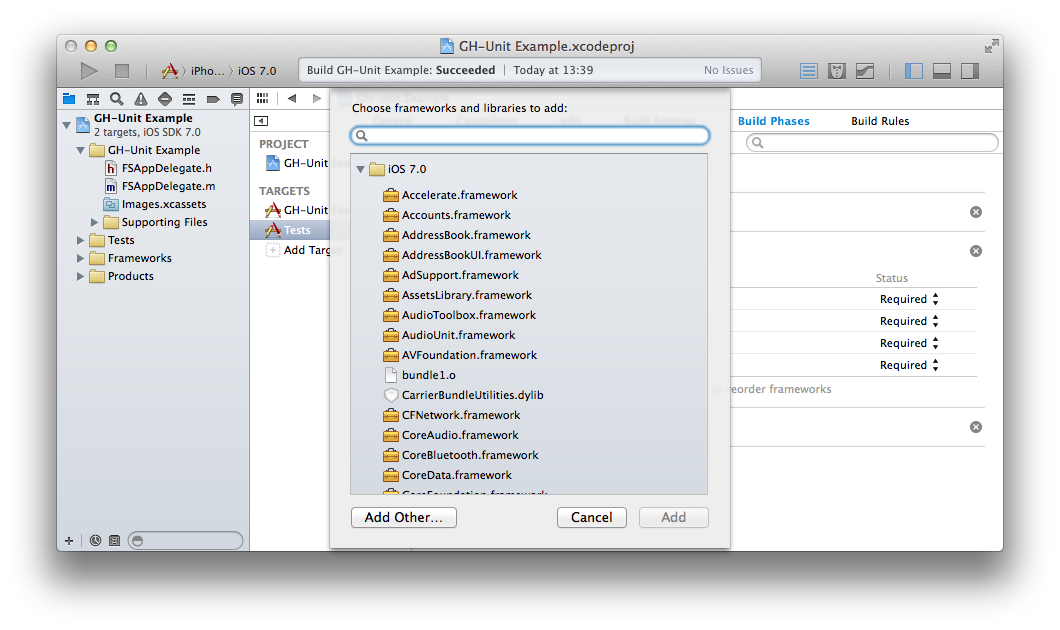
Select the created Test target and select the tab “Build Phases”. Open the “Link Binary With Libraries” option and click on the “+” button.Select
QuartzCore.frameworkand click “Add”.
Download GHUnitIOS.framework and unzip it in your Test Target directory (a subdirectory of your project directory).
Select the created Test target and select the tab “Build Phases”. Open the “Link Binary With Libraries” option and click on the “+” button.
Click “Add Other…”.
Select the
GHUnitIOS.frameworkfrom your Test Target directory.
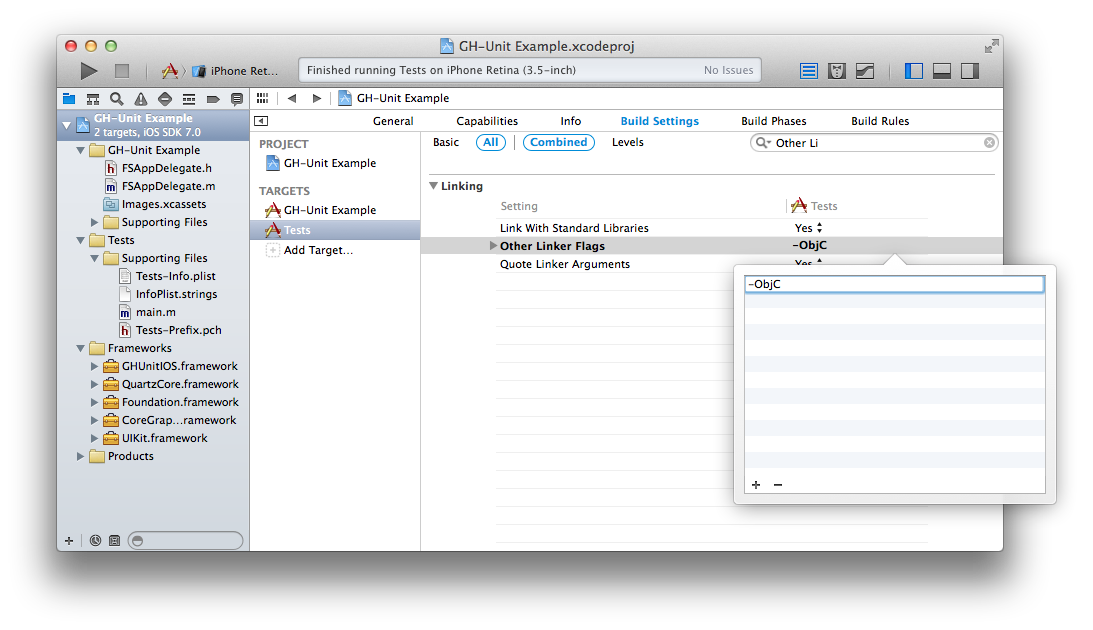
We want to enable use of Objective-C categories, which isn’t enabled for static libraries by default. In the Tests target, Build Settings, under Other Linker Flags, add
-ObjC.
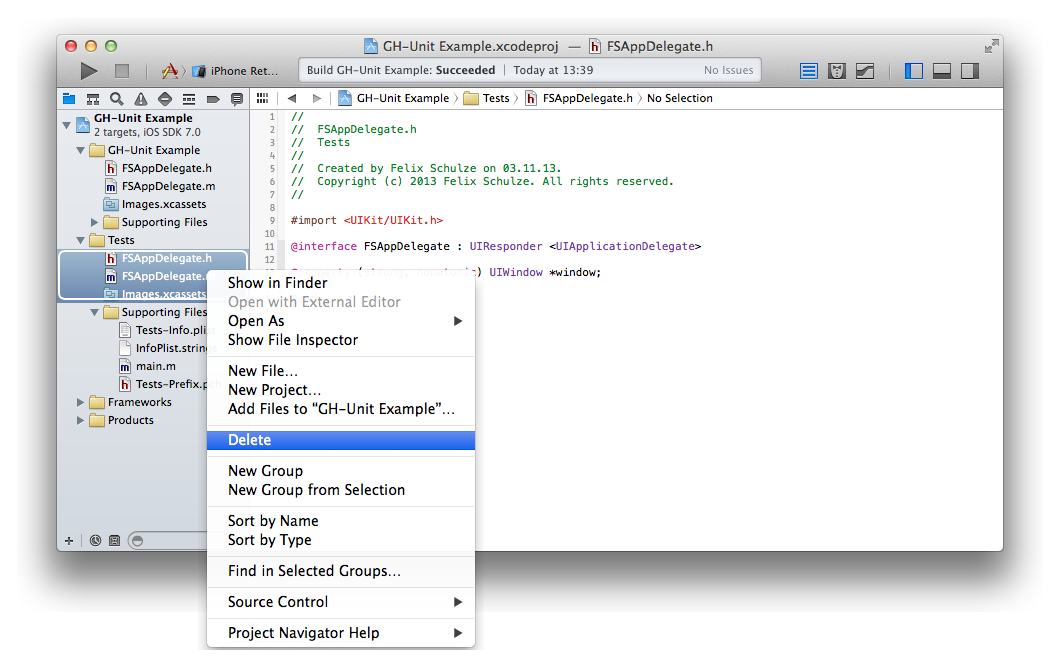
Select and delete the files from the existing Tests folder. Leave the Supporting Files folder. GHUnit will provide the application delegate below.
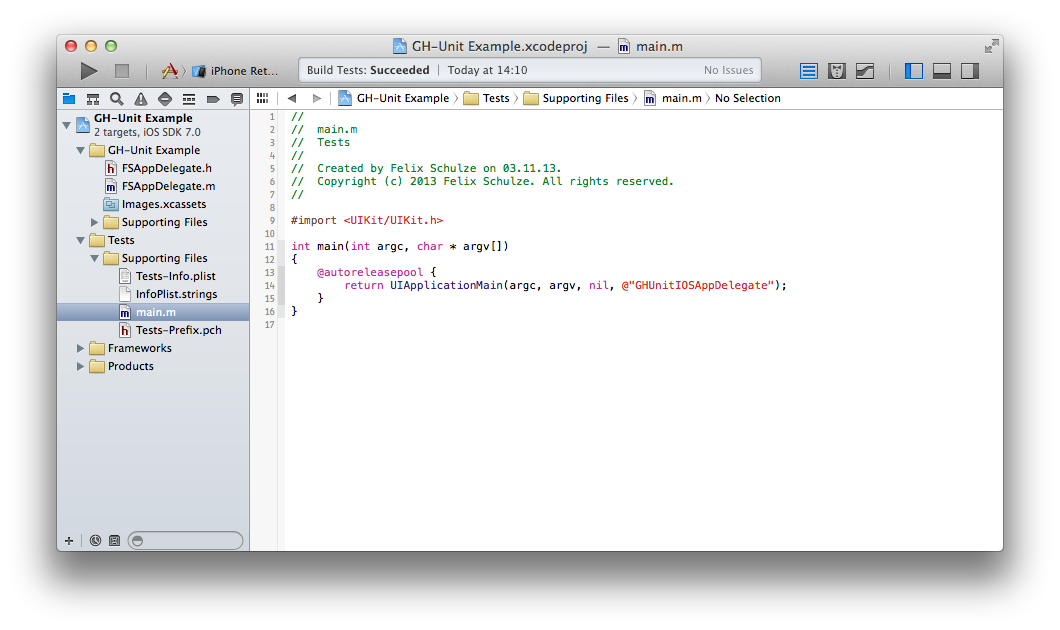
In Tests folder, in Supporting Files, main.m, replace the last argument of UIApplicationMain with
@"GHUnitIOSAppDelegate". Remove the
#import
"AppDelegate.h"
if present.
Select the Tests target, iPhone Simulator configuration:
Hit Run, and you’ll hopefully see the test application running (but without any tests).

相关文章推荐
- Android之使用Http协议实现文件上传功能
- 峰回路转,Firefox 浏览器即将重返 iOS 平台
- 峰回路转,Firefox 浏览器即将重返 iOS 平台
- 不可修补的 iOS 漏洞可能导致 iPhone 4s 到 iPhone X 永久越狱
- iOS 12.4 系统遭黑客破解,漏洞危及数百万用户
- 每日安全资讯:NSO,一家专业入侵 iPhone 的神秘公司
- [转][源代码]Comex公布JailbreakMe 3.0源代码
- [游戏资讯]《极品飞车16:亡命狂飙》配置需求公布
- 通晓网络测试常用命令
- 路由器备份配置
- 路由器的基本配置
- 路由器基础配置及传输协议
- 经典配置 Vlan篇
- 备份线路的配置
- 交换机如何配置 新手配置交换机详细教程
- 如何进行系统配置
- 路由器的配置与调试
- DOS下内存的配置