三大框架之spring入门1
2015-08-16 21:59
441 查看
一、spring简介
按照百度百科的说法
Spring是一个开源框架,Spring是于2003 年兴起的一个轻量级的Java 开发框架,由Rod Johnson 在其著作Expert One-On-One J2EE Development and Design中阐述的部分理念和原型衍生而来。它是为了解决企业应用开发的复杂性而创建的。框架的主要优势之一就是其分层架构,分层架构允许使用者选择使用哪一个组件,同时为 J2EE 应用程序开发提供集成的框架。Spring使用基本的JavaBean来完成以前只可能由EJB完成的事情。然而,Spring的用途不仅限于服务器端的开发。从简单性、可测试性和松耦合的角度而言,任何Java应用都可以从Spring中受益。Spring的核心是控制反转(IoC)和面向切面(AOP)。简单来说,Spring是一个分层的JavaSE/EEfull-stack(一站式) 轻量级开源框架。
其中有说到IOC控制反转以及面向切面的spring的核心
那么接下来我们先看一个例子
还是不要说太多原理,我们先通过一个例子来理解,先理解代码。一下例子需要有java的反射基础才能看得懂!
1、模拟springIOC
先写两个简单的类用来测试
UserService类
UserAction类
然后再写一个接口
在这里再写一个类利用反射生成对象
最后写一个测试类
spring.properties文件
从以上例子我们可以看出,当有需要,要用到某个类时候,并不需要自己去实例化,而是有一个类ClassPathApplicationContext ,用来装实例化的对象,就像一个实例化的容器,当我们需要时候就直接去拿就可以了。
ps:大家可以把代码拿去运行一下,增加理解!
2、springIOC真正开始
1、环境搭建
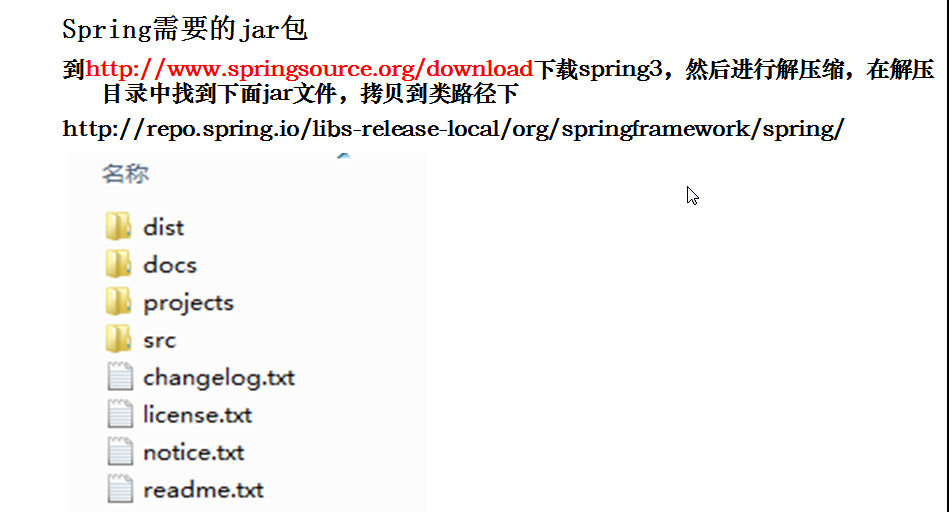
1)新建java工程或者web工程,然后导入spring需要的jar包,可以网上下载

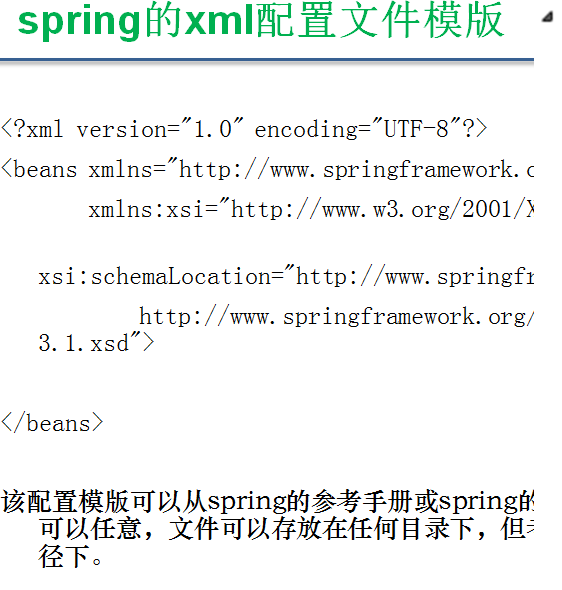
2)新建spring.xml

xml文
ce95
件的头部可以参考spring-bean-3.1.xml,需要根据版本,或者在官网下载spring时候
可以查看文档说明
3)当编写xml时候会遇到没有提示,可以按照下图去解决

2、测试环境
1)首先也是先准备两个类,这两个类的属性都有getter和setter方法,以及有默认构造器
2)初步配置一下spring.xml
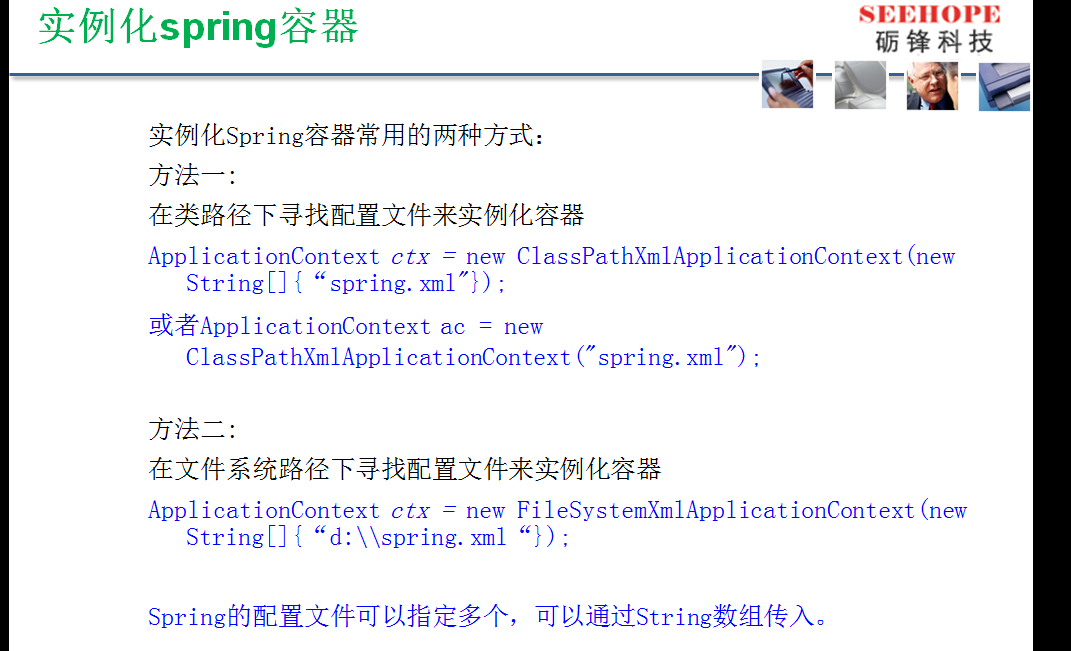
这里可以通过bean获取到UserService,先来写一个测试类来试一下尝试一下它的魅力
通过以上例子,我们会发现,当我们的应用需要获取其他类的实例对象时候并不需要自己亲自new,可以直接在外部容器拿到,可以通过xml配置文件方式直接获取,非常的方便,当我们的类一多时候,很容易搞不清楚,那里new哪里,很容易乱,通过这样的方式,可以很规范的管理我们的实例化对象
也许还不是很理解,没事,接着继续入门学习!
3)bean的属性
接着写一个测试类来尝试一下
运行一下上述例子可以看到,如果是singleton输出的对象是一样的,是prototype生成的对象是不一样的
按照百度百科的说法
Spring是一个开源框架,Spring是于2003 年兴起的一个轻量级的Java 开发框架,由Rod Johnson 在其著作Expert One-On-One J2EE Development and Design中阐述的部分理念和原型衍生而来。它是为了解决企业应用开发的复杂性而创建的。框架的主要优势之一就是其分层架构,分层架构允许使用者选择使用哪一个组件,同时为 J2EE 应用程序开发提供集成的框架。Spring使用基本的JavaBean来完成以前只可能由EJB完成的事情。然而,Spring的用途不仅限于服务器端的开发。从简单性、可测试性和松耦合的角度而言,任何Java应用都可以从Spring中受益。Spring的核心是控制反转(IoC)和面向切面(AOP)。简单来说,Spring是一个分层的JavaSE/EEfull-stack(一站式) 轻量级开源框架。
其中有说到IOC控制反转以及面向切面的spring的核心
那么接下来我们先看一个例子
还是不要说太多原理,我们先通过一个例子来理解,先理解代码。一下例子需要有java的反射基础才能看得懂!
1、模拟springIOC
先写两个简单的类用来测试
UserService类
package net.czy.action;

import net.czy.service.UserService;

public class UserAction {
private UserService us;
/*
* 没办法实例化
private UserService us =new UserService();
*/
public void add(){
us.addService();
}
public void del(){

us.delService();
}
}
UserAction类
package net.czy.service;

import net.czy.action.UserAction;

public class UserService {

public UserService() throws Exception{
//throw new Exception("我抛出异常!");
}

public void addService(){
System.out.println("添加业务");
}
public void delService(){
System.out.println("删除业务");
}
}
然后再写一个接口
package org.springframework.container;

public interface ApplicationContext {
public Object getBean(String beanName);
}
在这里再写一个类利用反射生成对象
package org.springframework.container;

import java.io.FileInputStream;
import java.io.IOException;
import java.net.URL;
import java.util.HashMap;
import java.util.Map;
import java.util.Properties;

public class ClassPathApplicationContext
implements ApplicationContext{
//存储实例化的对象
private Map map = new HashMap();
private Properties p;
public ClassPathApplicationContext(String path) {
// TODO Auto-generated constructor stub
//获取类路径中的资源地址
path = this.getClass().getClassLoader().getResource(path).toString();
path = path.substring(6);
System.out.println(path);
p = new Properties();
try {
p.load(new FileInputStream(path));
} catch (IOException e) {
// TODO Auto-generated catch block
e.printStackTrace();
}
}
@Override
public Object getBean(String beanName) {
// TODO Auto-generated method stub
//先从map集合获取对象
Object o = map.get(beanName);
if(o != null)return o;
//没有对象,那么使用反射生成对象
String className = p.getProperty(beanName);
if(className == null)return null;
try {
Class clzz = Class.forName(className);
o = clzz.newInstance();
map.put(beanName, o);
} catch (ClassNotFoundException e) {
// TODO Auto-generated catch block
e.printStackTrace();
} catch (InstantiationException e) {
// TODO Auto-generated catch block
e.printStackTrace();
} catch (IllegalAccessException e) {
// TODO Auto-generated catch block
e.printStackTrace();
}
return o;
}

}
最后写一个测试类
package net.czy.test;

import net.czy.action.UserAction;
import net.czy.service.UserService;

import org.springframework.container.ApplicationContext;
import org.springframework.container.ClassPathApplicationContext;

public class Test {

public static void main(String[] args) {
// TODO Auto-generated method stub
ApplicationContext ac =
new ClassPathApplicationContext("spring.properties");
//对象的创建不依赖与应用的本身
UserService us =
(UserService) ac.getBean("us1");
System.out.println(us);
us.addService();

UserService us1 =
(UserService) ac.getBean("us");
System.out.println(us1);

/*userAction没有实例化UserAction,会报空指针
UserAction ua=(UserAction) ac.getBean("ua");
ua.add();
*/
}

}
spring.properties文件
us1=net.czy.service.UserService
ua=net.czy.action.UserAction
从以上例子我们可以看出,当有需要,要用到某个类时候,并不需要自己去实例化,而是有一个类ClassPathApplicationContext ,用来装实例化的对象,就像一个实例化的容器,当我们需要时候就直接去拿就可以了。
ps:大家可以把代码拿去运行一下,增加理解!
2、springIOC真正开始
1、环境搭建
1)新建java工程或者web工程,然后导入spring需要的jar包,可以网上下载

2)新建spring.xml

xml文
ce95
件的头部可以参考spring-bean-3.1.xml,需要根据版本,或者在官网下载spring时候
可以查看文档说明
3)当编写xml时候会遇到没有提示,可以按照下图去解决

2、测试环境
1)首先也是先准备两个类,这两个类的属性都有getter和setter方法,以及有默认构造器
package net.seehope.action;

import javax.annotation.Resource;

import org.springframework.beans.factory.annotation.Autowired;
import org.springframework.stereotype.Controller;

import net.seehope.service.UserService;
public class UserAction {

private UserService us ;

public void useraction(){
System.out.println("useraction方法");
}

public UserService getUs() {
return us;
}

public void setUs(UserService us) {
this.us = us;
}
public void add(){
us.addService();
}
public void del(){

us.delService();
}
}
package net.seehope.service;
import org.springframework.stereotype.Service;
public class UserService {
private String name;
private int age;
private String address;
public void add(){
System.out.println("UserService增加服务");
}
public UserService() {
super();
// TODO Auto-generated constructor stub
}
public UserService(String name, int age, String address) {
super();
this.name = name;
this.age = age;
this.address = address;
}
public UserService(String name, String address) {
super();
this.name = name;
this.address = address;
System.out.println("name-address");
}
public UserService(String name, int age) {
super();
this.name = name;
this.age = age;
System.out.println("name-age");
}
public UserService(String name) {
super();
this.name = name;
System.out.println("一个参数构造器");
}
public void init(){
System.out.println("我被初始化了");
}
public void destory(){
System.out.println("我被销毁了");
}
public void addService(){
System.out.println("增加服务");
}
public void delService(){
System.out.println("删除服务");
}
public String getName() {
return name;
}
public void setName(String name) {
this.name = name;
}
public int getAge() {
return age;
}
public void setAge(int age) {
this.age = age;
}
public String getAddress() {
return address;
}
public void setAddress(String address) {
this.address = address;
}
}2)初步配置一下spring.xml
<?xml version="1.0" encoding="UTF-8"?>
<beans xmlns="http://www.springframework.org/schema/beans"
xmlns:xsi="http://www.w3.org/2001/XMLSchema-instance"
xmlns:context="http://www.springframework.org/schema/context"
xsi:schemaLocation="http://www.springframework.org/schema/beans http://www.springframework.org/schema/beans/spring-beans-3.1.xsd http://www.springframework.org/schema/context http://www.springframework.org/schema/context/spring-context-3.1.xsd"> <bean id="us"
class="net.seehope.service.UserService"
scope="singleton"
>
</beans>
这里可以通过bean获取到UserService,先来写一个测试类来试一下尝试一下它的魅力
package net.seehope.test;

import net.seehope.action.UserAction;
import net.seehope.service.UserService;

import org.springframework.container.ClassPathApplicationContext;
import org.springframework.context.ApplicationContext;
import org.springframework.context.support.ClassPathXmlApplicationContext;

public class Test1 {

public static void main(String[] args) {
/**读取spring.xml文件里面的内容,注意ApplicationContext 是一个
接口,不可以直接new的,只能new它的实现类
*/
ApplicationContext ac =new ClassPathXmlApplicationContext("spring.xml");
//从外部容器拿到UserService的实例化对象
UserService us=ac.getBean("us", UserService.class);
System.out.println(us);

}

}
通过以上例子,我们会发现,当我们的应用需要获取其他类的实例对象时候并不需要自己亲自new,可以直接在外部容器拿到,可以通过xml配置文件方式直接获取,非常的方便,当我们的类一多时候,很容易搞不清楚,那里new哪里,很容易乱,通过这样的方式,可以很规范的管理我们的实例化对象
也许还不是很理解,没事,接着继续入门学习!
3)bean的属性
<!-- scope="singleton"  -->  <!-- 每次从容器获取的对象都一样 ,prototype模式每次获取的对象都是不一样的,session以及request,主要适用于web工程,http请求的-->
<bean id="us"
class="net.seehope.service.UserService"
scope="singleton"
>
接着写一个测试类来尝试一下
package net.seehope.test;

import net.seehope.action.UserAction;
import net.seehope.service.UserService;

import org.springframework.container.ClassPathApplicationContext;
import org.springframework.context.ApplicationContext;
import org.springframework.context.support.ClassPathXmlApplicationContext;

public class Test1 {

public static void main(String[] args) {
/**读取spring.xml文件里面的内容,注意ApplicationContext 是一个
接口,不可以直接new的,只能new它的实现类
*/
ApplicationContext ac =new ClassPathXmlApplicationContext("spring.xml");
//从外部容器拿到UserService的实例化对象
UserService us=ac.getBean("us", UserService.class);

UserService us1=ac.getBean("us", UserService.class);
System.out.println(us1==us);

}

}
运行一下上述例子可以看到,如果是singleton输出的对象是一样的,是prototype生成的对象是不一样的
相关文章推荐
- java对世界各个时区(TimeZone)的通用转换处理方法(转载)
- java-注解annotation
- java-模拟tomcat服务器
- java-用HttpURLConnection发送Http请求.
- java-WEB中的监听器Lisener
- Android IPC进程间通讯机制
- Android Native 绘图方法
- Android java 与 javascript互访(相互调用)的方法例子
- 介绍一款信息管理系统的开源框架---jeecg
- 聚类算法之kmeans算法java版本
- java实现 PageRank算法
- PropertyChangeListener简单理解
- 插入排序
- 冒泡排序
- 堆排序
- 快速排序
- 二叉查找树
- 一个jar包里的网站
