iOS- Swift:如何使用iOS8中的UIAlertController
2015-08-07 18:11
525 查看
1.前言
在前段时间手机QQ:升级iOS8.3后,发图就崩的情况,
就是因为iOS8更新UIAlertController后,仍然使用UIAlertview导致的
具体原因分析 这个可以看腾讯团队发出来的总结分享。
http://bugly.qq.com/blog/?p=135#
在Xcode头文件中苹果也明确给出用UIAlertController替代UIAlertview和UIActionSheet的标识


所以iOS8以后我们还是使用苹果推荐的UIAlertController吧(这货居然是一个ViewController。。)
效果图1:
UIAlertControllerStyle.Alert 对话框样式
UIAlertControllerStyle.ActionSheet 上拉菜单样式
注意第三个参数,要确定您选择的是对话框样式还是上拉菜单样式。
UIAlertActionStyle
通过UIAlertActionStyle,可以选择如下三种动作样式:
常规(default)、取消(cancel)以及警示(destruective)。
UIAlertActionStyle.Default
UIAlertActionStyle.Cancel
UIAlertActionStyle.Destructive //“警告”样式会默认把按钮字体加红
效果图2:


效果图3:

作者: 清澈Saup
出处: http://www.cnblogs.com/qingche/
本文版权归作者和博客园共有,欢迎转载,但必须保留此段声明,且在文章页面明显位置给出原文连接。
在前段时间手机QQ:升级iOS8.3后,发图就崩的情况,
就是因为iOS8更新UIAlertController后,仍然使用UIAlertview导致的
具体原因分析 这个可以看腾讯团队发出来的总结分享。
http://bugly.qq.com/blog/?p=135#
在Xcode头文件中苹果也明确给出用UIAlertController替代UIAlertview和UIActionSheet的标识
所以iOS8以后我们还是使用苹果推荐的UIAlertController吧(这货居然是一个ViewController。。)
2.如何使用UIAlertController
2.2.第一种创建方式——默认提示框
最原始的init一般不用这种,默认是上拉菜单样式import UIKit
class ViewController: UIViewController {
override func viewDidLoad() {
super.viewDidLoad()
// Do any additional setup after loading the view, typically from a nib.
}
override func didReceiveMemoryWarning() {
super.didReceiveMemoryWarning()
// Dispose of any resources that can be recreated.
}
override func touchesBegan(touches: Set<NSObject>, withEvent event: UIEvent) {
// 单击屏幕触发
//方式一
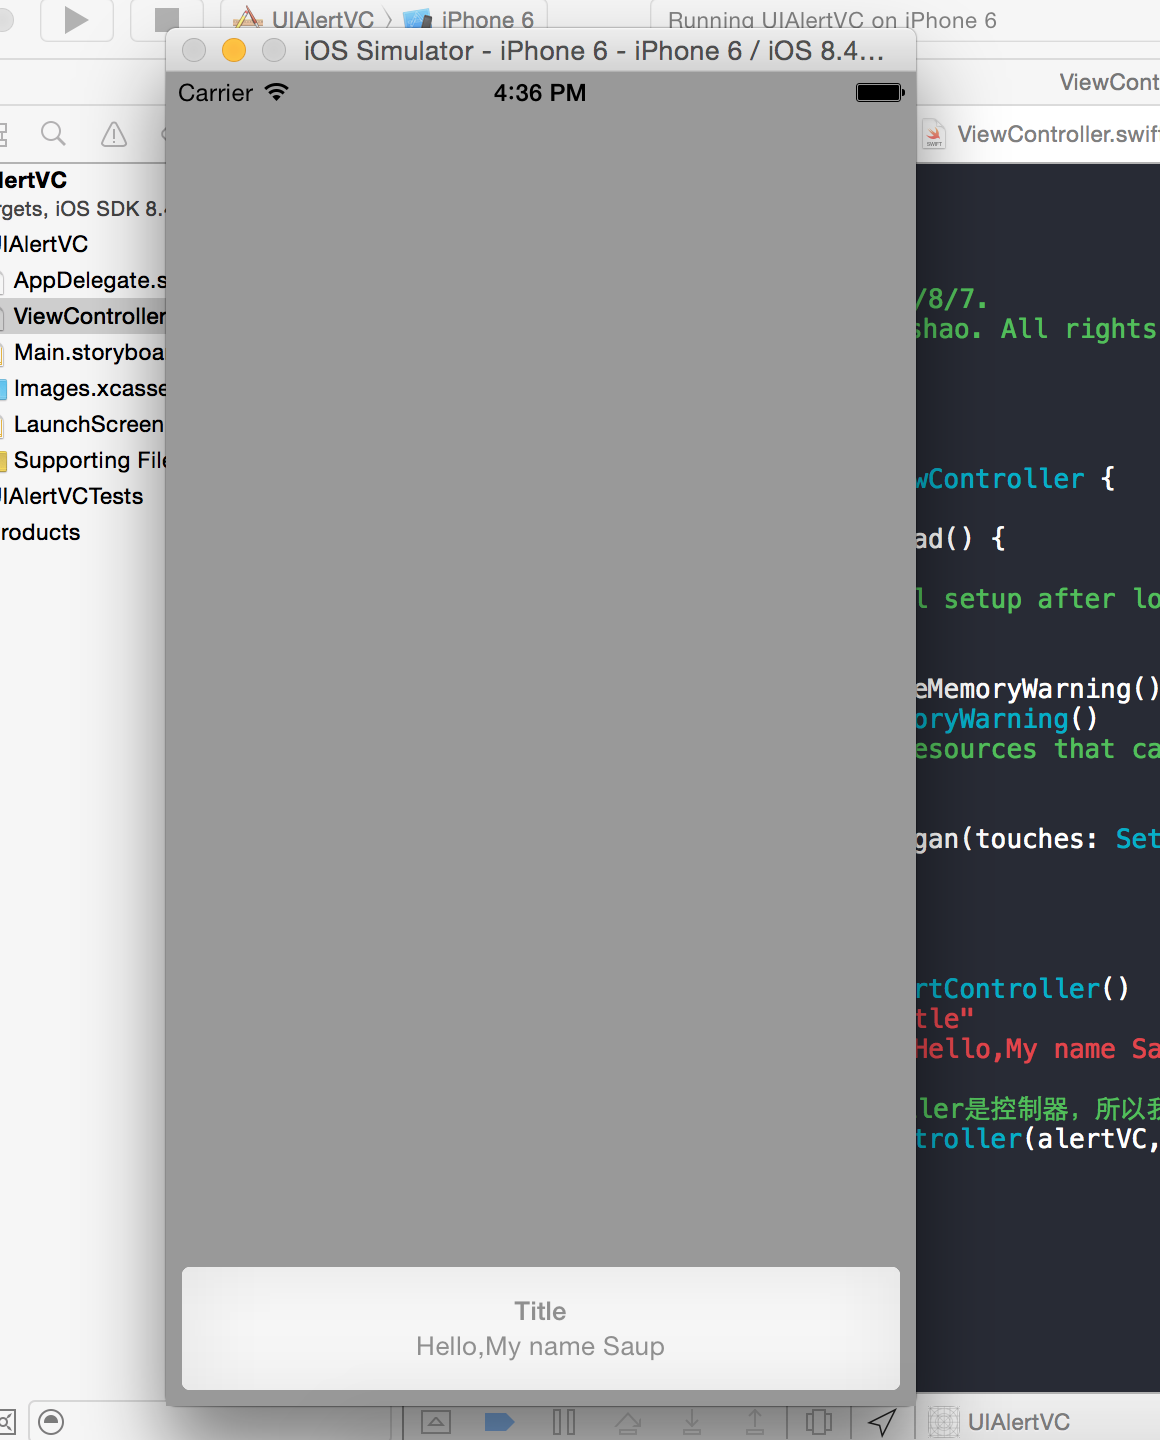
var alertVC = UIAlertController()
alertVC.title = "Title"
alertVC.message = "Hello,My name Saup"
//因为UIAlertController是控制器,所以我们现在得改用控制器弹出
self.presentViewController(alertVC, animated: true, completion: nil)
}效果图1:
2.2.第二种创建方式——自定义提示框
UIAlertControllerStyleUIAlertControllerStyle.Alert 对话框样式
UIAlertControllerStyle.ActionSheet 上拉菜单样式
注意第三个参数,要确定您选择的是对话框样式还是上拉菜单样式。
UIAlertActionStyle
通过UIAlertActionStyle,可以选择如下三种动作样式:
常规(default)、取消(cancel)以及警示(destruective)。
UIAlertActionStyle.Default
UIAlertActionStyle.Cancel
UIAlertActionStyle.Destructive //“警告”样式会默认把按钮字体加红
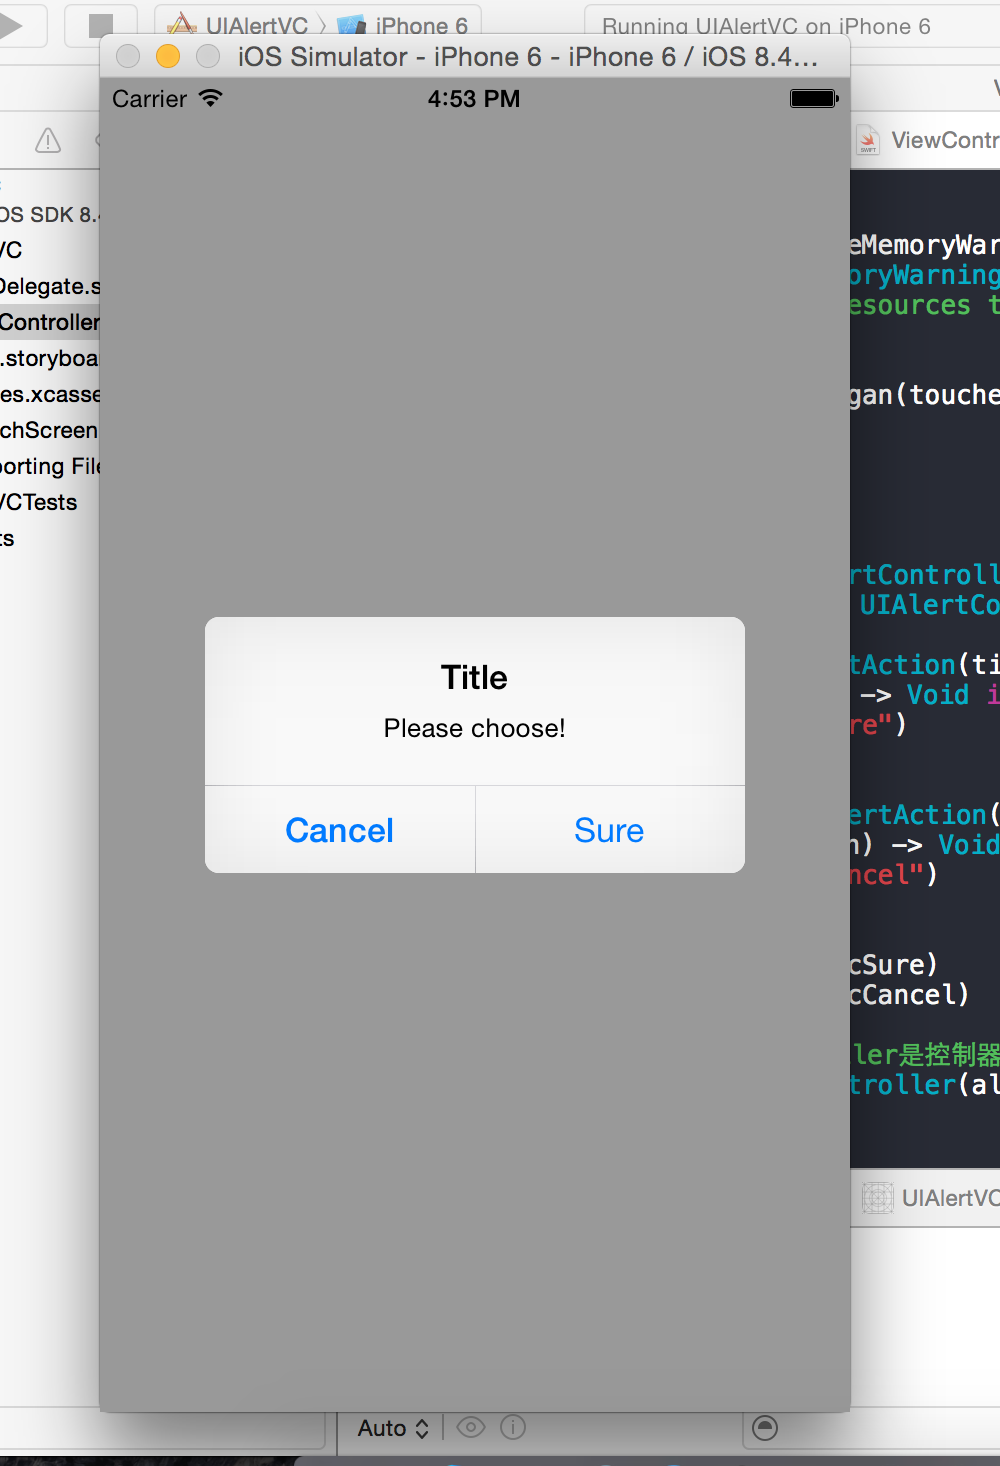
override func touchesBegan(touches: Set<NSObject>, withEvent event: UIEvent) {
// 单击屏幕触发

//方式二

//创建控制器
var alertVC = UIAlertController(title: "Title", message: "Please choose!", preferredStyle: UIAlertControllerStyle.ActionSheet)
//创建按钮
var acSure = UIAlertAction(title: "Sure", style: UIAlertActionStyle.Default) { (UIAlertAction) -> Void in
print("click Sure")
}

var acCancel = UIAlertAction(title: "Cancel", style: UIAlertActionStyle.Cancel) { (UIAlertAction) -> Void in
print("click Cancel")
}

//        var acDestuctive = UIAlertAction(title: "Destuctive", style: //UIAlertActionStyle.Destuctive) { (UIAlertAction) -> Void in
//            print("click Destuctive")
//        }

alertVC.addAction(acSure)
alertVC.addAction(acCancel)
//      alertVC.addAction(acDestuctive)

//因为UIAlertController是控制器,所以我们现在得改用控制器弹出
self.presentViewController(alertVC, animated: true, completion: nil)

}
效果图2:
2.3.第三种创建方式——文本对话框
override func touchesBegan(touches: Set<NSObject>, withEvent event: UIEvent) {
// 单击屏幕触发

//方式三

//创建控制器
var alertVC = UIAlertController(title: "TextFiled", message: "Please input!", preferredStyle: UIAlertControllerStyle.Alert)

alertVC.addTextFieldWithConfigurationHandler { (tField:UITextField!) -> Void in

tField.placeholder = "Account"

}

alertVC.addTextFieldWithConfigurationHandler {(textField:UITextField!) -> Void in
textField.placeholder = "Password"
textField.secureTextEntry = true;
}

var acOK = UIAlertAction(title: "OK", style: UIAlertActionStyle.Default) { (alertAction:UIAlertAction!) -> Void in

}
var acCancel = UIAlertAction(title: "Cancel", style: UIAlertActionStyle.Cancel) { (alertAction:UIAlertAction!) -> Void in
}

acOK.enabled = false

alertVC.addAction(acOK)
alertVC.addAction(acCancel)

//因为UIAlertController是控制器,所以我们现在得改用控制器弹出
self.presentViewController(alertVC, animated: true, completion: nil)
}
效果图3:
作者: 清澈Saup
出处: http://www.cnblogs.com/qingche/
本文版权归作者和博客园共有,欢迎转载,但必须保留此段声明,且在文章页面明显位置给出原文连接。

相关文章推荐
- swift封装的跑马灯效果
- Swift学习笔记(二十)——数组的基本操作
- [ios] Swift Closure(闭包)
- swift 代码加载xib storyboard
- swift学习笔记
- 【Swift】沙盒缓存
- Ray Wenderlich的swift教程01--推荐资料
- [ios] Swift Basis
- iOS开发实战教学:在Swift怎样创建CocoaPod?
- iPhone开发入门系列1(iOS8+Swift版)天天打靶APP学习15-16
- swift2.0学习之拓展
- swift public、internal和private
- ios开发——swift
- swift2.0学习之类型转换
- swift -- 定义空字符串 hasPrefix hasSuffix trim split join range
- Swift学习笔记系列——(18)造型
- RAMAnimatedTabBarController -swift kit
- Swift学习笔记系列——(15)自动引用计数
- Swift学习笔记系列——(16)可选链
- Swift 初学手册:可选类型 (Optionals)