Spring -- 注解配置Bean
2015-07-27 16:44
591 查看
通过注解配置Bean
特定组件包括:@Component: 基本注解, 标识了一个受 Spring 管理的组件
@Respository: 标识持久层组件
@Service: 标识服务层(业务层)组件
@Controller: 标识表现层组件
上面的组件可以混用,因为IOC容器并无法区分当前类是否为业务、持久、还是表现层。
对于扫描到的组件, Spring 有默认的命名策略: 使用非限定类名, 第一个字母小写. 也可以在注解中通过 value 属性值标识组件的名称
使用注解配置Bean前,我们需要引入spring-aop-4.1.7.RELEASE.jar包,否则会报异常。
我们先来通过注解创建几个Bean
组件类
@Component
public class Test {

}
Controllor类
@org.springframework.stereotype.Controller
public class Controller {

}
Service类
@org.springframework.stereotype.Service
public class Service {

}
Repository类
@Repository
public class Respository {
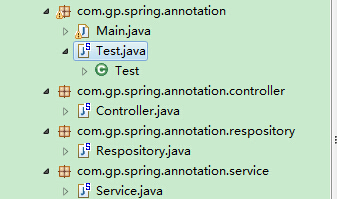
}我们来看下,工程目录
配置IOC容器
<context:component-scan base-package="com.gp.spring.annotation"></context:component-scan>
指定我们要扫描的包,spring会为我们自动扫描此包及当前包的子包。
测试
public static void main(String[] args) {
ApplicationContext context = new ClassPathXmlApplicationContext(
"spring_annotation.xml");
Test t = (Test) context.getBean("test");
System.out.println(t);
Controller c = (Controller) context.getBean("controller");
System.out.println(c);
Service s = (Service) context.getBean("service");
System.out.println(s);
Respository r = (Respository) context.getBean("respository");
System.out.println(r);
}
输出结果
com.gp.spring.annotation.Test@bddc6
com.gp.spring.annotation.controller.Controller@10cf230
com.gp.spring.annotation.service.Service@f032fa
com.gp.spring.annotation.respository.Respository@1a2fc31
成功完成注解配置Bean。
通过注解配置类之间的关系
我们有过spring基础的同学都知道,spring为我们省去了new 的操作,而是通过IOC容器为我们new 一个目标对象,之前是通过xml配置的,现在我们通过注解的方式,来演示这个配置。下面主要介绍以下几个注解
@Autowired
如他的名字一样,自动注入,为我们将类注入到IOC容器,也就是new了一个对象。
另外还有2个注解与@Autowired功能类似,@Resource 和 @Inject
@Resource 注解要求提供一个 Bean 名称的属性,若该属性为空,则自动采用标注处的变量或方法名作为 Bean 的名称
@Inject 和 @Autowired 注解一样也是按类型匹配注入的 Bean, 但没有 reqired 属性
@Autowired提供reqired 判断,如果未在IOC容器中找到目标Bean则创建一个将对象指向NULL
@Qualifier
在开发过程中我们通常会用到接口,然后是实现类,当同一接口有多个实现类的时候,再通过@Autowired注入对象的时候,就会出现异常,因为spring不知道你要注入的是哪个实现类
这时,我们就可以通过@Qualifier指定目标实现类
下面我们来看看代码
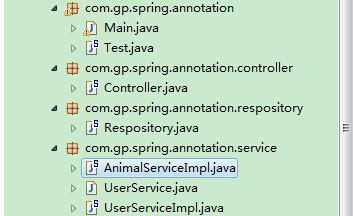
工程目录结构
Controller代码
public class Controller {

@Autowired
@Qualifier("animalServiceImpl")
public UserService service;

public void execute(){
System.out.println("Controller class execute method");
service.save();
}
}
代码中,我们定义了public UserService service;然后通过@Autowired注入实现类
@Qualifier(“animalServiceImpl”),使用此注解指定在同一接口多个实现类情况下,要调用的目标实现类
Service接口
public interface UserService {
public void save();
}
UserServiceImpl实现类
@Service
public class UserServiceImpl implements UserService {

@Autowired
private Respository respository;

public void save() {
System.out.println("service class save method");
respository.save();
}
}
AnimalServiceImpl实现类
@Service
public class AnimalServiceImpl implements UserService {

@Autowired
private Respository respository;

@Override
public void save() {
respository.save();
System.out.println("AnimalServiceImpl class save method");
}

}
Respository持久化类
@Repository
public class Respository {

public void save(){
System.out.println("Respository class save method");
}
}
测试方法
public class Main {
public static void main(String[] args) {
ApplicationContext context = new ClassPathXmlApplicationContext(
"spring_annotation.xml");
Controller c = (Controller) context.getBean("controller");
c.execute();
}
}
输出结果
Controller class execute method
Respository class save method
AnimalServiceImpl class save method

相关文章推荐
- Java中的参数传递方式
- Java中Class类详解、用法及泛化
- JavaScipt 排序算法
- Java基础复习(五)
- Java开发--Myeclipse10安装过程以及破解
- java 内存分配
- [转]终于找到全annotation配置springMVC的方法了(事务不失效)
- springboot框架下的上传下载
- Java中ArrayList类的用法(转)
- myeclipse项目转到eclipse中
- java文件上传带进度条的
- 简洁Java之道
- Java IO学习【12】字节流byte Stream的基本write/read学习
- java学习小总结
- 【Struts2框架】第六节拦截器-拦截器介绍和总结
- 基于android eclipse的JNI 构建-常用命令笔记
- eclipse 全局搜索
- 【Struts2框架】第五节声明式异常处理-处理异常的过程
- javaWeb-mvc之利用c3p0写入数据库出现乱码
- spring ioc