Struts+Spring+Hibernate整合
2015-07-17 11:03
375 查看
这段笔记三两年前写的,一直因为一些琐事,或者搞忘记了,没有发。今天偶然翻出了它,就和大家一起分享下吧。
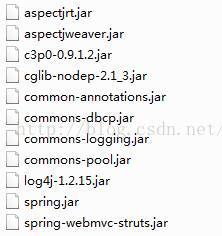
Spring的jar包:
Hibernate的jar包:
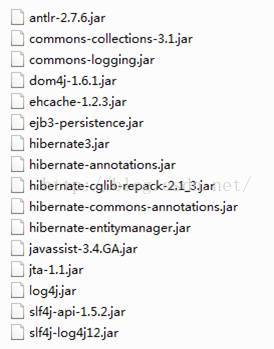
注意:只保留一个高版本的common-logging.jar包,Struts的jar包中struts2-spring-plugin-2.1.8.jar是必须要导入的,因为其是整合Struts和Spring的一个关键性jar包
Spring的application.xml中的配置代码如下:
1.导入jar包
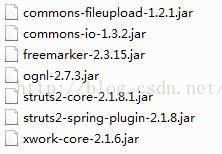
Struts的jar包:Spring的jar包:
Hibernate的jar包:
注意:只保留一个高版本的common-logging.jar包,Struts的jar包中struts2-spring-plugin-2.1.8.jar是必须要导入的,因为其是整合Struts和Spring的一个关键性jar包
2.Hibernate和Spring的整合
建议先整合Spring和Hibernate。2.1方法一 保留hibernate.cfg.xml文件
Hibernate的hibernate.cfg.xml代码不变,如下示例:<!DOCTYPE hibernate-configuration PUBLIC "-//Hibernate/Hibernate Configuration DTD 3.0//EN" "http://hibernate.sourceforge.net/hibernate-configuration-3.0.dtd"> <!-- Generated by MyEclipse Hibernate Tools. --> <hibernate-configuration> <session-factory> <property name="connection.driver_class"> oracle.jdbc.driver.OracleDriver </property> <property name="connection.url"> jdbc:oracle:thin:@localhost:1521:orcl </property> <property name="connection.username">admin</property> <property name="connection.password">admin</property> <property name="hibernate.c3p0.max_size">20</property> <property name="hibernate.c3p0.max_statements">1</property> <property name="hibernate.c3p0.timeout">1800</property> <property name="hibernate.c3p0.max_statements">50</property> <property name="hibernate.dialect"> org.hibernate.dialect.Oracle10gDialect </property> <property name="show_sql">true</property> <property name="hibernate.hbm2ddl.auto">update</property> <mapping resource="com/wzm/bean/User.hbm.xml"/> </session-factory> </hibernate-configuration>Spring的application.xml文件整合Hibernate代码如下:
<beans
xmlns="http://www.springframework.org/schema/beans"
xmlns:xsi="http://www.w3.org/2001/XMLSchema-instance"
xmlns:p="http://www.springframework.org/schema/p"
xsi:schemaLocation="http://www.springframework.org/schema/beans http://www.springframework.org/schema/beans/spring-beans-2.5.xsd">
<bean id="sessionFactory" class="org.springframework.orm.hibernate3.LocalSessionFactoryBean">
<property name="configLocation" value="classpath:hibernate.cfg.xml">
</property>
</bean>
</beans>
2.2 方法二 废弃使用hibernate.cfg.xml文件
将数据库的配置放在Spring的配置文件application.xml文件中,代码如下:<beans xmlns="http://www.springframework.org/schema/beans" xmlns:xsi="http://www.w3.org/2001/XMLSchema-instance" xmlns:context="http://www.springframework.org/schema/context" xmlns:aop="http://www.springframework.org/schema/aop" xmlns:tx="http://www.springframework.org/schema/tx" xmlns:p="http://www.springframework.org/schema/p" xsi:schemaLocation="http://www.springframework.org/schema/beans http://www.springframework.org/schema/beans/spring-beans-2.5.xsd http://www.springframework.org/schema/context http://www.springframework.org/schema/context/spring-context-2.5.xsd http://www.springframework.org/schema/tx http://www.springframework.org/schema/tx/spring-tx-2.5.xsd http://www.springframework.org/schema/aop http://www.springframework.org/schema/aop/spring-aop-3.0.xsd"> <context:component-scan base-package="com.wzm"/> <bean id="dataSource" class="com.mchange.v2.c3p0.ComboPooledDataSource" destroy-method="close"> <property name="driverClass" value="oracle.jdbc.driver.OracleDriver"/> <property name="jdbcUrl" value="jdbc:oracle:thin:@localhost:1521:orcl"/> <property name="user" value="admin"/> <property name="password" value="admin"/> <property name="maxPoolSize" value="20"/> <property name="minPoolSize" value="1"/> <property name="initialPoolSize" value="1"/> <property name="maxIdleTime" value="20"/> </bean> <bean id="sessionFactory" class="org.springframework.orm.hibernate3.LocalSessionFactoryBean"> <property name="dataSource" ref="dataSource"/> <property name="mappingResources"> <list> <value>com/wzm/bean/User.hbm.xml</value> </list> </property> <property name="hibernateProperties"> <value> hibernate.dialect=org.hibernate.dialect.Oracle10gDialect hibernate.hbm2ddl.auto=update hibernate.show_sql=true </value> </property> </bean> </beans>
2.3 使用properties文件提供数据库接口
这里的接口并非Java中的接口,而是指提供可扩展的接入点,properties文件中的代码如下:URL=jdbc:oracle:thin:@localhost:1521:orcl DRIVER=oracle.jdbc.driver.OracleDriver USERNAME=admin PASSWORD=admin #URL=jdbc:jtds:sqlserver://localhost:1433/qhit02 #DRIVER=net.sourceforge.jtds.jdbc.Driver #USERNAME=sa #PASSWORD=sa1234该文件中提供了Oracle11g和SQL Server两种数据库接口(接入点),甚至可以写入更多的数据库的信息,“#”是注销,即其后的代码不可用。
Spring的application.xml中的配置代码如下:
<beans
xmlns="http://www.springframework.org/schema/beans"
xmlns:xsi="http://www.w3.org/2001/XMLSchema-instance"
xmlns:context="http://www.springframework.org/schema/context"
xmlns:aop="http://www.springframework.org/schema/aop"
xmlns:tx="http://www.springframework.org/schema/tx"
xmlns:p="http://www.springframework.org/schema/p"
xsi:schemaLocation="http://www.springframework.org/schema/beans http://www.springframework.org/schema/beans/spring-beans-2.5.xsd http://www.springframework.org/schema/context http://www.springframework.org/schema/context/spring-context-2.5.xsd http://www.springframework.org/schema/tx http://www.springframework.org/schema/tx/spring-tx-2.5.xsd http://www.springframework.org/schema/aop http://www.springframework.org/schema/aop/spring-aop-3.0.xsd">
<context:component-scan base-package="com.wzm"/>
<context:property-placeholder location="classpath:DBOption.properties"/>

<bean id="dataSource" class="com.mchange.v2.c3p0.ComboPooledDataSource" destroy-method="close">
<property name="driverClass" value="${DRIVER}"/>
<property name="jdbcUrl" value="${URL}"/>
<property name="user" value="${USERNAME}"/>
<property name="password" value="${PASSWORD}"/>
<property name="maxPoolSize" value="20"/>
<property name="minPoolSize" value="1"/>
<property name="initialPoolSize" value="1"/>
<property name="maxIdleTime" value="20"/>
</bean>
<bean id="sessionFactory" class="org.springframework.orm.hibernate3.LocalSessionFactoryBean">
<property name="dataSource" ref="dataSource"/>
<property name="mappingResources">
<list>
<value>com/wzm/persistence/entiy/User.hbm.xml</value>
</list>
</property>
<property name="hibernateProperties">
<value>
hibernate.dialect=org.hibernate.dialect.Oracle10gDialect
hibernate.hbm2ddl.auto=update
hibernate.show_sql=true
</value>
</property>
</bean>
</beans>
3.整合Struts和Spring
整合Struts和Spring时,只需在WebRoot\WEB-INF\web.xml文件中加入Struts的过滤器和Spring的监听器即可,代码如下:<filter> <filter-name>struts2</filter-name> <filter-class> org.apache.struts2.dispatcher.ng.filter.StrutsPrepareAndExecuteFilter </filter-class> </filter> <filter-mapping> <filter-name>struts2</filter-name> <url-pattern>/*</url-pattern> </filter-mapping> <!-- 配置监听器 --> <context-param> <param-name>contextConfigLocation</param-name> <param-value> classpath:application.xml <span style="background-color: rgb(255, 0, 0);">(注意:配置多个Spring Bean文件时,这样写classpath:applicationContext.xml,classpath:bean.xml)</span> </param-value> </context-param> <listener> <listener-class> org.springframework.web.context.ContextLoaderListener </listener-class> </listener>

相关文章推荐
- 一个jar包里的网站
- 一个jar包里的网站之文件上传
- 一个jar包里的网站之返回对媒体类型
- Hibernate Oracle sequence的使用技巧
- jsp Hibernate批量更新和批量删除处理代码
- jsp hibernate的分页代码第1/3页
- spring+html5实现安全传输随机数字密码键盘
- Spring中属性注入详解
- JAVA+Hibernate 无限级分类
- SSH整合中 hibernate托管给Spring得到SessionFactory
- jsp hibernate 数据保存操作的原理
- struts2 spring整合fieldError问题
- hibernate中的增删改查实现代码
- 解决hibernate+mysql写入数据库乱码
- java优化hibernate性能的几点建议
- java Hibernate延迟加载
- spring的jdbctemplate的crud的基类dao
- hibernate 常用方法介绍
- 读取spring配置文件的方法(spring读取资源文件)
- java实现简单美女拼图游戏