Cocos2d-x HelloWorld 之源码分析
2015-07-06 23:08
731 查看
在《HelloWorld 之目录结构》中我们已经了解了怎么样新建一个HelloWorld工程,下面我们来看看源代码是什么样子的main.cpp -- 程序的主入口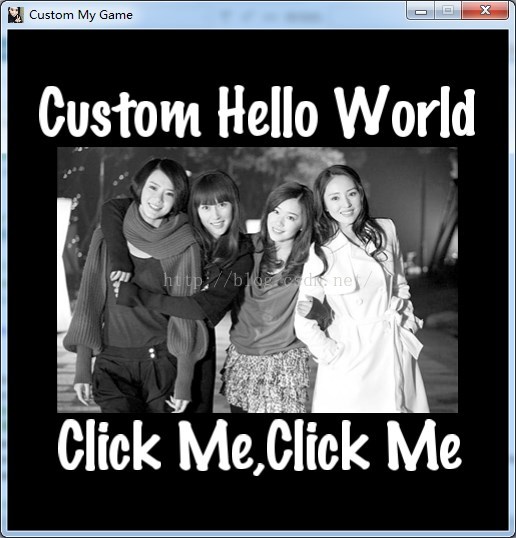
#include "main.h"
#include "AppDelegate.h"
#include "cocos2d.h"
USING_NS_CC;
int APIENTRY _tWinMain(HINSTANCE hInstance,
HINSTANCE hPrevInstance,
LPTSTRlpCmdLine,
int nCmdShow)
{UNREFERENCED_PARAMETER(hPrevInstance);
UNREFERENCED_PARAMETER(lpCmdLine);
// create the application instance
AppDelegate app; //创建这个应用程序实例
return Application::getInstance()->run(); //运行它
}问题:AppDelegate app; 的时候创建应用程序对象,但是为什么可以使用Application::getInstance()->run(); 来运行呢。为什么不是app.run(); 呢?AppDelegate.cpp -- 应用程序类,相当于Android 里面自定义Applicationclass AppDelegate : private cocos2d::Application class CC_DLL Application : public ApplicationProtocol class CC_DLL ApplicationProtocol CCApplicationProtocol.h 没有对应的cpp 文件,代码量很少CCApplication.h 这个类在每一个不同的平台都会有对应的实现类源代码位置为:F:\software\cocos2d\cocos2d-x-3.6\cocos\platformApplication 的单例实现方案win32
Application * Application::sm_pSharedApplication = 0; //0 就是null,C++比Java灵活多了
Application::Application() //构造函数
: _instance(nullptr)
, _accelTable(nullptr)
{_instance= GetModuleHandle(nullptr);
_animationInterval.QuadPart = 0;
CC_ASSERT(! sm_pSharedApplication);
sm_pSharedApplication = this;
}
Application::~Application() //析构函数
{CC_ASSERT(this == sm_pSharedApplication);
sm_pSharedApplication = nullptr;
}
Application* Application::getInstance() //拿到实例函数
{CC_ASSERT(sm_pSharedApplication);
return sm_pSharedApplication;
}Android
Application * Application::sm_pSharedApplication = 0;
Application::Application()
{CCAssert(! sm_pSharedApplication, "");
sm_pSharedApplication = this;
}
Application::~Application()
{CCAssert(this == sm_pSharedApplication, "");
sm_pSharedApplication = NULL;
}
Application* Application::getInstance()
{CCAssert(sm_pSharedApplication, "");
return sm_pSharedApplication;
}可以看出win32 和Android版的基本相同,在整个Cocos2d-x中AppDelegate就是一个单例模式。解上面的问题:单例模式和Java里面的有点不同,不是类本身实例化自己,还是要靠外部来实例化,例如在main.cpp 里面的AppDelegate app; 创建了实例,同时赋值给静态变量sm_pSharedApplication,以后可以通过getInstance()方法拿到这个实例(C++里面是叫实例吗?好纠结这些问题哦),为了满足单例模式拿到实例的一贯使用getInstance() 方法(习惯了Java里面叫方法,好像C++里面叫函数,以后我会改的)拿到实例。所以不用app->run();明白了吗?回到AppDelegale.cpp/h 相关的函数
AppDelegate();
virtual ~AppDelegate();
virtual void initGLContextAttrs(); //初始化OpenGL Context 的6个属性,red,green,blue,alpha,depth,stencil
virtual bool applicationDidFinishLaunching(); //当应用程序启动的时候执行,这里是游戏的开始,例如启动了loading 界面,开始加载游戏
virtual void applicationDidEnterBackground(); //当游戏进入后台时会执行,例如电话来了
virtual void applicationWillEnterForeground(); //当游戏恢复到前台运行时候执行,例如拒接电话实现的函数英文不好也要看英文呀这里又有一个问题,Context 是不是和Android 的Context 同一个概念呢?但是我连Android 的Context 的不理解,就算相同我也不知道是怎么样的一个东西。
//if you want a different context,just modify the value of glContextAttrs
//it will takes effect on all platforms
void AppDelegate::initGLContextAttrs()
{//set OpenGL context attributions,now can only set six attributions:
//red,green,blue,alpha,depth,stencil
GLContextAttrs glContextAttrs = {8, 8, 8, 8, 24, 8};GLView::setGLContextAttrs(glContextAttrs);//是为GLView 设置的,感觉这个GLView 非同一般
}说明几点auto c++ 11 的特征,相当于PHP 的var。类型自动识别Director::getInstance(); 导演的单例模式if(!glview){} 两部理解,我们的需求是,当个头OpenGLView() 返回空的时候我们需要创建这个glview1,if(glview) 当glview == null 的时候,但发现null == 0,这样直接为假,跳出去了2,if(!glview) 我加一个!不就完事了吗。3,背下来就ok了。director有getOpenGLView() & setOpenGLView(glview); 说明director 有一个属性GLView,猜想这个就是用来显示场景的,在拍戏的时候导演都是坐在一个电视机前面叫开始的,这个电视机就是GLView 了。
bool AppDelegate::applicationDidFinishLaunching() {// initialize director
auto director = Director::getInstance(); //导演隆重登场,这里也是用了单例模式,整个游戏只能有一个导演,不知道有没有副导演呢?
auto glview = director->getOpenGLView(); //GLView 再次出现,还是导演亲自请来的
if(!glview) {//0(null) 是假,非0 是真,那当什么时候!glview 为真呢?就是当glview == null 的时候//当glview 为null的时候
glview = GLViewImpl::create("My Game");director->setOpenGLView(glview);
}
// turn on display FPS
director->setDisplayStats(true); //显示FPS
// set FPS. the default value is 1.0/60 if you don't call this
director->setAnimationInterval(1.0 / 60); //刷新屏幕的间隔时间,就是等待多久换一次帧数据
register_all_packages();
// create a scene. it's an autorelease object
auto scene = HelloWorld::createScene();
// run
director->runWithScene(scene);
return true;
}HelloWorld 的超简单实现了另外两个函数
// This function will be called when the app is inactive. When comes a phone call,it's be invoked too
void AppDelegate::applicationDidEnterBackground() {Director::getInstance()->stopAnimation();
// if you use SimpleAudioEngine, it must be pause
// SimpleAudioEngine::getInstance()->pauseBackgroundMusic();
}
// this function will be called when the app is active again
void AppDelegate::applicationWillEnterForeground() {Director::getInstance()->startAnimation();
// if you use SimpleAudioEngine, it must resume here
// SimpleAudioEngine::getInstance()->resumeBackgroundMusic();
}从分析上面的代码看出,显示的第一个场景为HelloWorld::createScene();HelloWorldScene.cpp -- 运行的场景,相当于Android的Activity相关函数Ref 类:Ref is used for reference count manangement. If a class inherits from Ref, then it is easy to be shared in different places.cocos2dx中所有对象都继承于Ref,或者继承于 Ref和Clonable,Ref中就是维护了一个计数器,用于判断该继承于Ref的对象是否应该delete,意思就是我们可以放心的使用这些实例,不需要担心实例什么时候需要deleteCREATE_FUNC(HelloWorld)定义create() 方法,里面做了创建对象调用对象的init() 方法把对象加入到引用计数器的对象池中返回这个对象想必普通的对象都使用了这个宏了以后都使用这个函数来实例化对象//there's no 'id' in cpp, so we recommend returning the class instance pointer
static cocos2d::Scene* createScene(); //创建场景实例,返回的是一个指针
//Here's a difference. Method 'init' in cocos2d-x returns bool, instead of returning 'id' in cocos2d-iphone
virtual bool init(); //看到这个注释我也是醉了,一开始看到在cpp 里不能返回id,我就是看不明白,现在明白了,是不是iPhone 里面是可以返回id 的?猜应该是,Cocos2d-x 是由Cocos2d-iphone 版本发展过来的
void menuCloseCallback(cocos2d::Ref* pSender); //一个回调函数
CREATE_FUNC(HelloWorld);函数实现
Scene* HelloWorld::createScene()
{auto scene = Scene::create(); //创建一个场景
auto layer = HelloWorld::create(); //HelloWorld是一个层,MD,才发现HelloWorld 是一个层,看文件名字,我还以为是场景呢
scene->addChild(layer); //直接显示HelloWorld 层
return scene;
}总要知识点Layer 需要调用super 的init() 函数
if ( !Layer::init() ) //c++ 使用类名来指定调用哪个父类的方法
// on "init" you need to initialize your instance
bool HelloWorld::init()
{//////////////////////////////
// 1. super init first
if ( !Layer::init() )
{return false;
}
Size visibleSize = Director::getInstance()->getVisibleSize();//显示大小
Vec2 origin = Director::getInstance()->getVisibleOrigin(); //起点位置
/////////////////////////////
// 2. add a menu item with "X" image, which is clicked to quit the program
//you may modify it.
// add a "close" icon to exit the progress. it's an autorelease object
auto closeItem = MenuItemImage::create(
"CloseNormal.png",
"CloseSelected.png",
CC_CALLBACK_1(HelloWorld::menuCloseCallback, this));
closeItem->setPosition(Vec2(origin.x + visibleSize.width - closeItem->getContentSize().width/2 ,
origin.y + closeItem->getContentSize().height/2));
// create menu, it's an autorelease object
auto menu = Menu::create(closeItem, NULL);
menu->setPosition(Vec2::ZERO);
this->addChild(menu, 1); //添加菜单
/////////////////////////////
// 3. add your codes below...
// add a label shows "Hello World"
// create and initialize a label
auto label = Label::createWithTTF("Hello World", "fonts/Marker Felt.ttf", 24);// position the label on the center of the screen
label->setPosition(Vec2(origin.x + visibleSize.width/2,
origin.y + visibleSize.height - label->getContentSize().height));
// add the label as a child to this layer
this->addChild(label, 1); //添加label
// add "HelloWorld" splash screen"
auto sprite = Sprite::create("HelloWorld.png");// position the sprite on the center of the screen
sprite->setPosition(Vec2(visibleSize.width/2 + origin.x, visibleSize.height/2 + origin.y));
// add the sprite as a child to this layer
this->addChild(sprite, 0);//最后加入一个精灵当做背景
return true;
}回调函数,直接退出程序
void HelloWorld::menuCloseCallback(Ref* pSender)
{Director::getInstance()->end();
#if (CC_TARGET_PLATFORM == CC_PLATFORM_IOS)
exit(0);
#endif
}定制HelloWorld -- win32 版glview->setFrameSize(500,500); //指定显示的大小GLFW_ICON ICON "res\\custom_game.ico" //在win32 的game.rc 文件中修改http://www.ico.la/ 这个网站弄的 修改init 方法
bool HelloWorld::init()
{//////////////////////////////
// 1. super init first
if ( !Layer::init() )
{return false;
}
Size visibleSize = Director::getInstance()->getVisibleSize();
Vec2 origin = Director::getInstance()->getVisibleOrigin();
//定制HelloWorld
//弄了背景图
auto background = Sprite::create("custom_hello_world.jpg");background->setPosition(Vec2(visibleSize.width/2+origin.x,visibleSize.height/2+origin.y));
this->addChild(background,0);
//显示个Label 标题,显示在背景图的上面
auto labelTitle = Label::createWithTTF("Custom Hello World", "fonts/Marker Felt.ttf", 60);labelTitle->setPosition(Vec2(origin.x + visibleSize.width/2,
origin.y + visibleSize.height/2 + labelTitle->getContentSize().height/2 + background->getContentSize().height/2));
this->addChild(labelTitle, 1);
//使用Label 做点击菜单项
auto labelMenu = Label::createWithTTF("Click Me,Click Me", "fonts/Marker Felt.ttf", 60);auto closeMenu = MenuItemLabel::create(labelMenu);
closeMenu->setPosition(Vec2(origin.x + visibleSize.width/2 - background->getContentSize().width/2 + labelMenu->getContentSize().width/2,
origin.y + visibleSize.height/2 - background->getContentSize().width/2 + labelMenu->getContentSize().height/2));
closeMenu->setCallback(CC_CALLBACK_1(HelloWorld::menuCloseCallback, this)); //设置回调函数
auto menu = Menu::create(closeMenu,NULL);
menu->setPosition(Vec2::ZERO);
this->addChild(menu, 1);
return true;
}运行结果,nice

相关文章推荐
- Xcode安装Cocos2d-iphone
- Cocos2d-x学习笔记(两)Cocos2d-x总体框架
- cocos2d-x-3.2 利用cocos.py创建项目
- quick cocos2d-x 3.5打包安卓apk之Eclipse篇
- 教你pomeloclient包libpomelo增加cocos2d-x 3.0工程(Windows、Android、IOS平台)
- Mac os 下 cocos2dx-3.2
- cocos2dx3.4-android项目eclipse运行报错CDT',Properties下c/c++build无法打开
- 在Windows7上搭建Cocos2d-x win32开发环境
- quickcocoslua中继承的父类接口调用
- cocos2dx 3.6 UI 之 Button
- cocos2dx要点总结
- C++调用JS,可变参模板实现,方便调用(cocos2d-x)
- 为什么Cocos2D开源引擎最适合游戏创业团队?
- 【麦可网】Cocos2d-X跨平台游戏开发学习笔记---第二十六课:Cocos2D-X物理引擎之Box2D11-12
- 【麦可网】Cocos2d-X跨平台游戏开发学习笔记---第二十五课:Cocos2D-X物理引擎之Box2D8-10
- Cocos2dx-Lua动作之进度条小谈
- Cocos2dx 内存优化-第一天
- 【麦可网】Cocos2d-X跨平台游戏开发学习笔记---第二十四课:Cocos2D-X物理引擎之Box2D1-7
- cocos2d-x 源代码分析 : Ref (CCObject) 源代码分析 cocos2d-x内存管理策略
- COCOS2DX CCCALLBACK