车牌自动检测
2015-06-02 10:43
309 查看
一、ANPR简介:
Automatic Number Plate Recognition (ANPR),,是一种使用Optical Character Recognition (OCR)和其他分割、检测方法来读取汽车注册牌照的算法。最好的ANPR算法结果是由红外线照相机拍摄图片得到的。因为车牌的特殊材质,夜间会有逆反射效果,看不清车牌。但是现在我们不使用IR图片,我们使用常规图片,这样就增加了我们检测错误和识别错误的等级,以显示我们的算法有多牛逼【老外的意思,有逆反射的图片我没试过】。下面给出,反射、散射、逆反射的示意图:

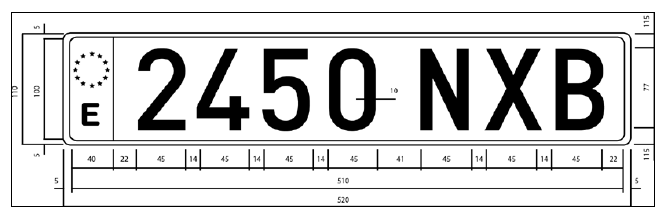
每个国家的车牌规格都不一样,这里使用西班牙的车牌,左边4个为数字,右边2个为字母,车牌以白色为背景。具体字符间隔如下图所示:
ANPR算法大体分为两个步骤:
1.车牌检测:检测车牌在图像中的位置
2.车牌识别:使用OCR算法检测车牌上的字母数字字符
这篇博文今天只讲车牌检测【提取车牌、SVM如何训练】,车牌识别为下一篇博文,搬到android系统为下下篇博文
二、车牌检测
大体也分为两个步骤:
1.图像分割:采用一系列不同的滤波器、形态学操作、轮廓算法和验证算法,提取图像中可能包含车牌的区域。
2.图像分类:对每个图像块使用支持向量机SVM分类,并由代码自动创建正负样本【正:有车牌,负:无车牌】(车牌规格统一:800像素宽,拍摄位置大概离车2-4米远)
整个车牌检测部分,会涉及以下内容:
Sobel filter
Threshold operation
Close morphologic operation
Mask of one filled area
Possible detected plates marked in red (features images)
Detected plates after the SVM classifier
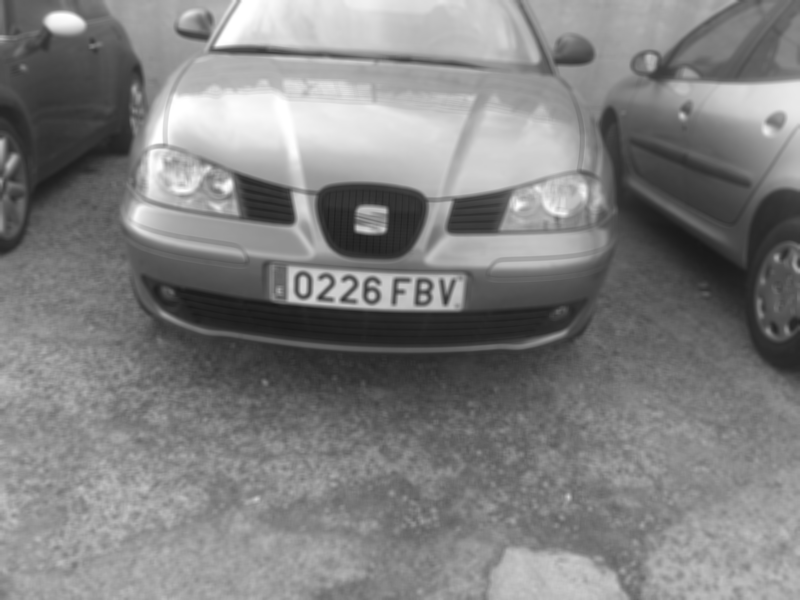
假设车牌图片没有旋转和变形,则车牌分割的一个重要特征是车牌中有大量的垂直边缘。这个特征可以通过在第一阶段剔除没有任何垂直边缘的区域来提取。车牌原图:

具体算法步骤如下:
1.将彩色图像转化为灰度图,并采用5*5模版对图像进行高斯模糊来退出由照相机或其他环境噪声(如果不这么做,我们会得到很多垂直边缘,导致错误检测。)
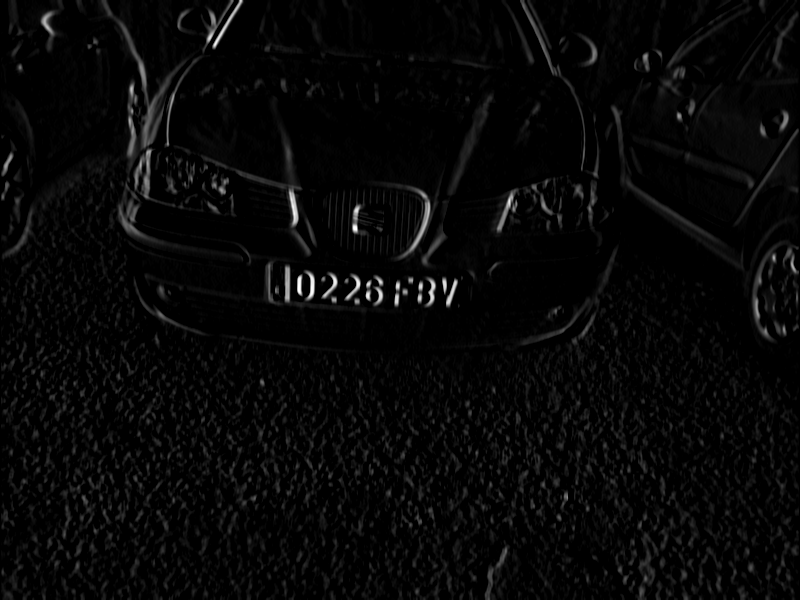
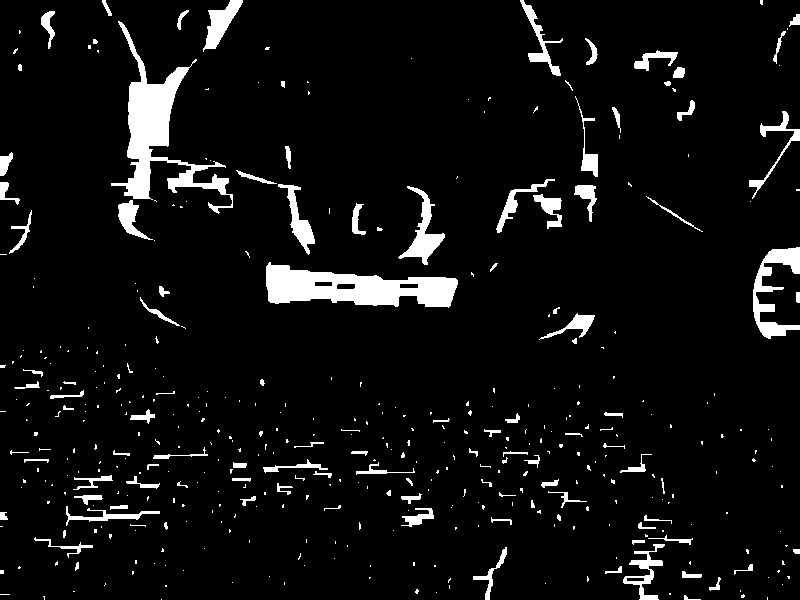
2.使用Sobel滤波器求一阶水平方向导数,以此寻找垂直边缘
3.使用Otsu自适应阈值算法获得图像二值化的阈值,并由此得到一副二值画图片
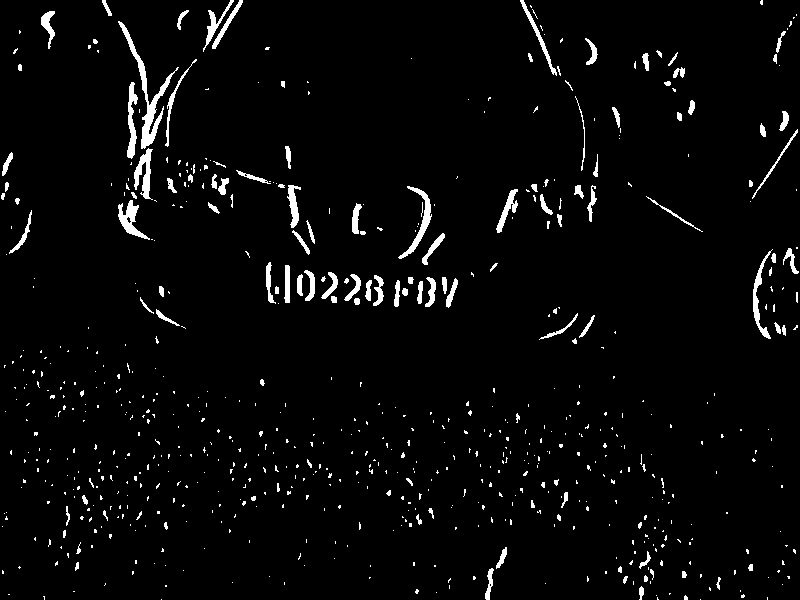
4.采用闭操作,去除每个垂直边缘线之间的空白空格,并连接所有包含 大量边缘的区域(这步过后,我们将有许多包含车牌的候选区域)
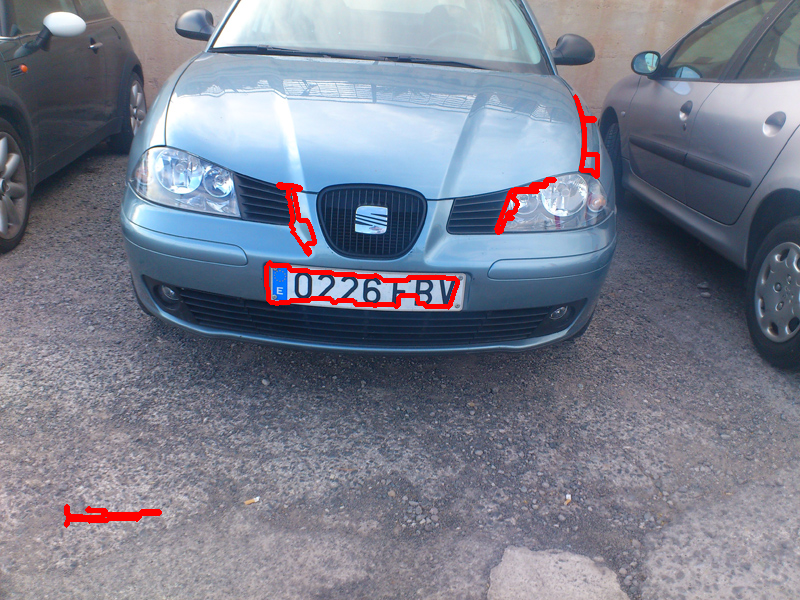
5.由于大多数区域并不包含车牌,我们使用轮廓外接矩形的纵横比和区域面积,对这些区域进行区分。
a.首先使用findContours找到外部轮廓
b.使用minAreaRect获得这些轮廓的最小外接矩形,存储在vector向量中
c.使用面积和长宽比,作基本的验证【阈值:长宽比为4.727272,允许误差范围正负40%,面积范围15*15至125*125】
经过判断后的轮廓图:
6.由于每个车牌都包含白色背景属性。我们为了更精确的裁剪图像,可以使用floodfill算法【用指定颜色填充某一密闭区域,相当于油漆桶的功能】来提取那些旋转的矩形。
不会翻译,不怎么明白,各位这步直接看代码吧
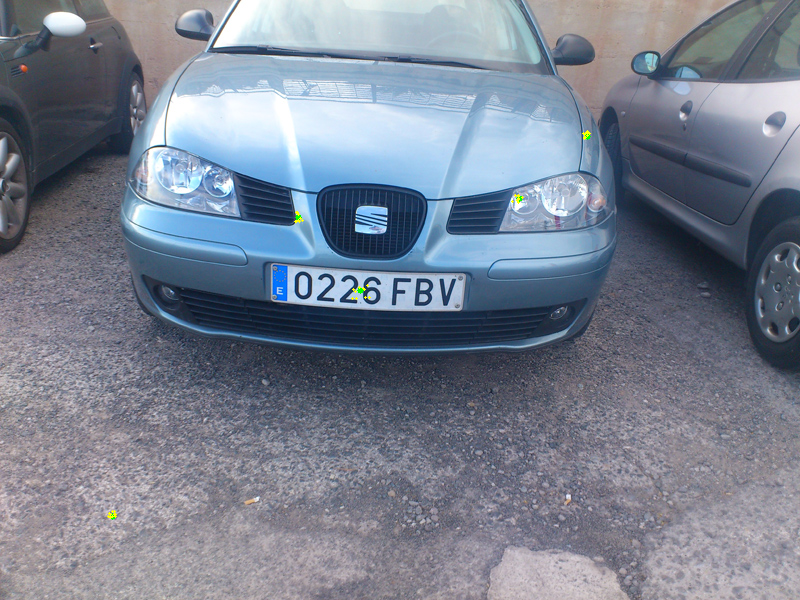
第一步的原文:get several seeds near the last rotated rectangle center. Then get the minimum size of plate between the width and height, and use it to generate random seeds near the patch center.】总之,得到每个矩形的中心,然后求每个矩形各自长宽的较小值,再用随机数和这个较小值得到中心附近的种子点
第二步的原文:for each se
4000
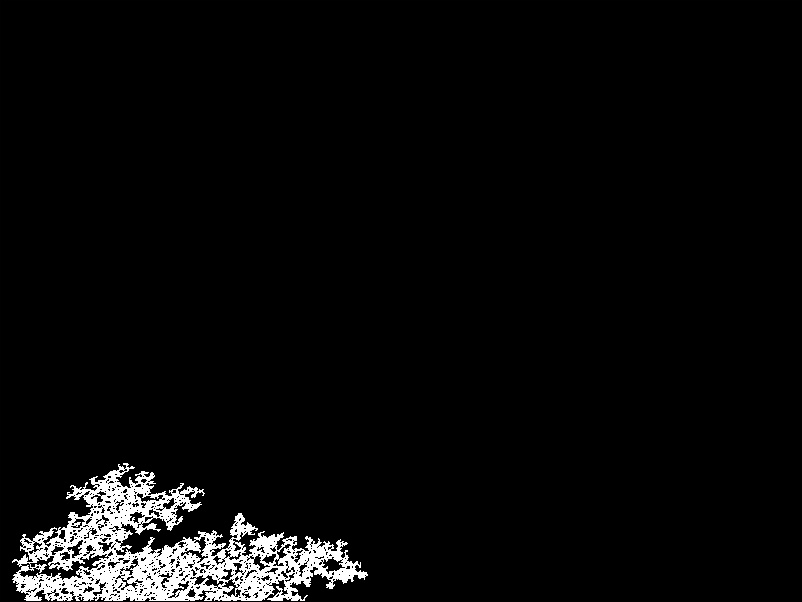
ed, we use a floodFill function to draw a new mask image to store the new closest cropping region:
第三部的翻译:对这些裁剪区域,再次用纵横比和区域面积进行验证,再去除图像的旋转,并裁剪图像到统一尺寸,均衡化图像的灰度
下面,分别给出这三步的结果图:
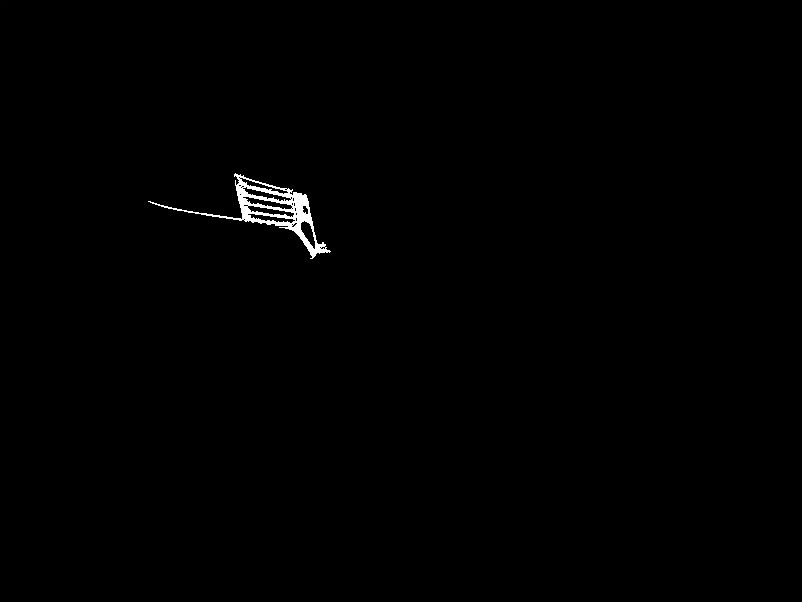
第一步的图像,绿色为矩形中心,黄色为种子点,不知道大家是否能看清楚:
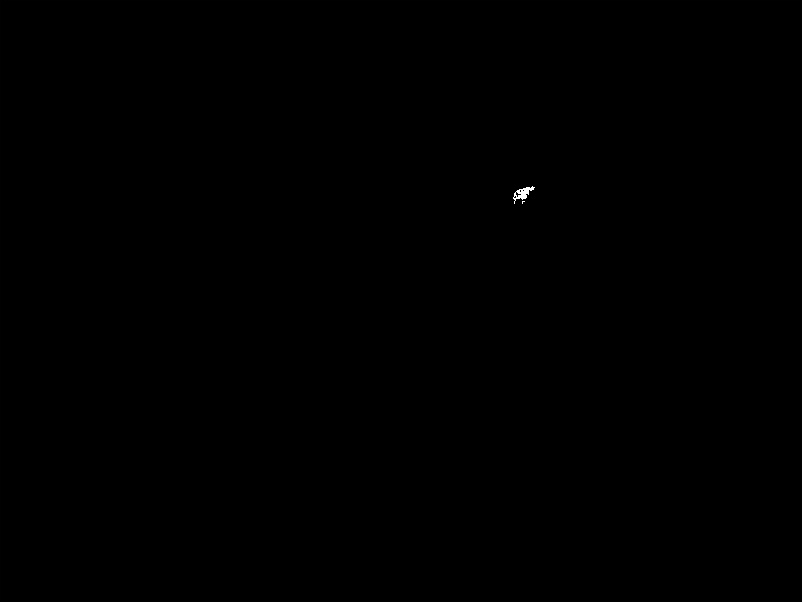
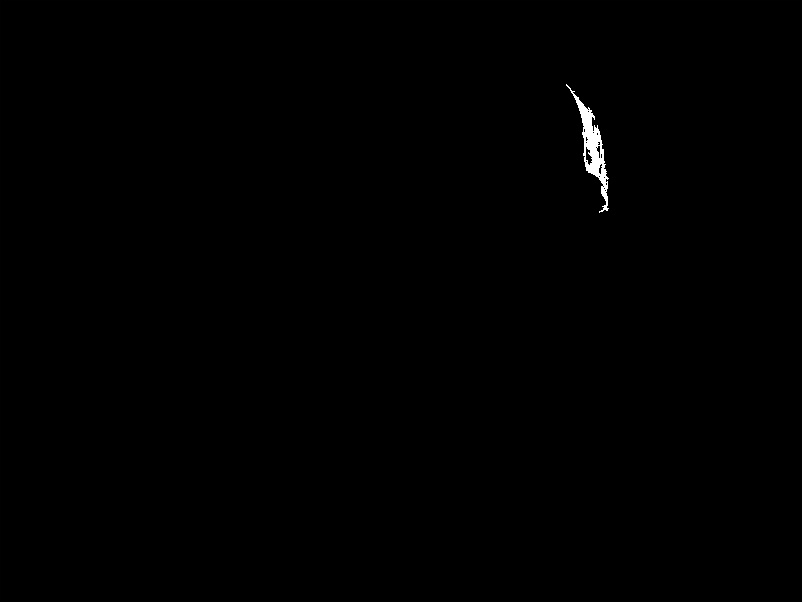
第二步的图片,上图有5处种子区域,故有5个模版mask图像【代表最近邻接区域】:
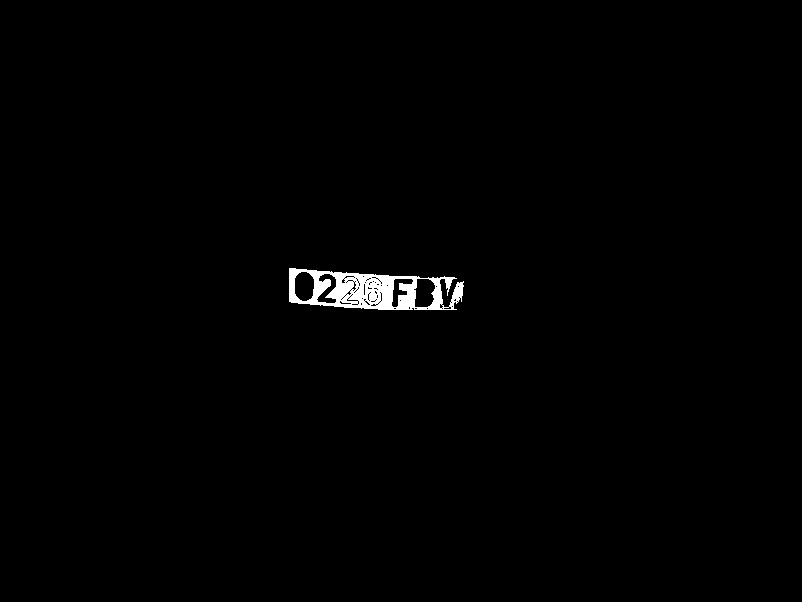
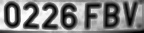
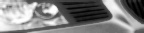
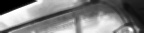
第三步的结果图,注意:这里的结果就是训练SVM的正负样本,只要人工挑选一下:
下面给出以上部分的完整代码【我讨厌一段段的写:)】
[cpp] view
plaincopy


// Car_plate.cpp : 定义控制台应用程序的入口点。
//
#include "stdafx.h"
#include<iostream>
#include <cv.h>
#include <highgui.h>
#include <cvaux.h>
using namespace std;
using namespace cv;
//对minAreaRect获得的最小外接矩形,用纵横比进行判断
bool verifySizes(RotatedRect mr)
{
float error=0.4;
//Spain car plate size: 52x11 aspect 4,7272
float aspect=4.7272;
//Set a min and max area. All other patchs are discarded
int min= 15*aspect*15; // minimum area
int max= 125*aspect*125; // maximum area
//Get only patchs that match to a respect ratio.
float rmin= aspect-aspect*error;
float rmax= aspect+aspect*error;
int area= mr.size.height * mr.size.width;
float r= (float)mr.size.width / (float)mr.size.height;
if(r<1)
r= (float)mr.size.height / (float)mr.size.width;
if(( area < min || area > max ) || ( r < rmin || r > rmax )){
return false;
}else{
return true;
}
}
//直方图均衡化
Mat histeq(Mat in)
{
Mat out(in.size(), in.type());
if(in.channels()==3){
Mat hsv;
vector<Mat> hsvSplit;
cvtColor(in, hsv, CV_BGR2HSV);
split(hsv, hsvSplit);
equalizeHist(hsvSplit[2], hsvSplit[2]);
merge(hsvSplit, hsv);
cvtColor(hsv, out, CV_HSV2BGR);
}else if(in.channels()==1){
equalizeHist(in, out);
}
return out;
}
int _tmain(int argc, _TCHAR* argv[])
{
Mat img_gray = imread("test.jpg",CV_LOAD_IMAGE_GRAYSCALE);
Mat input = imread("test.jpg");
//char res[20];
//apply a Gaussian blur of 5 x 5 and remove noise
blur(img_gray,img_gray,Size(5,5));
//Finde vertical edges. Car plates have high density of vertical lines
Mat img_sobel;
Sobel(img_gray, img_sobel, CV_8U, 1, 0, 3, 1, 0, BORDER_DEFAULT);//xorder=1,yorder=0,kernelsize=3
//apply a threshold filter to obtain a binary image through Otsu's method
Mat img_threshold;
threshold(img_sobel, img_threshold, 0, 255, CV_THRESH_OTSU+CV_THRESH_BINARY);
//Morphplogic operation close:remove blank spaces and connect all regions that have a high number of edges
Mat element = getStructuringElement(MORPH_RECT, Size(17, 3) );
morphologyEx(img_threshold, img_threshold, CV_MOP_CLOSE, element);
//Find 轮廓 of possibles plates
vector< vector< Point> > contours;
findContours(img_threshold,
contours, // a vector of contours
CV_RETR_EXTERNAL, // 提取外部轮廓
CV_CHAIN_APPROX_NONE); // all pixels of each contours
//Start to iterate to each contour founded
vector<vector<Point> >::iterator itc= contours.begin();
vector<RotatedRect> rects;
//Remove patch that are no inside limits of aspect ratio and area.
while (itc!=contours.end()) {
//Create bounding rect of object
RotatedRect mr= minAreaRect(Mat(*itc));
if( !verifySizes(mr)){
itc= contours.erase(itc);
}else{
++itc;
rects.push_back(mr);
}
}
// Draw blue contours on a white image
cv::Mat result;
//input.copyTo(result);
//cv::drawContours(result,contours,
// -1, // draw all contours
// cv::Scalar(0,0,255), // in blue
// 3); // with a thickness of 1
for(int i=0; i< rects.size(); i++)
{
//For better rect cropping for each posible box
//Make floodfill algorithm because the plate has white background
//And then we can retrieve more clearly the contour box
circle(result, rects[i].center, 3, Scalar(0,255,0), -1);
//get the min size between width and height
float minSize=(rects[i].size.width < rects[i].size.height)?rects[i].size.width:rects[i].size.height;
minSize=minSize-minSize*0.5;
//initialize rand and get 5 points around center for floodfill algorithm
srand ( time(NULL) );
//Initialize floodfill parameters and variables
Mat mask;
mask.create(input.rows + 2, input.cols + 2, CV_8UC1);
mask= Scalar::all(0);
int loDiff = 30;
int upDiff = 30;
int connectivity = 4;
int newMaskVal = 255;
int NumSeeds = 10;
Rect ccomp;
int flags = connectivity + (newMaskVal << 8 ) + CV_FLOODFILL_FIXED_RANGE + CV_FLOODFILL_MASK_ONLY;
for(int j=0; j<NumSeeds; j++){
Point seed;
seed.x=rects[i].center.x+rand()%(int)minSize-(minSize/2);
seed.y=rects[i].center.y+rand()%(int)minSize-(minSize/2);
circle(result, seed, 1, Scalar(0,255,255), -1);
int area = floodFill(input, mask, seed, Scalar(255,0,0), &ccomp, Scalar(loDiff, loDiff, loDiff), Scalar(upDiff, upDiff, upDiff), flags);
}
//sprintf(res,"result%d.jpg",i);
//imwrite(res,mask);
//Check new floodfill mask match for a correct patch.
//Get all points detected for get Minimal rotated Rect
vector<Point> pointsInterest;
Mat_<uchar>::iterator itMask= mask.begin<uchar>();
Mat_<uchar>::iterator end= mask.end<uchar>();
for( ; itMask!=end; ++itMask)
if(*itMask==255)
pointsInterest.push_back(itMask.pos());
RotatedRect minRect = minAreaRect(pointsInterest);
if(verifySizes(minRect)){
// rotated rectangle drawing
Point2f rect_points[4]; minRect.points( rect_points );
for( int j = 0; j < 4; j++ )
line( result, rect_points[j], rect_points[(j+1)%4], Scalar(0,0,255), 1, 8 );
//Get rotation matrix
float r= (float)minRect.size.width / (float)minRect.size.height;
float angle=minRect.angle;
if(r<1)
angle=90+angle;
Mat rotmat= getRotationMatrix2D(minRect.center, angle,1);
//Create and rotate image
Mat img_rotated;
warpAffine(input, img_rotated, rotmat, input.size(), CV_INTER_CUBIC);
//Crop image
Size rect_size=minRect.size;
if(r < 1)
swap(rect_size.width, rect_size.height);
Mat img_crop;
getRectSubPix(img_rotated, rect_size, minRect.center, img_crop);
Mat resultResized;
resultResized.create(33,144, CV_8UC3);
resize(img_crop, resultResized, resultResized.size(), 0, 0, INTER_CUBIC);
//Equalize croped image
Mat grayResult;
cvtColor(resultResized, grayResult, CV_BGR2GRAY);
blur(grayResult, grayResult, Size(3,3));
grayResult=histeq(grayResult);
/* if(1){
stringstream ss(stringstream::in | stringstream::out);
ss << "haha" << "_" << i << ".jpg";
imwrite(ss.str(), grayResult);
}*/
//output.push_back(Plate(grayResult,minRect.boundingRect()));
}
}
//imshow("car_plate",result);
waitKey(0);
return 0;
}
注意上述代码末尾的注释部分:
[cpp] view
plaincopy
<span style="white-space:pre"> </span>if(1){
stringstream ss(stringstream::in | stringstream::out);
ss << "haha" << "_" << i << ".jpg";
imwrite(ss.str(), grayResult);
}
以上部分,就是自动生成正负样本的代码。比人工去QQ截图好多了:)
在介绍SVM车牌分类之前,我介绍怎么训练SVM【注意:SVM的实现是个庞大的工程,我一直没有自己弄过,这里使用的还是opencv封装的SVM】
如何训练:
正样本75张包含车牌的图像和35张不包含车牌的144*33图像。【还有其他更好的特征来训练SVM,PCA,傅立叶变换,纹理分析等等】。
如何获取样本及存放训练数据。
通过上述图像分割步骤,我们可以得到车牌及非车牌图像,我们把二者都执行reshaple(1,1),再存放到trainImage的矩阵中,并修改对应trainLables矩阵的0-1值,然后把trainData改为32为浮点数系,再把trainData和trainLabel直接写进xml文件【也就是说xml中包含了样本图像的像素值和样本分类标记】
具体代码:
[cpp] view
plaincopy
Mat classes;//(numPlates+numNoPlates, 1, CV_32FC1);
Mat trainingData;//(numPlates+numNoPlates, imageWidth*imageHeight, CV_32FC1 );
Mat trainingImages;
vector<int> trainingLabels;
for(int i=0; i< numPlates; i++)
{
stringstream ss(stringstream::in | stringstream::out);
ss << path_Plates << i << ".jpg";
Mat img=imread(ss.str(), 0);
img= img.reshape(1, 1);
trainingImages.push_back(img);
trainingLabels.push_back(1);
}
for(int i=0; i< numNoPlates; i++)
{
stringstream ss(stringstream::in | stringstream::out);
ss << path_NoPlates << i << ".jpg";
Mat img=imread(ss.str(), 0);
img= img.reshape(1, 1);
trainingImages.push_back(img);
trainingLabels.push_back(0);
}
Mat(trainingImages).copyTo(trainingData);
//trainingData = trainingData.reshape(1,trainingData.rows);
trainingData.convertTo(trainingData, CV_32FC1);
Mat(trainingLabels).copyTo(classes);
FileStorage fs("SVM.xml", FileStorage::WRITE);
fs << "TrainingData" << trainingData;
fs << "classes" << classes;
fs.release();
以上代码,可以自己另外建一个工程,认为设置一下正负样本的数量numPlates和numNoPlates,正负样本存储的路径path_Plates和path_NoPlates。这样我们就得到了存放正负样本的SVM.XML文件了。
最后,给出使用Opencv提供的SVM分类器,对图像进行分了的完整代码【对一副图像判断其中是否含有西班牙车牌】:
劳什子外国人搞了车牌类,好吧,我挑和本文有关的都贴出来吧
[cpp] view
plaincopy
#ifndef Plate_h
#define Plate_h
#include <string.h>
#include <vector>
#include <cv.h>
#include <highgui.h>
#include <cvaux.h>
using namespace std;
using namespace cv;
class Plate{
public:
Plate();
Plate(Mat img, Rect pos);
string str();
Rect position;
Mat plateImg;
vector<char> chars;
vector<Rect> charsPos;
};
#endif
这里,我们只要实现上述Plate类的构造函数就行了
[cpp] view
plaincopy
Plate::Plate(Mat img, Rect pos){
plateImg=img;
position=pos;
}
下面我再次给出完整代码,不过大家重点关注如何配置SVM就行了:
[cpp] view
plaincopy
// car_plate_svm.cpp : 定义控制台应用程序的入口点。
//
#include "stdafx.h"
#include<iostream>
#include <cv.h>
#include <highgui.h>
#include <cvaux.h>
#include "Plate.h"
using namespace std;
using namespace cv;
//对minAreaRect获得的最小外接矩形,用纵横比进行判断
bool verifySizes(RotatedRect mr)
{
float error=0.4;
//Spain car plate size: 52x11 aspect 4,7272
float aspect=4.7272;
//Set a min and max area. All other patchs are discarded
int min= 15*aspect*15; // minimum area
int max= 125*aspect*125; // maximum area
//Get only patchs that match to a respect ratio.
float rmin= aspect-aspect*error;
float rmax= aspect+aspect*error;
int area= mr.size.height * mr.size.width;
float r= (float)mr.size.width / (float)mr.size.height;
if(r<1)
r= (float)mr.size.height / (float)mr.size.width;
if(( area < min || area > max ) || ( r < rmin || r > rmax )){
return false;
}else{
return true;
}
}
Mat histeq(Mat in)
{
Mat out(in.size(), in.type());
if(in.channels()==3){
Mat hsv;
vector<Mat> hsvSplit;
cvtColor(in, hsv, CV_BGR2HSV);
split(hsv, hsvSplit);
equalizeHist(hsvSplit[2], hsvSplit[2]);
merge(hsvSplit, hsv);
cvtColor(hsv, out, CV_HSV2BGR);
}else if(in.channels()==1){
equalizeHist(in, out);
}
return out;
}
vector<Plate> segment(Mat input){
vector<Plate> output;
//char res[20];
//apply a Gaussian blur of 5 x 5 and remove noise
Mat img_gray;
cvtColor(input, img_gray, CV_BGR2GRAY);
blur(img_gray, img_gray, Size(5,5));
//Finde vertical edges. Car plates have high density of vertical lines
Mat img_sobel;
Sobel(img_gray, img_sobel, CV_8U, 1, 0, 3, 1, 0, BORDER_DEFAULT);//xorder=1,yorder=0,kernelsize=3
//apply a threshold filter to obtain a binary image through Otsu's method
Mat img_threshold;
threshold(img_sobel, img_threshold, 0, 255, CV_THRESH_OTSU+CV_THRESH_BINARY);
//Morphplogic operation close:remove blank spaces and connect all regions that have a high number of edges
Mat element = getStructuringElement(MORPH_RECT, Size(17, 3) );
morphologyEx(img_threshold, img_threshold, CV_MOP_CLOSE, element);
//Find 轮廓 of possibles plates
vector< vector< Point> > contours;
findContours(img_threshold,
contours, // a vector of contours
CV_RETR_EXTERNAL, // 提取外部轮廓
CV_CHAIN_APPROX_NONE); // all pixels of each contours
//Start to iterate to each contour founded
vector<vector<Point> >::iterator itc= contours.begin();
vector<RotatedRect> rects;
//Remove patch that are no inside limits of aspect ratio and area.
while (itc!=contours.end()) {
//Create bounding rect of object
RotatedRect mr= minAreaRect(Mat(*itc));
if( !verifySizes(mr)){
itc= contours.erase(itc);
}else{
++itc;
rects.push_back(mr);
}
}
//// Draw blue contours on a white image
cv::Mat result;
input.copyTo(result);
//cv::drawContours(result,contours,
// -1, // draw all contours
// cv::Scalar(255,0,0), // in blue
// 1); // with a thickness of 1
for(int i=0; i< rects.size(); i++)
{
//For better rect cropping for each posible box
//Make floodfill algorithm because the plate has white background
//And then we can retrieve more clearly the contour box
circle(result, rects[i].center, 3, Scalar(0,255,0), -1);
//get the min size between width and height
float minSize=(rects[i].size.width < rects[i].size.height)?rects[i].size.width:rects[i].size.height;
minSize=minSize-minSize*0.5;
//initialize rand and get 5 points around center for floodfill algorithm
srand ( time(NULL) );
//Initialize floodfill parameters and variables
Mat mask;
mask.create(input.rows + 2, input.cols + 2, CV_8UC1);
mask= Scalar::all(0);
int loDiff = 30;
int upDiff = 30;
int connectivity = 4;
int newMaskVal = 255;
int NumSeeds = 10;
Rect ccomp;
int flags = connectivity + (newMaskVal << 8 ) + CV_FLOODFILL_FIXED_RANGE + CV_FLOODFILL_MASK_ONLY;
for(int j=0; j<NumSeeds; j++){
Point seed;
seed.x=rects[i].center.x+rand()%(int)minSize-(minSize/2);
seed.y=rects[i].center.y+rand()%(int)minSize-(minSize/2);
circle(result, seed, 1, Scalar(0,255,255), -1);
int area = floodFill(input, mask, seed, Scalar(255,0,0), &ccomp, Scalar(loDiff, loDiff, loDiff), Scalar(upDiff, upDiff, upDiff), flags);
}
//sprintf(res,"result%d.jpg",i);
//imwrite(res,mask);
//Check new floodfill mask match for a correct patch.
//Get all points detected for get Minimal rotated Rect
vector<Point> pointsInterest;
Mat_<uchar>::iterator itMask= mask.begin<uchar>();
Mat_<uchar>::iterator end= mask.end<uchar>();
for( ; itMask!=end; ++itMask)
if(*itMask==255)
pointsInterest.push_back(itMask.pos());
RotatedRect minRect = minAreaRect(pointsInterest);
if(verifySizes(minRect)){
// rotated rectangle drawing
Point2f rect_points[4]; minRect.points( rect_points );
for( int j = 0; j < 4; j++ )
line( result, rect_points[j], rect_points[(j+1)%4], Scalar(0,0,255), 1, 8 );
//Get rotation matrix
float r= (float)minRect.size.width / (float)minRect.size.height;
147f2
;float angle=minRect.angle;
if(r<1)
angle=90+angle;
Mat rotmat= getRotationMatrix2D(minRect.center, angle,1);
//Create and rotate image
Mat img_rotated;
warpAffine(input, img_rotated, rotmat, input.size(), CV_INTER_CUBIC);
//Crop image
Size rect_size=minRect.size;
if(r < 1)
swap(rect_size.width, rect_size.height);
Mat img_crop;
getRectSubPix(img_rotated, rect_size, minRect.center, img_crop);
Mat resultResized;
resultResized.create(33,144, CV_8UC3);
resize(img_crop, resultResized, resultResized.size(), 0, 0, INTER_CUBIC);
//Equalize croped image
Mat grayResult;
cvtColor(resultResized, grayResult, CV_BGR2GRAY);
blur(grayResult, grayResult, Size(3,3));
grayResult=histeq(grayResult);
/* if(1){
stringstream ss(stringstream::in | stringstream::out);
ss << "haha" << "_" << i << ".jpg";
imwrite(ss.str(), grayResult);
}*/
output.push_back(Plate(grayResult,minRect.boundingRect()));
}
}
//imshow("car_plate",result);
//waitKey(0);
return output;
}
int _tmain(int argc, _TCHAR* argv[])
{
Mat input = imread("test.jpg");
vector<Plate> posible_regions = segment(input);
//SVM for each plate region to get valid car plates
//Read file storage.
FileStorage fs;
fs.open("SVM.xml", FileStorage::READ);
Mat SVM_TrainingData;
Mat SVM_Classes;
fs["TrainingData"] >> SVM_TrainingData;
fs["classes"] >> SVM_Classes;
//Set SVM params
CvSVMParams SVM_params;
SVM_params.svm_type = CvSVM::C_SVC;
SVM_params.kernel_type = CvSVM::LINEAR; //CvSVM::LINEAR;
SVM_params.degree = 0;
SVM_params.gamma = 1;
SVM_params.coef0 = 0;
SVM_params.C = 1;
SVM_params.nu = 0;
SVM_params.p = 0;
SVM_params.term_crit = cvTermCriteria(CV_TERMCRIT_ITER, 1000, 0.01);
//Train SVM
CvSVM svmClassifier(SVM_TrainingData, SVM_Classes, Mat(), Mat(), SVM_params);
//For each possible plate, classify with svm if it's a plate or no
vector<Plate> plates;
for(int i=0; i< posible_regions.size(); i++)
{
Mat img=posible_regions[i].plateImg;
Mat p= img.reshape(1, 1);
p.convertTo(p, CV_32FC1);
int response = (int)svmClassifier.predict( p );
/*if(response==1)
plates.push_back(posible_regions[i]);*/
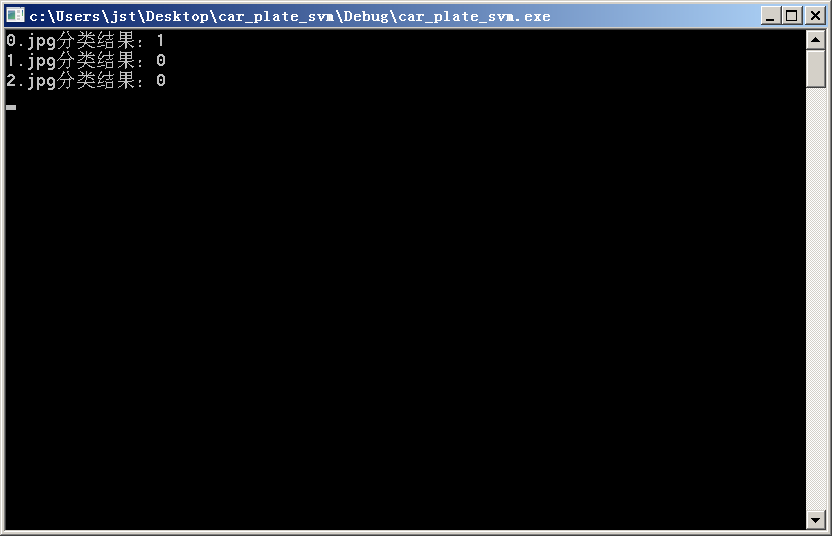
printf("%d.jpg分类结果:%d\n",i,response);
}
return 0;
}
好吧,今天到此为止了。还是那张原图,由于图像分割后产生3个候选车牌,所以SVM分类结果为:
这里关于OPENCV的各种函数配置,我一点没提,因为如果不懂原理,就不要用人家成熟的东西,否则永远被动,被opencv牵着走。
Automatic Number Plate Recognition (ANPR),,是一种使用Optical Character Recognition (OCR)和其他分割、检测方法来读取汽车注册牌照的算法。最好的ANPR算法结果是由红外线照相机拍摄图片得到的。因为车牌的特殊材质,夜间会有逆反射效果,看不清车牌。但是现在我们不使用IR图片,我们使用常规图片,这样就增加了我们检测错误和识别错误的等级,以显示我们的算法有多牛逼【老外的意思,有逆反射的图片我没试过】。下面给出,反射、散射、逆反射的示意图:
每个国家的车牌规格都不一样,这里使用西班牙的车牌,左边4个为数字,右边2个为字母,车牌以白色为背景。具体字符间隔如下图所示:
ANPR算法大体分为两个步骤:
1.车牌检测:检测车牌在图像中的位置
2.车牌识别:使用OCR算法检测车牌上的字母数字字符
这篇博文今天只讲车牌检测【提取车牌、SVM如何训练】,车牌识别为下一篇博文,搬到android系统为下下篇博文
二、车牌检测
大体也分为两个步骤:
1.图像分割:采用一系列不同的滤波器、形态学操作、轮廓算法和验证算法,提取图像中可能包含车牌的区域。
2.图像分类:对每个图像块使用支持向量机SVM分类,并由代码自动创建正负样本【正:有车牌,负:无车牌】(车牌规格统一:800像素宽,拍摄位置大概离车2-4米远)
整个车牌检测部分,会涉及以下内容:
Sobel filter
Threshold operation
Close morphologic operation
Mask of one filled area
Possible detected plates marked in red (features images)
Detected plates after the SVM classifier
假设车牌图片没有旋转和变形,则车牌分割的一个重要特征是车牌中有大量的垂直边缘。这个特征可以通过在第一阶段剔除没有任何垂直边缘的区域来提取。车牌原图:
具体算法步骤如下:
1.将彩色图像转化为灰度图,并采用5*5模版对图像进行高斯模糊来退出由照相机或其他环境噪声(如果不这么做,我们会得到很多垂直边缘,导致错误检测。)
2.使用Sobel滤波器求一阶水平方向导数,以此寻找垂直边缘
3.使用Otsu自适应阈值算法获得图像二值化的阈值,并由此得到一副二值画图片
4.采用闭操作,去除每个垂直边缘线之间的空白空格,并连接所有包含 大量边缘的区域(这步过后,我们将有许多包含车牌的候选区域)
5.由于大多数区域并不包含车牌,我们使用轮廓外接矩形的纵横比和区域面积,对这些区域进行区分。
a.首先使用findContours找到外部轮廓
b.使用minAreaRect获得这些轮廓的最小外接矩形,存储在vector向量中
c.使用面积和长宽比,作基本的验证【阈值:长宽比为4.727272,允许误差范围正负40%,面积范围15*15至125*125】
经过判断后的轮廓图:
6.由于每个车牌都包含白色背景属性。我们为了更精确的裁剪图像,可以使用floodfill算法【用指定颜色填充某一密闭区域,相当于油漆桶的功能】来提取那些旋转的矩形。
不会翻译,不怎么明白,各位这步直接看代码吧
第一步的原文:get several seeds near the last rotated rectangle center. Then get the minimum size of plate between the width and height, and use it to generate random seeds near the patch center.】总之,得到每个矩形的中心,然后求每个矩形各自长宽的较小值,再用随机数和这个较小值得到中心附近的种子点
第二步的原文:for each se
4000
ed, we use a floodFill function to draw a new mask image to store the new closest cropping region:
第三部的翻译:对这些裁剪区域,再次用纵横比和区域面积进行验证,再去除图像的旋转,并裁剪图像到统一尺寸,均衡化图像的灰度
下面,分别给出这三步的结果图:
第一步的图像,绿色为矩形中心,黄色为种子点,不知道大家是否能看清楚:
第二步的图片,上图有5处种子区域,故有5个模版mask图像【代表最近邻接区域】:
第三步的结果图,注意:这里的结果就是训练SVM的正负样本,只要人工挑选一下:
下面给出以上部分的完整代码【我讨厌一段段的写:)】
[cpp] view
plaincopy
// Car_plate.cpp : 定义控制台应用程序的入口点。
//
#include "stdafx.h"
#include<iostream>
#include <cv.h>
#include <highgui.h>
#include <cvaux.h>
using namespace std;
using namespace cv;
//对minAreaRect获得的最小外接矩形,用纵横比进行判断
bool verifySizes(RotatedRect mr)
{
float error=0.4;
//Spain car plate size: 52x11 aspect 4,7272
float aspect=4.7272;
//Set a min and max area. All other patchs are discarded
int min= 15*aspect*15; // minimum area
int max= 125*aspect*125; // maximum area
//Get only patchs that match to a respect ratio.
float rmin= aspect-aspect*error;
float rmax= aspect+aspect*error;
int area= mr.size.height * mr.size.width;
float r= (float)mr.size.width / (float)mr.size.height;
if(r<1)
r= (float)mr.size.height / (float)mr.size.width;
if(( area < min || area > max ) || ( r < rmin || r > rmax )){
return false;
}else{
return true;
}
}
//直方图均衡化
Mat histeq(Mat in)
{
Mat out(in.size(), in.type());
if(in.channels()==3){
Mat hsv;
vector<Mat> hsvSplit;
cvtColor(in, hsv, CV_BGR2HSV);
split(hsv, hsvSplit);
equalizeHist(hsvSplit[2], hsvSplit[2]);
merge(hsvSplit, hsv);
cvtColor(hsv, out, CV_HSV2BGR);
}else if(in.channels()==1){
equalizeHist(in, out);
}
return out;
}
int _tmain(int argc, _TCHAR* argv[])
{
Mat img_gray = imread("test.jpg",CV_LOAD_IMAGE_GRAYSCALE);
Mat input = imread("test.jpg");
//char res[20];
//apply a Gaussian blur of 5 x 5 and remove noise
blur(img_gray,img_gray,Size(5,5));
//Finde vertical edges. Car plates have high density of vertical lines
Mat img_sobel;
Sobel(img_gray, img_sobel, CV_8U, 1, 0, 3, 1, 0, BORDER_DEFAULT);//xorder=1,yorder=0,kernelsize=3
//apply a threshold filter to obtain a binary image through Otsu's method
Mat img_threshold;
threshold(img_sobel, img_threshold, 0, 255, CV_THRESH_OTSU+CV_THRESH_BINARY);
//Morphplogic operation close:remove blank spaces and connect all regions that have a high number of edges
Mat element = getStructuringElement(MORPH_RECT, Size(17, 3) );
morphologyEx(img_threshold, img_threshold, CV_MOP_CLOSE, element);
//Find 轮廓 of possibles plates
vector< vector< Point> > contours;
findContours(img_threshold,
contours, // a vector of contours
CV_RETR_EXTERNAL, // 提取外部轮廓
CV_CHAIN_APPROX_NONE); // all pixels of each contours
//Start to iterate to each contour founded
vector<vector<Point> >::iterator itc= contours.begin();
vector<RotatedRect> rects;
//Remove patch that are no inside limits of aspect ratio and area.
while (itc!=contours.end()) {
//Create bounding rect of object
RotatedRect mr= minAreaRect(Mat(*itc));
if( !verifySizes(mr)){
itc= contours.erase(itc);
}else{
++itc;
rects.push_back(mr);
}
}
// Draw blue contours on a white image
cv::Mat result;
//input.copyTo(result);
//cv::drawContours(result,contours,
// -1, // draw all contours
// cv::Scalar(0,0,255), // in blue
// 3); // with a thickness of 1
for(int i=0; i< rects.size(); i++)
{
//For better rect cropping for each posible box
//Make floodfill algorithm because the plate has white background
//And then we can retrieve more clearly the contour box
circle(result, rects[i].center, 3, Scalar(0,255,0), -1);
//get the min size between width and height
float minSize=(rects[i].size.width < rects[i].size.height)?rects[i].size.width:rects[i].size.height;
minSize=minSize-minSize*0.5;
//initialize rand and get 5 points around center for floodfill algorithm
srand ( time(NULL) );
//Initialize floodfill parameters and variables
Mat mask;
mask.create(input.rows + 2, input.cols + 2, CV_8UC1);
mask= Scalar::all(0);
int loDiff = 30;
int upDiff = 30;
int connectivity = 4;
int newMaskVal = 255;
int NumSeeds = 10;
Rect ccomp;
int flags = connectivity + (newMaskVal << 8 ) + CV_FLOODFILL_FIXED_RANGE + CV_FLOODFILL_MASK_ONLY;
for(int j=0; j<NumSeeds; j++){
Point seed;
seed.x=rects[i].center.x+rand()%(int)minSize-(minSize/2);
seed.y=rects[i].center.y+rand()%(int)minSize-(minSize/2);
circle(result, seed, 1, Scalar(0,255,255), -1);
int area = floodFill(input, mask, seed, Scalar(255,0,0), &ccomp, Scalar(loDiff, loDiff, loDiff), Scalar(upDiff, upDiff, upDiff), flags);
}
//sprintf(res,"result%d.jpg",i);
//imwrite(res,mask);
//Check new floodfill mask match for a correct patch.
//Get all points detected for get Minimal rotated Rect
vector<Point> pointsInterest;
Mat_<uchar>::iterator itMask= mask.begin<uchar>();
Mat_<uchar>::iterator end= mask.end<uchar>();
for( ; itMask!=end; ++itMask)
if(*itMask==255)
pointsInterest.push_back(itMask.pos());
RotatedRect minRect = minAreaRect(pointsInterest);
if(verifySizes(minRect)){
// rotated rectangle drawing
Point2f rect_points[4]; minRect.points( rect_points );
for( int j = 0; j < 4; j++ )
line( result, rect_points[j], rect_points[(j+1)%4], Scalar(0,0,255), 1, 8 );
//Get rotation matrix
float r= (float)minRect.size.width / (float)minRect.size.height;
float angle=minRect.angle;
if(r<1)
angle=90+angle;
Mat rotmat= getRotationMatrix2D(minRect.center, angle,1);
//Create and rotate image
Mat img_rotated;
warpAffine(input, img_rotated, rotmat, input.size(), CV_INTER_CUBIC);
//Crop image
Size rect_size=minRect.size;
if(r < 1)
swap(rect_size.width, rect_size.height);
Mat img_crop;
getRectSubPix(img_rotated, rect_size, minRect.center, img_crop);
Mat resultResized;
resultResized.create(33,144, CV_8UC3);
resize(img_crop, resultResized, resultResized.size(), 0, 0, INTER_CUBIC);
//Equalize croped image
Mat grayResult;
cvtColor(resultResized, grayResult, CV_BGR2GRAY);
blur(grayResult, grayResult, Size(3,3));
grayResult=histeq(grayResult);
/* if(1){
stringstream ss(stringstream::in | stringstream::out);
ss << "haha" << "_" << i << ".jpg";
imwrite(ss.str(), grayResult);
}*/
//output.push_back(Plate(grayResult,minRect.boundingRect()));
}
}
//imshow("car_plate",result);
waitKey(0);
return 0;
}
注意上述代码末尾的注释部分:
[cpp] view
plaincopy
<span style="white-space:pre"> </span>if(1){
stringstream ss(stringstream::in | stringstream::out);
ss << "haha" << "_" << i << ".jpg";
imwrite(ss.str(), grayResult);
}
以上部分,就是自动生成正负样本的代码。比人工去QQ截图好多了:)
在介绍SVM车牌分类之前,我介绍怎么训练SVM【注意:SVM的实现是个庞大的工程,我一直没有自己弄过,这里使用的还是opencv封装的SVM】
如何训练:
正样本75张包含车牌的图像和35张不包含车牌的144*33图像。【还有其他更好的特征来训练SVM,PCA,傅立叶变换,纹理分析等等】。
如何获取样本及存放训练数据。
通过上述图像分割步骤,我们可以得到车牌及非车牌图像,我们把二者都执行reshaple(1,1),再存放到trainImage的矩阵中,并修改对应trainLables矩阵的0-1值,然后把trainData改为32为浮点数系,再把trainData和trainLabel直接写进xml文件【也就是说xml中包含了样本图像的像素值和样本分类标记】
具体代码:
[cpp] view
plaincopy
Mat classes;//(numPlates+numNoPlates, 1, CV_32FC1);
Mat trainingData;//(numPlates+numNoPlates, imageWidth*imageHeight, CV_32FC1 );
Mat trainingImages;
vector<int> trainingLabels;
for(int i=0; i< numPlates; i++)
{
stringstream ss(stringstream::in | stringstream::out);
ss << path_Plates << i << ".jpg";
Mat img=imread(ss.str(), 0);
img= img.reshape(1, 1);
trainingImages.push_back(img);
trainingLabels.push_back(1);
}
for(int i=0; i< numNoPlates; i++)
{
stringstream ss(stringstream::in | stringstream::out);
ss << path_NoPlates << i << ".jpg";
Mat img=imread(ss.str(), 0);
img= img.reshape(1, 1);
trainingImages.push_back(img);
trainingLabels.push_back(0);
}
Mat(trainingImages).copyTo(trainingData);
//trainingData = trainingData.reshape(1,trainingData.rows);
trainingData.convertTo(trainingData, CV_32FC1);
Mat(trainingLabels).copyTo(classes);
FileStorage fs("SVM.xml", FileStorage::WRITE);
fs << "TrainingData" << trainingData;
fs << "classes" << classes;
fs.release();
以上代码,可以自己另外建一个工程,认为设置一下正负样本的数量numPlates和numNoPlates,正负样本存储的路径path_Plates和path_NoPlates。这样我们就得到了存放正负样本的SVM.XML文件了。
最后,给出使用Opencv提供的SVM分类器,对图像进行分了的完整代码【对一副图像判断其中是否含有西班牙车牌】:
劳什子外国人搞了车牌类,好吧,我挑和本文有关的都贴出来吧
[cpp] view
plaincopy
#ifndef Plate_h
#define Plate_h
#include <string.h>
#include <vector>
#include <cv.h>
#include <highgui.h>
#include <cvaux.h>
using namespace std;
using namespace cv;
class Plate{
public:
Plate();
Plate(Mat img, Rect pos);
string str();
Rect position;
Mat plateImg;
vector<char> chars;
vector<Rect> charsPos;
};
#endif
这里,我们只要实现上述Plate类的构造函数就行了
[cpp] view
plaincopy
Plate::Plate(Mat img, Rect pos){
plateImg=img;
position=pos;
}
下面我再次给出完整代码,不过大家重点关注如何配置SVM就行了:
[cpp] view
plaincopy
// car_plate_svm.cpp : 定义控制台应用程序的入口点。
//
#include "stdafx.h"
#include<iostream>
#include <cv.h>
#include <highgui.h>
#include <cvaux.h>
#include "Plate.h"
using namespace std;
using namespace cv;
//对minAreaRect获得的最小外接矩形,用纵横比进行判断
bool verifySizes(RotatedRect mr)
{
float error=0.4;
//Spain car plate size: 52x11 aspect 4,7272
float aspect=4.7272;
//Set a min and max area. All other patchs are discarded
int min= 15*aspect*15; // minimum area
int max= 125*aspect*125; // maximum area
//Get only patchs that match to a respect ratio.
float rmin= aspect-aspect*error;
float rmax= aspect+aspect*error;
int area= mr.size.height * mr.size.width;
float r= (float)mr.size.width / (float)mr.size.height;
if(r<1)
r= (float)mr.size.height / (float)mr.size.width;
if(( area < min || area > max ) || ( r < rmin || r > rmax )){
return false;
}else{
return true;
}
}
Mat histeq(Mat in)
{
Mat out(in.size(), in.type());
if(in.channels()==3){
Mat hsv;
vector<Mat> hsvSplit;
cvtColor(in, hsv, CV_BGR2HSV);
split(hsv, hsvSplit);
equalizeHist(hsvSplit[2], hsvSplit[2]);
merge(hsvSplit, hsv);
cvtColor(hsv, out, CV_HSV2BGR);
}else if(in.channels()==1){
equalizeHist(in, out);
}
return out;
}
vector<Plate> segment(Mat input){
vector<Plate> output;
//char res[20];
//apply a Gaussian blur of 5 x 5 and remove noise
Mat img_gray;
cvtColor(input, img_gray, CV_BGR2GRAY);
blur(img_gray, img_gray, Size(5,5));
//Finde vertical edges. Car plates have high density of vertical lines
Mat img_sobel;
Sobel(img_gray, img_sobel, CV_8U, 1, 0, 3, 1, 0, BORDER_DEFAULT);//xorder=1,yorder=0,kernelsize=3
//apply a threshold filter to obtain a binary image through Otsu's method
Mat img_threshold;
threshold(img_sobel, img_threshold, 0, 255, CV_THRESH_OTSU+CV_THRESH_BINARY);
//Morphplogic operation close:remove blank spaces and connect all regions that have a high number of edges
Mat element = getStructuringElement(MORPH_RECT, Size(17, 3) );
morphologyEx(img_threshold, img_threshold, CV_MOP_CLOSE, element);
//Find 轮廓 of possibles plates
vector< vector< Point> > contours;
findContours(img_threshold,
contours, // a vector of contours
CV_RETR_EXTERNAL, // 提取外部轮廓
CV_CHAIN_APPROX_NONE); // all pixels of each contours
//Start to iterate to each contour founded
vector<vector<Point> >::iterator itc= contours.begin();
vector<RotatedRect> rects;
//Remove patch that are no inside limits of aspect ratio and area.
while (itc!=contours.end()) {
//Create bounding rect of object
RotatedRect mr= minAreaRect(Mat(*itc));
if( !verifySizes(mr)){
itc= contours.erase(itc);
}else{
++itc;
rects.push_back(mr);
}
}
//// Draw blue contours on a white image
cv::Mat result;
input.copyTo(result);
//cv::drawContours(result,contours,
// -1, // draw all contours
// cv::Scalar(255,0,0), // in blue
// 1); // with a thickness of 1
for(int i=0; i< rects.size(); i++)
{
//For better rect cropping for each posible box
//Make floodfill algorithm because the plate has white background
//And then we can retrieve more clearly the contour box
circle(result, rects[i].center, 3, Scalar(0,255,0), -1);
//get the min size between width and height
float minSize=(rects[i].size.width < rects[i].size.height)?rects[i].size.width:rects[i].size.height;
minSize=minSize-minSize*0.5;
//initialize rand and get 5 points around center for floodfill algorithm
srand ( time(NULL) );
//Initialize floodfill parameters and variables
Mat mask;
mask.create(input.rows + 2, input.cols + 2, CV_8UC1);
mask= Scalar::all(0);
int loDiff = 30;
int upDiff = 30;
int connectivity = 4;
int newMaskVal = 255;
int NumSeeds = 10;
Rect ccomp;
int flags = connectivity + (newMaskVal << 8 ) + CV_FLOODFILL_FIXED_RANGE + CV_FLOODFILL_MASK_ONLY;
for(int j=0; j<NumSeeds; j++){
Point seed;
seed.x=rects[i].center.x+rand()%(int)minSize-(minSize/2);
seed.y=rects[i].center.y+rand()%(int)minSize-(minSize/2);
circle(result, seed, 1, Scalar(0,255,255), -1);
int area = floodFill(input, mask, seed, Scalar(255,0,0), &ccomp, Scalar(loDiff, loDiff, loDiff), Scalar(upDiff, upDiff, upDiff), flags);
}
//sprintf(res,"result%d.jpg",i);
//imwrite(res,mask);
//Check new floodfill mask match for a correct patch.
//Get all points detected for get Minimal rotated Rect
vector<Point> pointsInterest;
Mat_<uchar>::iterator itMask= mask.begin<uchar>();
Mat_<uchar>::iterator end= mask.end<uchar>();
for( ; itMask!=end; ++itMask)
if(*itMask==255)
pointsInterest.push_back(itMask.pos());
RotatedRect minRect = minAreaRect(pointsInterest);
if(verifySizes(minRect)){
// rotated rectangle drawing
Point2f rect_points[4]; minRect.points( rect_points );
for( int j = 0; j < 4; j++ )
line( result, rect_points[j], rect_points[(j+1)%4], Scalar(0,0,255), 1, 8 );
//Get rotation matrix
float r= (float)minRect.size.width / (float)minRect.size.height;
147f2
;float angle=minRect.angle;
if(r<1)
angle=90+angle;
Mat rotmat= getRotationMatrix2D(minRect.center, angle,1);
//Create and rotate image
Mat img_rotated;
warpAffine(input, img_rotated, rotmat, input.size(), CV_INTER_CUBIC);
//Crop image
Size rect_size=minRect.size;
if(r < 1)
swap(rect_size.width, rect_size.height);
Mat img_crop;
getRectSubPix(img_rotated, rect_size, minRect.center, img_crop);
Mat resultResized;
resultResized.create(33,144, CV_8UC3);
resize(img_crop, resultResized, resultResized.size(), 0, 0, INTER_CUBIC);
//Equalize croped image
Mat grayResult;
cvtColor(resultResized, grayResult, CV_BGR2GRAY);
blur(grayResult, grayResult, Size(3,3));
grayResult=histeq(grayResult);
/* if(1){
stringstream ss(stringstream::in | stringstream::out);
ss << "haha" << "_" << i << ".jpg";
imwrite(ss.str(), grayResult);
}*/
output.push_back(Plate(grayResult,minRect.boundingRect()));
}
}
//imshow("car_plate",result);
//waitKey(0);
return output;
}
int _tmain(int argc, _TCHAR* argv[])
{
Mat input = imread("test.jpg");
vector<Plate> posible_regions = segment(input);
//SVM for each plate region to get valid car plates
//Read file storage.
FileStorage fs;
fs.open("SVM.xml", FileStorage::READ);
Mat SVM_TrainingData;
Mat SVM_Classes;
fs["TrainingData"] >> SVM_TrainingData;
fs["classes"] >> SVM_Classes;
//Set SVM params
CvSVMParams SVM_params;
SVM_params.svm_type = CvSVM::C_SVC;
SVM_params.kernel_type = CvSVM::LINEAR; //CvSVM::LINEAR;
SVM_params.degree = 0;
SVM_params.gamma = 1;
SVM_params.coef0 = 0;
SVM_params.C = 1;
SVM_params.nu = 0;
SVM_params.p = 0;
SVM_params.term_crit = cvTermCriteria(CV_TERMCRIT_ITER, 1000, 0.01);
//Train SVM
CvSVM svmClassifier(SVM_TrainingData, SVM_Classes, Mat(), Mat(), SVM_params);
//For each possible plate, classify with svm if it's a plate or no
vector<Plate> plates;
for(int i=0; i< posible_regions.size(); i++)
{
Mat img=posible_regions[i].plateImg;
Mat p= img.reshape(1, 1);
p.convertTo(p, CV_32FC1);
int response = (int)svmClassifier.predict( p );
/*if(response==1)
plates.push_back(posible_regions[i]);*/
printf("%d.jpg分类结果:%d\n",i,response);
}
return 0;
}
好吧,今天到此为止了。还是那张原图,由于图像分割后产生3个候选车牌,所以SVM分类结果为:
这里关于OPENCV的各种函数配置,我一点没提,因为如果不懂原理,就不要用人家成熟的东西,否则永远被动,被opencv牵着走。

相关文章推荐
- Meteor node.js 复制(copy)文件的方法
- ServletContext和ServletConfig区别
- 第十三周--动物怎么叫(1)
- 日经春秋 20150602
- 日经社説 20150602 バター不足が迫る酪農改革
- 为什么程序员应该从现在就开始看书
- 【VS2013学习】
- Raft一致性算法
- c 函数指针
- TRIZ系列-创新原理-22-变害为利原理
- Android源代码下载方法具体解释
- Graph database_neo4j 底层存储结构分析(7)
- C++二分查找在搜索引擎多文档求交的应用分析
- list_for_each_entry宏函数解析(上)
- 数学之美札记:谈谈中文分词
- python中os.path.isfile()和os.path.isdir()均返回false的问题
- 天声人語 20150602
- Java 并发编程框架(一)
- Java 排序算法
- 【转】【java】java中的byte,以及它与int的转化