Spring Security使用数据库中的用户进行身份认证
2015-04-30 14:02
495 查看
本文在上一篇博文的基础上,将使用数据库中的用户进行身份认证。从本文中你将会看到Spring Security使用数据库中的用户进行身份认证依然是非常简单的事情。
1. 在pom.xml中添加mysql数据库驱动与c3p0数据源的相关的依赖。
2. 准备MySQL数据库及相关数据。
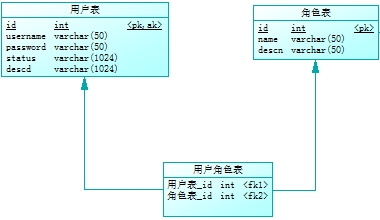
本例子使用到user(用户表)、role(角色表)和user_role(用户角色表)三个表,表之间的关系如下:
为了方便大家进行测试,建表的语句如下:
3. 修改springSecurity.xml,更改security:authentication-provider提供的用户访问机制。
将上面的灰色划掉的部分更改为下面绿色的部分。
备注:dataSource在springdb.xml中定义,在springSecurity.xml中引用springdb.xml即可。springdb.xml相关的文件如下:
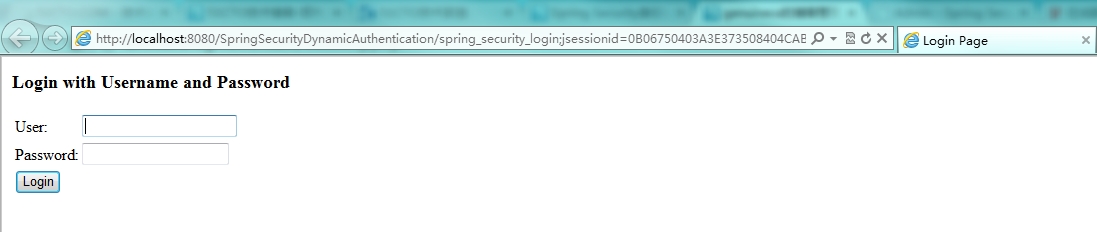
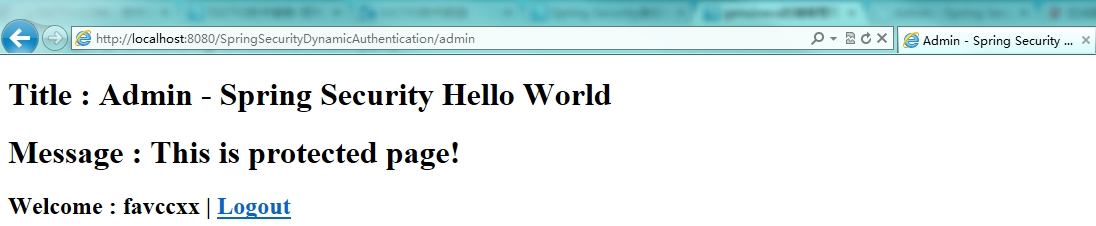
4. 工程运行效果如下
1. 在pom.xml中添加mysql数据库驱动与c3p0数据源的相关的依赖。
<dependency>
           <groupId>mysql</groupId>
           <artifactId>mysql-connector-java</artifactId>
           <version>5.1.21</version>
 </dependency>
<dependency>
            <groupId>c3p0</groupId>
            <artifactId>c3p0</artifactId>
            <version>0.9.1.2</version>
 </dependency>
2. 准备MySQL数据库及相关数据。
本例子使用到user(用户表)、role(角色表)和user_role(用户角色表)三个表,表之间的关系如下:
为了方便大家进行测试,建表的语句如下:
/*
Navicat MySQL Data Transfer

Source Server         : 10.0.0.12
Source Server Version : 50619
Source Host           : 10.0.0.12:3305
Source Database       : favsecurity

Target Server Type    : MYSQL
Target Server Version : 50619
File Encoding         : 65001

Date: 2015-01-23 10:28:39
*/

SET FOREIGN_KEY_CHECKS=0;

-- ----------------------------
-- Table structure for role
-- ----------------------------
DROP TABLE IF EXISTS `role`;
CREATE TABLE `role` (
  `id` int(11) NOT NULL DEFAULT '0' COMMENT 'id',
  `name` varchar(50) DEFAULT NULL COMMENT 'name',
  `descn` varchar(50) DEFAULT NULL COMMENT 'descn',
  PRIMARY KEY (`id`)
) ENGINE=InnoDB DEFAULT CHARSET=utf8 COMMENT='角色表';

-- ----------------------------
-- Records of role
-- ----------------------------
INSERT INTO `role` VALUES ('1', 'ROLE_ADMIN', '管理员角色');
INSERT INTO `role` VALUES ('2', 'ROLE_USER', '用户角色');

-- ----------------------------
-- Table structure for user
-- ----------------------------
DROP TABLE IF EXISTS `user`;
CREATE TABLE `user` (
  `id` int(11) NOT NULL DEFAULT '0' COMMENT 'id',
  `username` varchar(50) DEFAULT NULL COMMENT 'username',
  `password` varchar(50) DEFAULT NULL COMMENT 'password',
  `status` varchar(1024) DEFAULT NULL COMMENT 'status',
  `descn` varchar(1024) DEFAULT NULL COMMENT 'descd',
  PRIMARY KEY (`id`),
  KEY `AK_Key_1` (`id`)
) ENGINE=InnoDB DEFAULT CHARSET=utf8 COMMENT='用户表';

-- ----------------------------
-- Records of user
-- ----------------------------
INSERT INTO `user` VALUES ('1', 'admin', 'admin', '1', '管理\r\n员');
INSERT INTO `user` VALUES ('2', 'user', 'user', '1', '用户\r\n');
INSERT INTO `user` VALUES ('3', 'favccxx', 'favboy', '1', '帅锅');

-- ----------------------------
-- Table structure for user_role
-- ----------------------------
DROP TABLE IF EXISTS `user_role`;
CREATE TABLE `user_role` (
  `user_id` int(11) DEFAULT NULL COMMENT '用户表_id',
  `role_id` int(11) DEFAULT NULL COMMENT '角色表_id',
  KEY `FK_FK_USER_ROLE_ROLE` (`role_id`),
  KEY `FK_FK_USER_ROLE_USER` (`user_id`),
  CONSTRAINT `FK_FK_USER_ROLE_USER` FOREIGN KEY (`user_id`) REFERENCES `user` (`id`),
  CONSTRAINT `FK_FK_USER_ROLE_ROLE` FOREIGN KEY (`role_id`) REFERENCES `role` (`id`)
) ENGINE=InnoDB DEFAULT CHARSET=utf8 COMMENT='用户角色表';

-- ----------------------------
-- Records of user_role
-- ----------------------------
INSERT INTO `user_role` VALUES ('1', '1');
INSERT INTO `user_role` VALUES ('1', '2');
INSERT INTO `user_role` VALUES ('2', '2');
INSERT INTO `user_role` VALUES ('3', '1');
INSERT INTO `user_role` VALUES ('3', '2');
3. 修改springSecurity.xml,更改security:authentication-provider提供的用户访问机制。
| <security:authentication-manager> <security:authentication-provider> <security:user-service> <security:user name="favccxx" password="favccxx" authorities="ROLE_USER,ROLE_ADMIN"/> <security:user name="super" password="super" authorities="ROLE_SUPERADMIN"/> </security:user-service> </security:authentication-provider> </security:authentication-manager> |
| <security:authentication-manager> <security:authentication-provider> <security:jdbc-user-service data-source-ref="dataSource" users-by-username-query="select username,password,1 as enabled from user WHERE username=?" authorities-by-username-query="select u.username, r.name as role from user u,user_role ur, role r where u.id=ur.user_Id and r.id = ur.role_Id and u.username=?"/> </security:authentication-provider> </security:authentication-manager> |
<?xml version="1.0" encoding="UTF-8"?>
<beans xmlns="http://www.springframework.org/schema/beans"
    xmlns:xsi="http://www.w3.org/2001/XMLSchema-instance"
    xmlns:context="http://www.springframework.org/schema/context"
     xmlns:tx="http://www.springframework.org/schema/tx"
     xmlns:aop="http://www.springframework.org/schema/aop"
    xsi:schemaLocation="http://www.springframework.org/schema/beans http://www.springframework.org/schema/beans/spring-beans-3.0.xsd     http://www.springframework.org/schema/context http://www.springframework.org/schema/context/spring-context-3.0.xsd
          http://www.springframework.org/schema/tx         http://www.springframework.org/schema/tx/spring-tx-3.0.xsd          http://www.springframework.org/schema/aop http://www.springframework.org/schema/aop/spring-aop-3.0.xsd
    ">

    <context:property-placeholder location="classpath:database.properties"/>

    <bean id="dataSource" class="com.mchange.v2.c3p0.ComboPooledDataSource" destroy-method="close">
        <property name="driverClass">
            <value>${dataSource.driverClassName}</value>
        </property>
        <property name="jdbcUrl">
            <value>${dataSource.url}</value>
        </property>
        <property name="user">
            <value>${dataSource.username}</value>
        </property>
        <property name="password">
            <value>${dataSource.password}</value>
        </property>

        <!-- 最大连接数 -->
        <property name="maxPoolSize">
            <value>${dataSource.c3p0.max_size}</value>
        </property>

        <!-- 最小连接数 -->
        <property name="minPoolSize">
            <value>${dataSource.c3p0.min_size}</value>
        </property>

        <!-- 最大空闲时间,超时未被使用则连接被抛弃,单位毫秒 -->
        <property name="maxIdleTime">
            <value>${dataSource.c3p0.max_idle_time}</value>
        </property>

        <!-- 获得连接的超时时间,如果超过这个时间,会抛出异常,单位毫秒 -->
        <!--
        <property name="checkoutTimeout">
            <value>${dataSource.c3p0.checkout_timeout}</value>
        </property>
       -->

        <!-- 最大的PreparedStatement的数量 -->
        <property name="maxStatements">
            <value>${dataSource.c3p0.max_statements}</value>
        </property>

        <!-- 每隔120秒检查连接池里的空闲连接 ,单位是秒 -->
        <property name="idleConnectionTestPeriod">
            <value>${dataSource.c3p0.idle_test_period}</value>
        </property>

        <!-- 当连接池里面的连接用完的时候,C3P0一下获取的新的连接数 -->
        <property name="acquireIncrement">
            <value>${dataSource.c3p0.acquire_increment}</value>
        </property>
    </bean>

</beans>
<![CDATA[ dataSource.driverClassName=com.mysql.jdbc.Driver dataSource.username=favccxx dataSource.password=favboy dataSource.url=jdbc:mysql://10.0.0.12:3305/favsecurity?useUnicode=true&characterEncoding=utf-8 # For c3p0 connect pool dataSource.c3p0.max_size=200 dataSource.c3p0.min_size=10 dataSource.c3p0.max_idle_time=300 #dataSource.c3p0.checkout_timeout=30000 dataSource.c3p0.max_statements=0 dataSource.c3p0.idle_test_period=120 dataSource.c3p0.acquire_increment=5 ]]>
4. 工程运行效果如下

相关文章推荐
- Spring Security笔记:使用数据库进行用户认证(form login using database)
- Spring Security笔记:使用数据库进行用户认证(form login using database) - 菩提树下的杨过 - 博客园
- Spring Security 使用数据库用户进行认证
- Spring Security进阶身份认证之使用数据库中的用户进行身份认证(附源码)
- Spring Security笔记:使用数据库进行用户认证(form login using database)
- 使用MD5对存放在数据库中用户密码进行保护
- 使用Spring Security进行用户权限控制
- spring security之使用数据库来读取用户
- Spring Security教程(6)---- 使用数据库管理用户及权限
- Spring Security教程(6)---- 使用数据库管理用户及权限
- 在Asp.net MVC中使用Authorization Manager (AzMan)进行Windows用户身份认证
- spring security使用hibernate进行查询数据库验证
- 修改用户信息的时候,使用Servlet对新的数据和数据库的数据进行对比,修改成功实现页面的弹窗和页面的跳转
- Spring Security教程(6)---- 使用数据库管理用户及权限
- Spring Security教程(6)---- 使用数据库管理用户及权限
- Oracle中对用户所能使用的数据库资源进行限制
- 在登录页面中js进行正则验证电话号码和邮箱地址,并使用ajax进行用户ID的数据库验证
- 如何恢复一个非用户sa创建的数据库,且使用原用户创建者进行访问
- 使用原生ADO进行数据库存取。
- 使用SQL-DMO备份数据库并进行校验