iOS开发 剖析网易新闻标签栏视图切换(addChildViewController属性介绍)
2015-03-04 14:46
525 查看
iOS开发 剖析网易新闻标签栏视图切换(addChildViewController属性介绍)
本来只是打算介绍一下addChildViewController这个方法的,正好今天朋友去换工作面试问到网易新闻标签栏效果的实现,就结合它,用个小Demo实例介绍一下:(具体解释都写在了Demo里面的注释)
[objc]
view plaincopy
//
// HMTMainViewController.m
// UIScrollView
//
// Created by HMT on 14-6-25.
// Copyright (c) 2014年 humingtao. All rights reserved.
//
#import "HMTMainViewController.h"
#import "HMTFirstViewController.h"
#import "HMTSecondViewController.h"
#import "HMTThirdViewController.h"
@interface HMTMainViewController () <UIScrollViewDelegate>
@property (nonatomic ,strong) HMTThirdViewController *thirdVC;
@property (nonatomic ,strong) HMTFirstViewController *firstVC;
@property (nonatomic ,strong) HMTSecondViewController *secondVC;
@property (nonatomic ,strong) UIViewController *currentVC;
@property (nonatomic ,strong) UIScrollView *headScrollView; // 顶部滚动视图
@property (nonatomic ,strong) NSArray *headArray;
@end
@implementation HMTMainViewController
- (id)initWithNibName:(NSString *)nibNameOrNil bundle:(NSBundle *)nibBundleOrNil
{
self = [super initWithNibName:nibNameOrNil bundle:nibBundleOrNil];
if (self) {
// Custom initialization
}
return self;
}
- (void)viewDidLoad
{
[super viewDidLoad];
// Do any additional setup after loading the view.
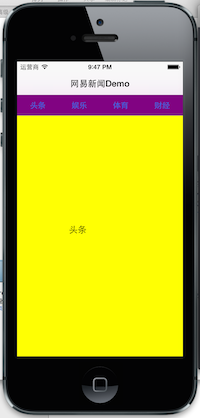
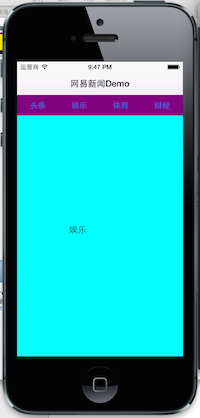
self.navigationItem.title = @"网易新闻Demo";
self.headArray = @[@"头条",@"娱乐",@"体育",@"财经",@"科技",@"NBA",@"手机"];
/**
* automaticallyAdjustsScrollViewInsets 又被这个属性坑了
* 我"UI高级"里面一篇文章着重讲了它,大家可以去看看
*/
self.automaticallyAdjustsScrollViewInsets = NO;
self.headScrollView = [[UIScrollView alloc] initWithFrame:CGRectMake(0, 64, 320, 40)];
self.headScrollView.backgroundColor = [UIColor purpleColor];
self.headScrollView.contentSize = CGSizeMake(560, 0);
self.headScrollView.bounces = NO;
self.headScrollView.pagingEnabled = YES;
[self.view addSubview:self.headScrollView];
for (int i = 0; i < [self.headArray count]; i++) {
UIButton *button = [UIButton buttonWithType:UIButtonTypeSystem];
button.frame = CGRectMake(0 + i*80, 0, 80, 40);
[button setTitle:[self.headArray objectAtIndex:i] forState:UIControlStateNormal];
button.tag = i + 100;
[button addTarget:self action:@selector(didClickHeadButtonAction:) forControlEvents:UIControlEventTouchUpInside];
[self.headScrollView addSubview:button];
}
/*
苹果新的API增加了addChildViewController方法,并且希望我们在使用addSubview时,同时调用[self addChildViewController:child]方法将sub view对应的viewController也加到当前ViewController的管理中。
对于那些当前暂时不需要显示的subview,只通过addChildViewController把subViewController加进去;需要显示时再调用transitionFromViewController方法。将其添加进入底层的ViewController中。
这样做的好处:
1.无疑,对页面中的逻辑更加分明了。相应的View对应相应的ViewController。
2.当某个子View没有显示时,将不会被Load,减少了内存的使用。
3.当内存紧张时,没有Load的View将被首先释放,优化了程序的内存释放机制。
*/
/**
* 在iOS5中,ViewController中新添加了下面几个方法:
* addChildViewController:
* removeFromParentViewController
* transitionFromViewController:toViewController:duration:options:animations:completion:
* willMoveToParentViewController:
* didMoveToParentViewController:
*/
self.firstVC = [[HMTFirstViewController alloc] init];
[self.firstVC.view setFrame:CGRectMake(0, 104, 320, 464)];
[self addChildViewController:_firstVC];
self.secondVC = [[HMTSecondViewController alloc] init];
[self.secondVC.view setFrame:CGRectMake(0, 104, 320, 464)];
self.thirdVC = [[HMTThirdViewController alloc] init];
[self.thirdVC.view setFrame:CGRectMake(0, 104, 320, 464)];
// 默认,第一个视图(你会发现,全程就这一个用了addSubview)
[self.view addSubview:self.firstVC.view];
self.currentVC = self.firstVC;
}
- (void)didClickHeadButtonAction:(UIButton *)button
{
// 点击处于当前页面的按钮,直接跳出
if ((self.currentVC == self.firstVC && button.tag == 100)||(self.currentVC == self.secondVC && button.tag == 101.)) {
return;
}else{
// 展示2个,其余一样,自行补全噢
switch (button.tag) {
case 100:
[self replaceController:self.currentVC newController:self.firstVC];
break;
case 101:
[self replaceController:self.currentVC newController:self.secondVC];
break;
case 102:
//.......
break;
case 103:
//.......
break;
case 104:
//.......
break;
case 105:
//.......
break;
case 106:
//.......
break;
//.......
default:
break;
}
}
}
// 切换各个标签内容
- (void)replaceController:(UIViewController *)oldController newController:(UIViewController *)newController
{
/**
* 着重介绍一下它
* transitionFromViewController:toViewController:duration:options:animations:completion:
* fromViewController 当前显示在父视图控制器中的子视图控制器
* toViewController 将要显示的姿势图控制器
* duration 动画时间(这个属性,old friend 了 O(∩_∩)O)
* options 动画效果(渐变,从下往上等等,具体查看API)
* animations 转换过程中得动画
* completion 转换完成
*/
[self addChildViewController:newController];
[self transitionFromViewController:oldController toViewController:newController duration:2.0 options:UIViewAnimationOptionTransitionCrossDissolve animations:nil completion:^(BOOL finished) {
if (finished) {
[newController didMoveToParentViewController:self];
[oldController willMoveToParentViewController:nil];
[oldController removeFromParentViewController];
self.currentVC = newController;
}else{
self.currentVC = oldController;
}
}];
}
本来只是打算介绍一下addChildViewController这个方法的,正好今天朋友去换工作面试问到网易新闻标签栏效果的实现,就结合它,用个小Demo实例介绍一下:(具体解释都写在了Demo里面的注释)
[objc]
view plaincopy
//
// HMTMainViewController.m
// UIScrollView
//
// Created by HMT on 14-6-25.
// Copyright (c) 2014年 humingtao. All rights reserved.
//
#import "HMTMainViewController.h"
#import "HMTFirstViewController.h"
#import "HMTSecondViewController.h"
#import "HMTThirdViewController.h"
@interface HMTMainViewController () <UIScrollViewDelegate>
@property (nonatomic ,strong) HMTThirdViewController *thirdVC;
@property (nonatomic ,strong) HMTFirstViewController *firstVC;
@property (nonatomic ,strong) HMTSecondViewController *secondVC;
@property (nonatomic ,strong) UIViewController *currentVC;
@property (nonatomic ,strong) UIScrollView *headScrollView; // 顶部滚动视图
@property (nonatomic ,strong) NSArray *headArray;
@end
@implementation HMTMainViewController
- (id)initWithNibName:(NSString *)nibNameOrNil bundle:(NSBundle *)nibBundleOrNil
{
self = [super initWithNibName:nibNameOrNil bundle:nibBundleOrNil];
if (self) {
// Custom initialization
}
return self;
}
- (void)viewDidLoad
{
[super viewDidLoad];
// Do any additional setup after loading the view.
self.navigationItem.title = @"网易新闻Demo";
self.headArray = @[@"头条",@"娱乐",@"体育",@"财经",@"科技",@"NBA",@"手机"];
/**
* automaticallyAdjustsScrollViewInsets 又被这个属性坑了
* 我"UI高级"里面一篇文章着重讲了它,大家可以去看看
*/
self.automaticallyAdjustsScrollViewInsets = NO;
self.headScrollView = [[UIScrollView alloc] initWithFrame:CGRectMake(0, 64, 320, 40)];
self.headScrollView.backgroundColor = [UIColor purpleColor];
self.headScrollView.contentSize = CGSizeMake(560, 0);
self.headScrollView.bounces = NO;
self.headScrollView.pagingEnabled = YES;
[self.view addSubview:self.headScrollView];
for (int i = 0; i < [self.headArray count]; i++) {
UIButton *button = [UIButton buttonWithType:UIButtonTypeSystem];
button.frame = CGRectMake(0 + i*80, 0, 80, 40);
[button setTitle:[self.headArray objectAtIndex:i] forState:UIControlStateNormal];
button.tag = i + 100;
[button addTarget:self action:@selector(didClickHeadButtonAction:) forControlEvents:UIControlEventTouchUpInside];
[self.headScrollView addSubview:button];
}
/*
苹果新的API增加了addChildViewController方法,并且希望我们在使用addSubview时,同时调用[self addChildViewController:child]方法将sub view对应的viewController也加到当前ViewController的管理中。
对于那些当前暂时不需要显示的subview,只通过addChildViewController把subViewController加进去;需要显示时再调用transitionFromViewController方法。将其添加进入底层的ViewController中。
这样做的好处:
1.无疑,对页面中的逻辑更加分明了。相应的View对应相应的ViewController。
2.当某个子View没有显示时,将不会被Load,减少了内存的使用。
3.当内存紧张时,没有Load的View将被首先释放,优化了程序的内存释放机制。
*/
/**
* 在iOS5中,ViewController中新添加了下面几个方法:
* addChildViewController:
* removeFromParentViewController
* transitionFromViewController:toViewController:duration:options:animations:completion:
* willMoveToParentViewController:
* didMoveToParentViewController:
*/
self.firstVC = [[HMTFirstViewController alloc] init];
[self.firstVC.view setFrame:CGRectMake(0, 104, 320, 464)];
[self addChildViewController:_firstVC];
self.secondVC = [[HMTSecondViewController alloc] init];
[self.secondVC.view setFrame:CGRectMake(0, 104, 320, 464)];
self.thirdVC = [[HMTThirdViewController alloc] init];
[self.thirdVC.view setFrame:CGRectMake(0, 104, 320, 464)];
// 默认,第一个视图(你会发现,全程就这一个用了addSubview)
[self.view addSubview:self.firstVC.view];
self.currentVC = self.firstVC;
}
- (void)didClickHeadButtonAction:(UIButton *)button
{
// 点击处于当前页面的按钮,直接跳出
if ((self.currentVC == self.firstVC && button.tag == 100)||(self.currentVC == self.secondVC && button.tag == 101.)) {
return;
}else{
// 展示2个,其余一样,自行补全噢
switch (button.tag) {
case 100:
[self replaceController:self.currentVC newController:self.firstVC];
break;
case 101:
[self replaceController:self.currentVC newController:self.secondVC];
break;
case 102:
//.......
break;
case 103:
//.......
break;
case 104:
//.......
break;
case 105:
//.......
break;
case 106:
//.......
break;
//.......
default:
break;
}
}
}
// 切换各个标签内容
- (void)replaceController:(UIViewController *)oldController newController:(UIViewController *)newController
{
/**
* 着重介绍一下它
* transitionFromViewController:toViewController:duration:options:animations:completion:
* fromViewController 当前显示在父视图控制器中的子视图控制器
* toViewController 将要显示的姿势图控制器
* duration 动画时间(这个属性,old friend 了 O(∩_∩)O)
* options 动画效果(渐变,从下往上等等,具体查看API)
* animations 转换过程中得动画
* completion 转换完成
*/
[self addChildViewController:newController];
[self transitionFromViewController:oldController toViewController:newController duration:2.0 options:UIViewAnimationOptionTransitionCrossDissolve animations:nil completion:^(BOOL finished) {
if (finished) {
[newController didMoveToParentViewController:self];
[oldController willMoveToParentViewController:nil];
[oldController removeFromParentViewController];
self.currentVC = newController;
}else{
self.currentVC = oldController;
}
}];
}

相关文章推荐
- ios 开发日记 13-剖析网易新闻标签栏视图切换(addChildViewController属性介绍)
- iOS开发 剖析网易新闻标签栏视图切换(addChildViewController属性介绍)
- iOS开发 剖析网易新闻标签栏视图切换(addChildViewController属性介绍)
- iOS开发 剖析网易新闻标签栏视图切换(addChildViewController属性介绍)
- iOS开发 剖析网易新闻标签栏视图切换(addChildViewController属性介绍)
- iOS开发 剖析网易新闻标签栏视图切换(addChildViewController属性介绍)
- iOS开发 剖析网易新闻标签栏视图切换(addChildViewController属性介绍)
- iOS开发 剖析网易新闻标签栏视图切换(addChildViewController属性介绍)
- iOS开发 剖析网易新闻标签栏视图切换(addChildViewController属性介绍)
- iOS开发 剖析网易新闻标签栏视图切换(addChildViewController属性介绍)
- 转载 iOS开发 剖析网易新闻标签栏视图切换(addChildViewController属性介绍)
- iOS开发 剖析网易新闻标签栏视图切换(addChildViewController属性介绍)
- IOS开发—通过ChildViewController实现view的切换
- iOS: 通过addChildViewController实现 Segment 下的 View 的切换
- IOS开发—通过ChildViewController实现view的切换
- iOS开发之使用addChildViewController:给控制器添加子控制器
- iOS开发 addChildViewController的应用
- iOS开发--ChildViewController实现订单页的切换
- iOS: 通过addChildViewController实现 Segment 下的 View 的切换
- iOS: 通过addChildViewController实现 Segment 下的 View 的切换