RedHat EL5 安装Oracle 10g RAC之--Oracle软件安装
2014-05-07 17:39
489 查看
RedHat EL5 安装Oracle 10g RAC之--Oracle软件安装系统环境:
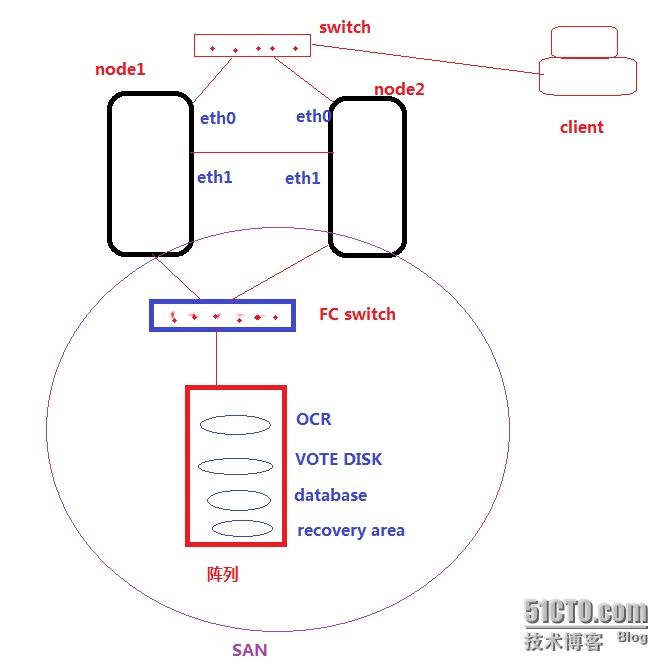
操作系统:RedHat EL5Cluster: Oracle CRS 10.2.0.1.0Oracle: Oracle 10.2.0.1.0如图所示:RAC 系统架构
三、安装Orancle 软件
在构建、配置完成CRS以后,就可以安装Oracle软件
安装需采用图形化方式,以Oracle用户的身份安装(在node1上):注意:修改安装配置文件,增加redhat-5的支持[oracle@node1 install]$ pwd/home/oracle/database/install[oracle@node1 install]$ lsaddLangs.sh images oneclick.properties oraparamsilent.ini responseaddNode.sh lsnodes oraparam.ini resource unzip[oracle@node1 install]$ vi oraparam.ini[Certified Versions]Linux=redhat-3,SuSE-9,redhat-4,redhat-5,UnitedLinux-1.0,asianux-1,asianux-2[oracle@node1 Disk1]$./runInstaller
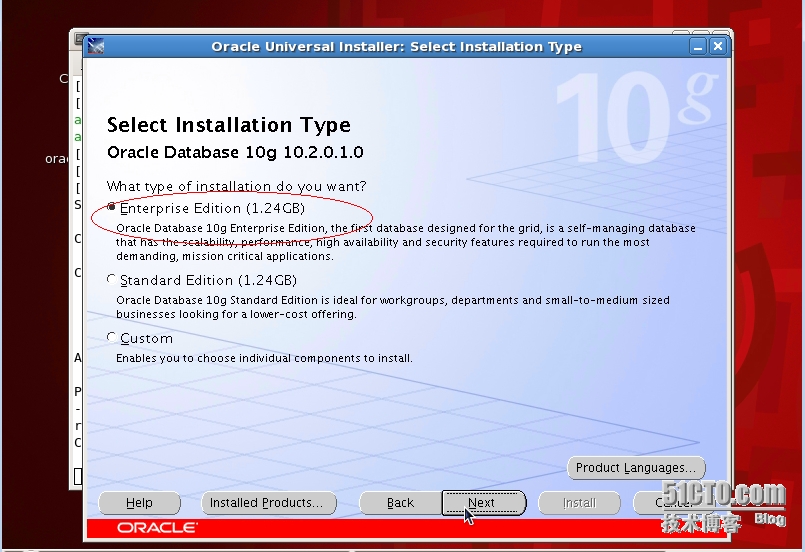
安装Oracle 企业版
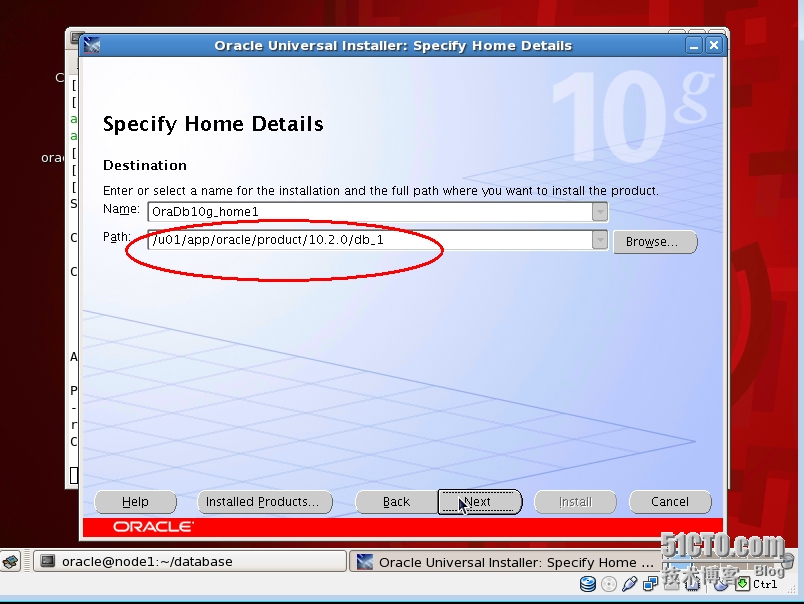
注意安装路径

选择所有node
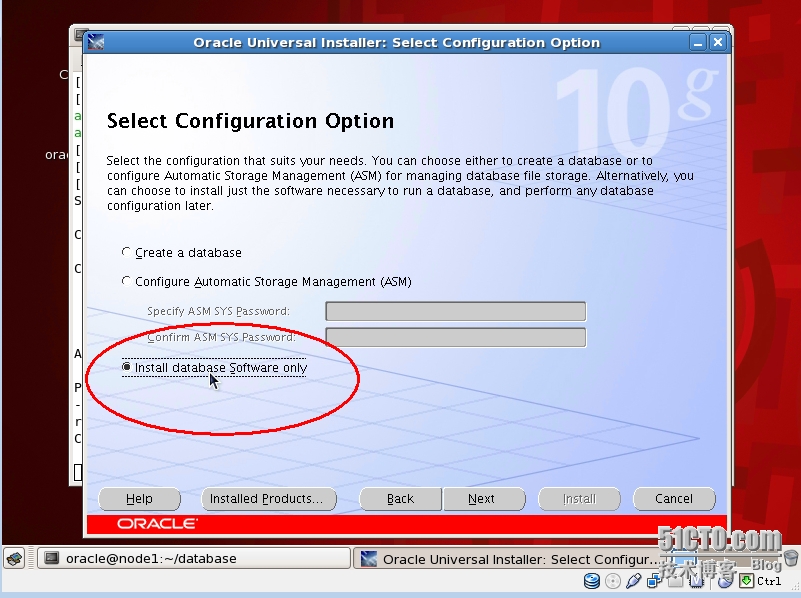
只安装软件
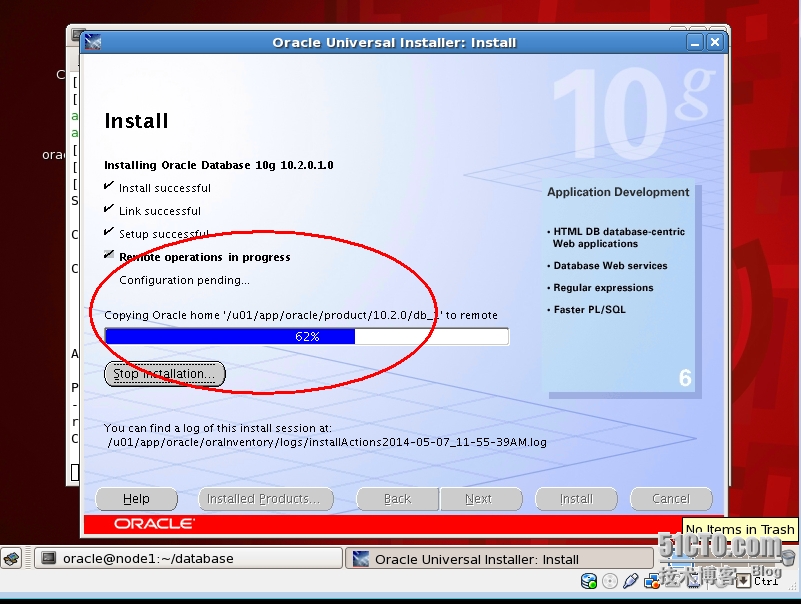
开始安装和传送软件到node2
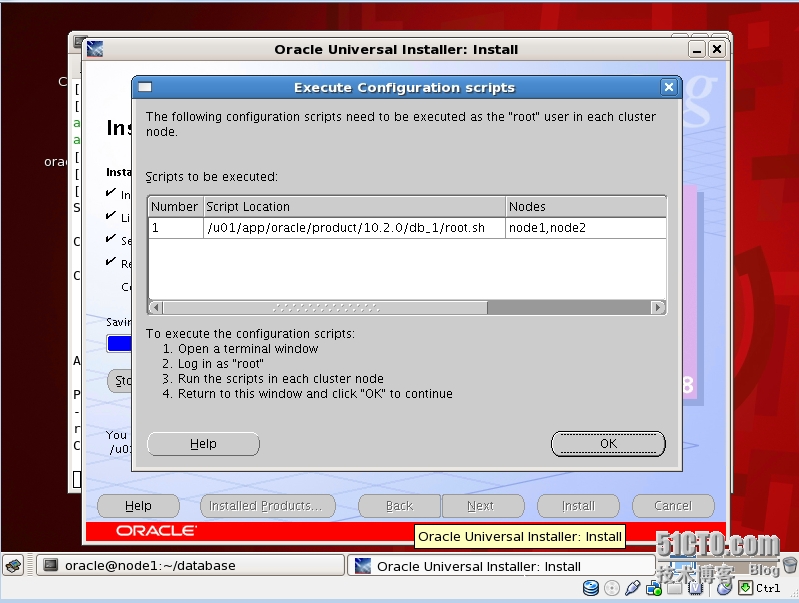
分别在node1和node2,按顺序执行scriptnode1:[root@node1 ~]# /u01/app/oracle/product/10.2.0/db_1/root.sh
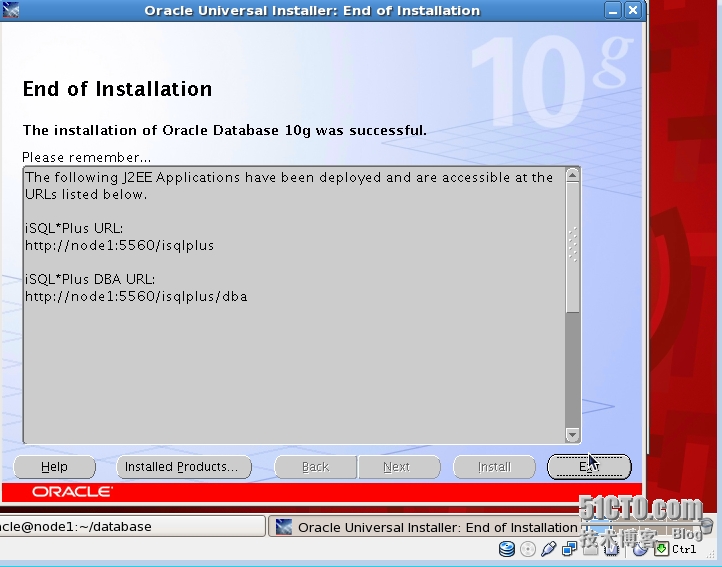
完成安装!本文出自 “天涯客的blog” 博客,请务必保留此出处http://tiany.blog.51cto.com/513694/1408053
操作系统:RedHat EL5Cluster: Oracle CRS 10.2.0.1.0Oracle: Oracle 10.2.0.1.0如图所示:RAC 系统架构
三、安装Orancle 软件
在构建、配置完成CRS以后,就可以安装Oracle软件
安装需采用图形化方式,以Oracle用户的身份安装(在node1上):注意:修改安装配置文件,增加redhat-5的支持[oracle@node1 install]$ pwd/home/oracle/database/install[oracle@node1 install]$ lsaddLangs.sh images oneclick.properties oraparamsilent.ini responseaddNode.sh lsnodes oraparam.ini resource unzip[oracle@node1 install]$ vi oraparam.ini[Certified Versions]Linux=redhat-3,SuSE-9,redhat-4,redhat-5,UnitedLinux-1.0,asianux-1,asianux-2[oracle@node1 Disk1]$./runInstaller
安装Oracle 企业版
注意安装路径
选择所有node
只安装软件
开始安装和传送软件到node2
分别在node1和node2,按顺序执行scriptnode1:[root@node1 ~]# /u01/app/oracle/product/10.2.0/db_1/root.sh
Running Oracle10 root.sh script...
The following environment variables are set as:
ORACLE_OWNER= oracle
ORACLE_HOME=  /u01/app/oracle/product/10.2.0/db_1
Enter the full pathname of the local bin directory: [/usr/local/bin]:
Copying dbhome to /usr/local/bin ...
Copying oraenv to /usr/local/bin ...
Copying coraenv to /usr/local/bin ...
Creating /etc/oratab file...
Entries will be added to the /etc/oratab file as needed by
Database Configuration Assistant when a database is created
Finished running generic part of root.sh script.
Now product-specific root actions will be performed.
node2:
[root@node2 bin]# /u01/app/oracle/product/10.2.0/db_1/root.sh
Running Oracle10 root.sh script...
The following environment variables are set as:
ORACLE_OWNER= oracle
ORACLE_HOME=  /u01/app/oracle/product/10.2.0/db_1
Enter the full pathname of the local bin directory: [/usr/local/bin]:
Copying dbhome to /usr/local/bin ...
Copying oraenv to /usr/local/bin ...
Copying coraenv to /usr/local/bin ...
Creating /etc/oratab file...
Entries will be added to the /etc/oratab file as needed by
Database Configuration Assistant when a database is created
Finished running generic part of root.sh script.
Now product-specific root actions will be performed.
完成安装!本文出自 “天涯客的blog” 博客,请务必保留此出处http://tiany.blog.51cto.com/513694/1408053

相关文章推荐
- RedHat EL5 安装Oracle 10g RAC之--Oracle软件安装
- RedHat EL5 安装Oracle 10g RAC之--系统环境配置(1)
- RedHat EL5 安装Oracle 10g RAC之--建库
- RedHat EL5 安装Oracle 10g RAC之--系统环境配置(2)
- RedHat EL5 安装Oracle 10g RAC之--系统环境配置(1)
- RedHat EL5 安装Oracle 10g RAC之--CRS 安装
- RedHat EL5 安装Oracle 10g RAC之--系统环境配置(2)
- RedHat EL5 安装Oracle 10g RAC之--CRS 安装
- RedHat 5.6_x86_64 + ASM + RAW+ Oracle 10g RAC (九) 添加节点—安装数据库软件
- Solaris 10(x86)构建Oracle 10g RAC之--安装Oracle软件
- Redhat 5.4 + ASM + RAW+ Oracle 10g RAC 安装文档
- Redhat5.4+Oracle 10g RAC+ASM+RAW的安装文档
- Redhat 5.4 Oracle 10g RAC Openfiler+Multipath + RAW+ ASM 安装文档
- Redhat 5.4 + ASM + RAW+ Oracle 10g RAC 安装文档
- RedHat 5.6_x86_64 + ASM + RAW+ Oracle 10g RAC (八) 添加节点—安装clusterware
- Redhat 5.4 Oracle 10g RAC Openfiler+Multipath + RAW+ ASM 安装文档
- redhat 下 oracle 10G RAC 集群 详细安装
- Redhat 5.4 Oracle 10g RAC Openfiler+Multipath + RAW+ ASM 安装文档
- vmware server 1.0 redhat5.4 Oracle 10G RAC 安装文档!
- redhat 下 oracle 10G RAC 集群 详细安装