nagios1------搭建nagios监控环境
2014-03-13 12:59
218 查看
㈡ 实现资源监控
㈢ 图形化MRTG
===============================
nagios-安装
安装前准备
创建用户和用户组# groupadd -r nagios
# useradd -r -c "user for nagios" -s /bin/bash -g nagios nagios
需开启MTA服务。应该先安装完 http 服务再安装 nagios 。
安装nagios
# cd nagios-3.2# ./configure --prefix=/opt/nagios --with-mail=/bin/mail --with-httpd-conf=/etc/httpd/conf.d --with-init-dir=/etc/rc.d/init.d# make all # make install 用来安装主程序,CGI 和HTML 文件# make install-init 创建启动脚本# make install-commandmode 配置目录权限# make install-config 安装示例配置文件# make install-web *① 安装示例配置文件;需要在配置的时候指定apache的安装目录。| ① 执行后,报错。错误是,“没有对应的规则”。<nagios-3.2.3.tar.gz> # vi Makefile /^install-web #在这查看后是应该执行[# make install-webconf] |
安装后目录介绍
| PREFIX/bin可执行程序所在目录PREFIX/etc配置文件所在目录PREFIX/sbin CGI 文件所在目录,即执行外部命令所需文件目录PREFIX/share 网页文件所在目录PREFIX/libexec 外部插件所在目录PREFIX/var 日志文件、lock 等文件PREFIX/var/archives 日志自动归档目录PREFIX/var/rw 存放外部命令文件的目录 |
安装nagios插件
# cd nagios-plugins-1.5 # ./configure --prefix=/opt/nagios # make # make install# cd nagios-cn-3.2# ./configure # make all # make install
安装配置web服务
注意:nagios 在nagios-3.1.x 版本以后,配置web 监控界面时需要php 的支持。安装# cd httpd-2.0.65# ./configure --prefix=/opt/apache2# make # make install# cd php-5.3.2 # ./configure --prefix=/opt/php --with-apxs2=/opt/apache2/bin/apxs # make # make install
配置
# vi /opt/nagios/conf/httpd.conf (添加或修改)User nagiosGroup nagiosLoadModule php5_module modules/libphp5.soDirectoryIndex index.html index.phpAddType application/x-httpd-php .php
为了安全,一般让nagios 的web 监控界面必须经过授权才能访问,这需要增加验证配置,于是修改httpd.conf, 添加:#Setting for nagios ScriptAlias /nagios/cgi-bin “/opt/nagios/sbin” <Directory “/opt/nagios/sbin”> AuthType Basic Options ExecCGI AllowOverrideNone Order allow,deny Allow from all AuthName “Nagios Access” AuthUserFile /opt/nagios/etc/htpasswds (名字比下边多个“s”) Require valid-user </Directory> Alias /nagios “/opt/nagios/share” <Directory “/opt/nagios/share”> AuthType Basic Options None AllowOverride None Order allow,deny Allow from all AuthName “Nagios Managements” AuthUserFile /opt/nagios/etc/htpasswd Require valid-user </Directory>
附件中有自动生成的格式:# SAMPLE CONFIG SNIPPETS FOR APACHE WEB SERVER
#
# This file contains examples of entries that need
# to be incorporated into your Apache web server
# configuration file. Customize the paths, etc. as
# needed to fit your system.
ScriptAlias /nagios/cgi-bin "/usr/nagios/sbin"
<Directory "/usr/nagios/sbin">
# SSLRequireSSL
Options ExecCGI
AllowOverride None
Order allow,deny
Allow from all
# Order deny,allow
# Deny from all
# Allow from 127.0.0.1
AuthName "Nagios Access"
AuthType Basic
AuthUserFile /usr/nagios/etc/htpasswd.users
Require valid-user
</Directory>
Alias /nagios "/usr/nagios/share"
<Directory "/usr/nagios/share">
# SSLRequireSSL
Options None
AllowOverride None
Order allow,deny
Allow from all
# Order deny,allow
# Deny from all
# Allow from 127.0.0.1
AuthName "Nagios Access"
AuthType Basic
AuthUserFile /usr/nagios/etc/htpasswd.users
Require valid-user
</Directory>
创建apache 目录验证文件
# /opt/nagios/bin/htpasswd -c -s /opt/nagios/etc/htpasswd admin# /opt/nagios/bin/htpasswd -c -s /opt/nagios/etc/htpasswds root
# chown -R nagios.nagios /opt/nagios
启动服务
# /usr/local/apache2/bin/apachectl start# /etc/init.d/nagios start# ps -ef
===============================
NRPE
上边的安装过程可以实现公共服务的监控。如果需要监控到远程主机的本地资源,就需要这里再进行nrpe的安装设置。
安装 check_nrpe 插件工作于 nagios server 端。安装 nrpe守护进程在被监控端(远程主机)。nagios server 执行 check_nrpe 插件,联系 nrpe 守护进程,获取远程主机的本地资源信息并反馈给nagios server。
| nagios:中央红军5人工作小组。 check_nrpe:中央军委。 nrpe守护进程(NRPE):野战军指挥员。 |
远程主机(NRPE):提示符 “hhh# ”
服务端和客户端都执行:提示符“&# ”
hhh# vi /etc/services
| nrpe 5666/tcp # NRPE |
&# cd /usr/src/nrpe-1.5
&# ./configure --prefix=/usr/local/nagios
这里指定 “--prefix” 不是必须的,这里完成的安装是手工完成的。编译后,目录里有个文件可以用来在被监控端管理 nrpe 服务:“init-script”。这里体现了自由软件是多么的自由啊。
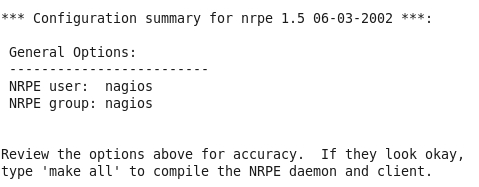
上图最后一行显示,编译出的同时有守护进程和插件;server 端和 client 端都要执行一次编译安装。
&# make all
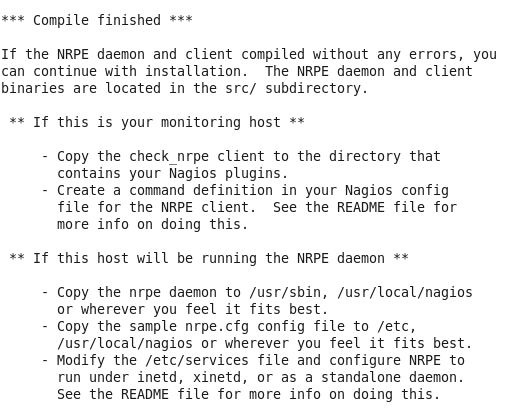
上图显示编译得到服务端程序和客户端程序:nrpe check_nrpe。服务端采用服务托管(不是必然)。
托管方式有两种,任选其一;就是系统使用的是那一个。centos 6使用的是xined(这里默认)。
| * ①xinetd ②inetd |
| # default: on # description: NRPE service nrpe { flags = REUSE socket_type = stream wait = no user = nagios server = /usr/sbin/nrpe server_args = -i /etc/nrpe.cfg log_on_failure += USERID disable = no only_from = 192.168.0.180 # 192.168.0.180 是 nagios server 的 IP 地址。 } |
| #nrpe stream tcp nowait <user> /usr/sbin/tcpd <nrpebin> -i <nrpecfg> nrpe stream tcp nowait nagios /usr/sbin/nrpe -i /etc/nrpe.cfg |
hhh# cp src/nrpe /usr/sbin/
# cp src/check_nrpe /usr/local/nagios/libexec/
# chown nagios.nagios /usr/local/nagios/libexec/check_nrpe
hhh# nrpe -d /etc/nrpe.cfg (测试服务进程是否可以正常启动;实际使用还是托管的好。)
hhh# netstat -nltp (随系统启动如果不想托管,这么个演示也就给出答案了。)
hhh# lsof -i:5666
hhh# vi /etc/nrpe.cfg (这个文件还需要进一步配置才能得到想要的结果。略)
| 服务的启动停止 *① hhh# /etc/rc.d/init.d/xinetd restart | start | stop *② hhh# /etc/rc.d/init.d/xinetd restart | start | stop hhh# /usr/sbin/nrpe -d /etc/nrpe.cfg hhh# netstat -nltp | grep nrpe hhh# kill 4366 |
| define command{ command_name check_nrpe command_line $USER1$/check_nrpe $HOSTADDRESS$ -c $ARG1$ } |
hhh# ./check_nrpe localhost -p 5666 (使用默认端口的话不用指定“-p 5666”)
# ./check_nrpe 192.168.0.180 -p 5666
……………………………………………………
* 有些资料显示该插件使用时需要“-H”指定指定主机IP,这个就看该插件的语法了。
被监控端(远程主机)需要安装一次插件。
如果测试不成功,需要检查配置文件,是否配置正确。略
===============================
MRTG
| MRTG安装配置启动 http://sunnybay.blog.51cto.com/2249903/1417127 |
生成 nagios 性能状态图
# vi /usr/src/nagios-3.2/sample-config/mrtg.cfg

节选一段,可以跟下边要修改的地方做个对比。
# cp /usr/src/nagios-3.2/sample-config/mrtg.cfg /usr/local/mrtg /etc/mrtg/nagios.mrtg
# cat /etc/mrtg/nagios.mrtg >> /etc/mrtg/mrtg.cfg
# vi /usr/src/nagios-3.2/sample-config/mrtg.cfg.in

这个路径需要弄得合适。
# cp /usr/src/nagios-3.2/sample-config/mrtg.cfg.in /usr/local/mrtg /etc/mrtg/nagios.mrtg2
# cat /etc/mrtg/nagios.mrtg2 >> /etc/mrtg/mrtg.cfg
# vi /usr/local/apache2/conf.d/mrtg.conf
Alias /mrtg /usr/local/httpd/htdocs/mrtg_nagios
<Directory>
......
*******************
over !

本文出自 “小崔的实验笔记” 博客,谢绝转载!

相关文章推荐
- 搭建基于nginx环境的nagios监控系统 推荐
- 一起搭建linux监控平台之nagios(一)lamp环境
- 搭建基于nginx环境的nagios监控系统
- linux系统下Nagios+rrdtool+Pnp4nagios监控环境的搭建
- 一起搭建linux监控平台之nagios(二)监控端环境部署
- nagios监控之(运行环境搭建)
- nagios监控环境搭建
- Nagios监控环境搭建
- 一起搭建linux监控平台之nagios(三)被监控端的环境部署
- nagios 监控环境搭建
- ubuntu下nagios监控环境搭建
- nagios环境搭建与监控mysql,脚本编写
- Grafana监控可视化环境搭建
- (搜集)centos 搭建postfix+extmail并用nagios监控
- Nagios监控平台搭建--安装篇
- (原创)CentOS环境下搭建Nagios系统
- Ganglia环境搭建并监控Hadoop分布式集群
- nagios搭建服务器监控系统
- 生产环境开源监控系统整合Nagios+Cacti+Nconf
- Linux下nginx+nagios 监控平台搭建