The basics of using ui-router with AngularJS
2014-01-17 10:53
225 查看
URL routing is a popular approach to matching the contents of a URL to specific functionality within a web application. URL routes programatically present specific content to users based on the URL that they are visiting. It is a popular approach that has proven to be very effective.
Something that might not be obvious is that URL routing is also a finite state machine. When you configure the routing for an app, you are laying out the various states the application can be in, and informing the application what to display and do when a specific route is encountered.
AngularJS supplies URL routing by default. It is adequate, but also has some limitations.
In this case,
I’m not going to explore this option. I’m not particularly fond of it.
Why not?
The
The state of the main content area is captured and stored on a model
It feels like “logic in markup”, which I try to avoid
If you go down the
You need to think about your routing a bit differently, but once you get your head around the state-based approach, I think you will like it.
This example is functionally very similar to the
The above code is the configuration for the router. We are defining the
After the states are defined, they are added to the
the
The
Passing data between states
Listening for state events
Named views (love this, it deserves its own post)
URL Routing
The ui-router README warns that the utility is still in active early development. The API is still subject to change, so if you choose ui-router for your next project, that is something to be aware of.
Let me know if you’d like me to explore ui-router a bit deeper in future posts. I think it is an excellent approach to routing, and look forward to using it more.
Update: I’ve recorded a screencast about ui-router for egghead.io.
Update 2: Here’s a screencast about ui-router’s named views that I recorded for egghead.io. (note: it is paid/subscription content)
Something that might not be obvious is that URL routing is also a finite state machine. When you configure the routing for an app, you are laying out the various states the application can be in, and informing the application what to display and do when a specific route is encountered.
AngularJS supplies URL routing by default. It is adequate, but also has some limitations.
So what’s the problem?
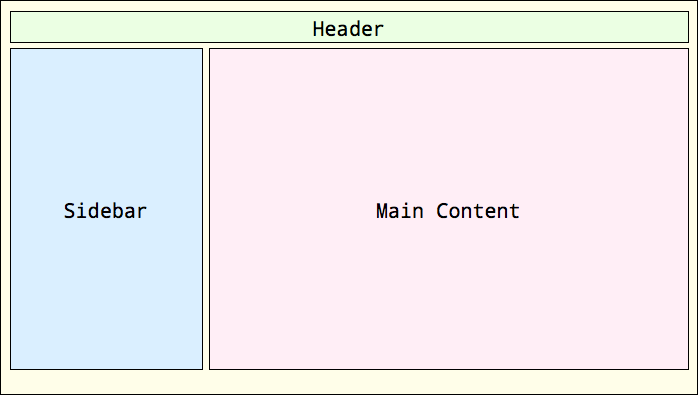
Looking at the structure above, imagine an application where interacting with items on the header or the sidebar causes the main content to load completely different HTML. AngularJS provides a mechanism for this withng-switch. You can see a (very simple) example of this below.
In this case,
ng-switchis swapping out
divelements, but you can also use this approach to swap out templates using
ng-include.
I’m not going to explore this option. I’m not particularly fond of it.
Why not?
The
ng-switchadds markup that could be confusing
The state of the main content area is captured and stored on a model
It feels like “logic in markup”, which I try to avoid
If you go down the
ng-includeroad, you need to remember to always put single quotes around your template names. I always forget. ;<
ui-router
ui-router fully embraces the state-machine nature of a routing system. It allows you to define states, and transition your application to those states. The real win is that it allows you to decouple nested states, and do some very complicated layouts in an elegant way.You need to think about your routing a bit differently, but once you get your head around the state-based approach, I think you will like it.
This example is functionally very similar to the
ng-switchapproach. The main difference is that the main content area is populated with templated HTML for each of the states, without using switching or
ng-include.
1 2 3 4 5 6 7 8 9 10 11 12 13 14 15 16 17 18 19 20 21 22 23 24 25 26 27 28 29 30 31 | angular.module('app', ['ui.compat'])
.config(['$stateProvider', function ($stateProvider) {
var home = {
name: 'home',
url: '/',
templateUrl: 'content.html'
},
red = {
name: 'red',
url: '/red',
parent: home,
templateUrl: 'content.red.html'
},
blue = {
name: 'blue',
url: '/blue',
parent: home,
templateUrl: 'content.blue.html'
},
green = {
name: 'green',
url: '/green',
parent: home,
templateUrl: 'content.green.html'
};
$stateProvider.state(home);
$stateProvider.state(red);
$stateProvider.state(green);
$stateProvider.state(blue);
}]) |
module, but instead of injecting
$routeProvideras we would with stock AngularJS, we are injecting a
$stateProviderthat is used to define the states. We are defining 4 states.
homeis the parent state of the next 3. It defines the header, siderbar, and the
ui-viewelement that will be populated with the child states.
redis the first child state. It references the
homeas its parent, as well as targeting its own template.
blueand
greenare identical to
red, but use different templates.
After the states are defined, they are added to the
$stateProvider. They are now ready to be navigated to.
1 2 3 | .run(['$state', function ($state) {
$state.transitionTo('home');
}]) |
runmethod is a great place to navigate to your intial state. You are able to inject the now-resolved
$stateobject and use its
transitionTomethod to set
homeas the current state.
1 2 34 | .controller('SidebarCtrl', function ($scope, $state) {
$scope.content = ['red', 'green', 'blue'];
$scope.setPage = function (page) {
$state.transitionTo(page);
}; |
SidebarCtrllists contains a simple array called content on its
$scopewhich is used in a
ng-repeatto give us a simple menu. When one of those items is clicked the
setPagefunction is called with the item that was clicked. In this case, the content items correspond to the names of the states that we’ve defined, so we simply
transitionTothe selected state to display the content of that state.
Next steps with ui-router
This only really scratches the very surface of what you can pull off with ui-router. There are a ton of options and the wiki is well put together. Some things I didn’t explore, but that are available:Passing data between states
Listening for state events
Named views (love this, it deserves its own post)
URL Routing
The ui-router README warns that the utility is still in active early development. The API is still subject to change, so if you choose ui-router for your next project, that is something to be aware of.
Let me know if you’d like me to explore ui-router a bit deeper in future posts. I think it is an excellent approach to routing, and look forward to using it more.
Update: I’ve recorded a screencast about ui-router for egghead.io.
Update 2: Here’s a screencast about ui-router’s named views that I recorded for egghead.io. (note: it is paid/subscription content)

相关文章推荐
- The basics of using ui-router with AngularJS
- A Better $state.reload for the AngularJS UI-Router
- AngularJS Routing Using UI-Router
- 【ionic+angularjs】angularjs ui-router路由简介($urlRouter、$state、$stateProvider、ui-sref....)
- angularjs ui-router
- Handle unmanaged code in managed c# with the help of using statement
- angular.js学习 ui-router 0.2.15
- AngularJS ui-router
- [Redux] Using withRouter() to Inject the Params into Connected Components
- AngularJS ui-router
- AngularJs、RequireJs、AngularAMD、ui-router搭建的JS文件动态加载
- angularjs ui-router传值
- angularjs ui-router 动态切换视图到指定的ui-view中
- AngularJS ui-router (嵌套路由)
- angularjs ui-router路由移除#解决方案
- UI-Router:为什么开发者都不喜欢Angular.js内置的路由
- Description of the default C and C++ libraries that a program will link with when built by using Vis
- angular.js之ui.router篇
- 【翻译】oc.lazyLoad with Angular ui router(按需加载文件)
- [Angular2 Router] Lazy Load Angular 2 Modules with the Router