C#创建、安装一个Windows服务
2013-08-29 14:50
309 查看
关于WIndows服务的介绍,之前写过一篇:http://blog.csdn.net/yysyangyangyangshan/article/details/7295739。可能这里对如何写一个服务不是很详细。现在纯用代码的形式介绍一下windows服务是如何开发和安装的。
开发环境:Win7 32位;工具:visualstudio2010。
因为win7自带的就有.net环境,算是偷一下懒吧。因为无论是手动安装或程序安装都要用到。一个目录(默认C盘为操作系统的情况):C:\Windows\Microsoft.NET\Framework,如果你的代码是.net2.0:C:\Windows\Microsoft.NET\Framework\v2.0.50727;4.0:C:\Windows\Microsoft.NET\Framework\v4.0.30319。
下面看一下代码:
一、创建windows服务
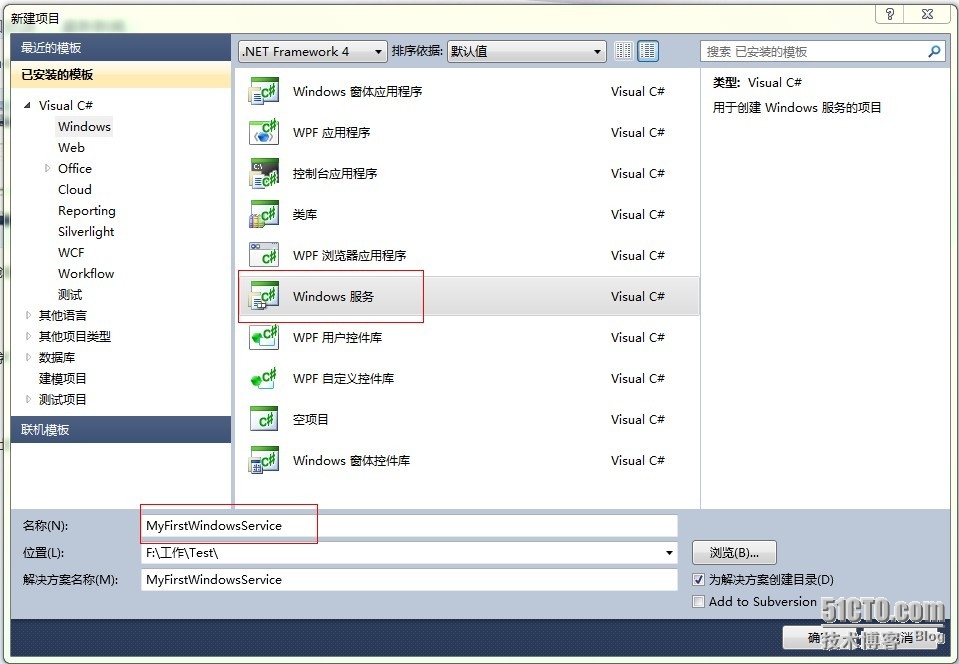
如图新建一个Windows服务
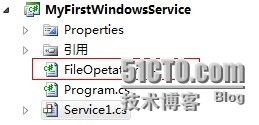
进入程序如图

空白服务如下
如图
创建一个类,用户写文件,
那么在Service1中调用,
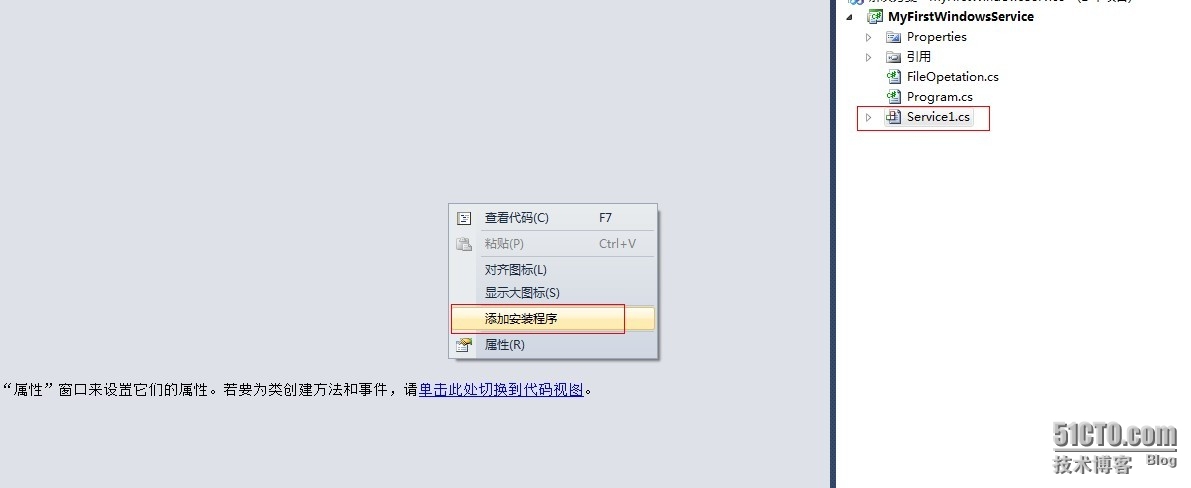
如图,在service1上右键-添加安装程序,
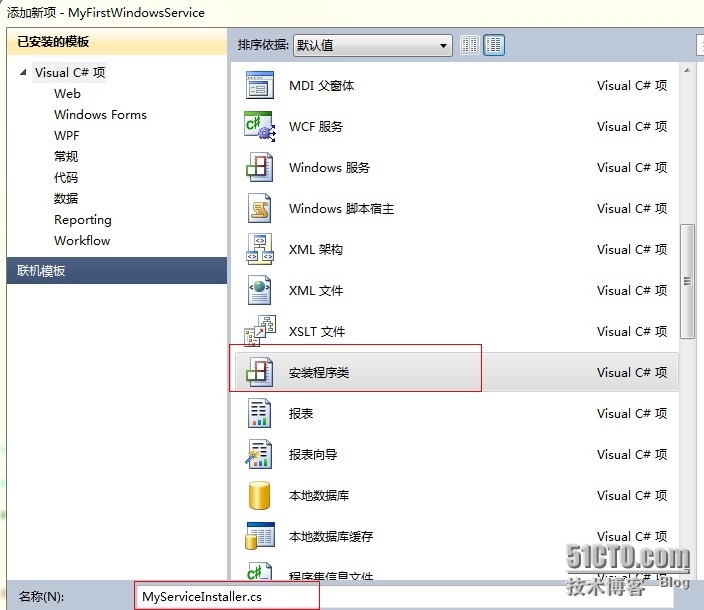
如图,添加一个安装程序,
如图,添加完成后,
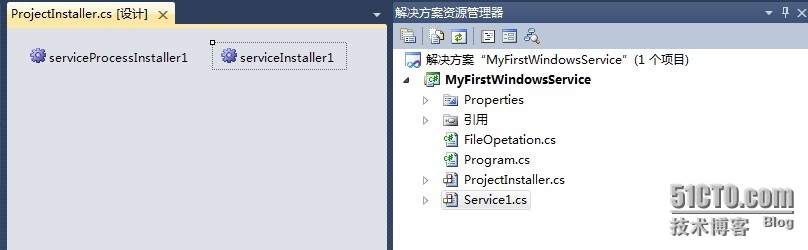
设置相应的属性,给serviceInstaller1设置属性,主要是描述信息。如图,
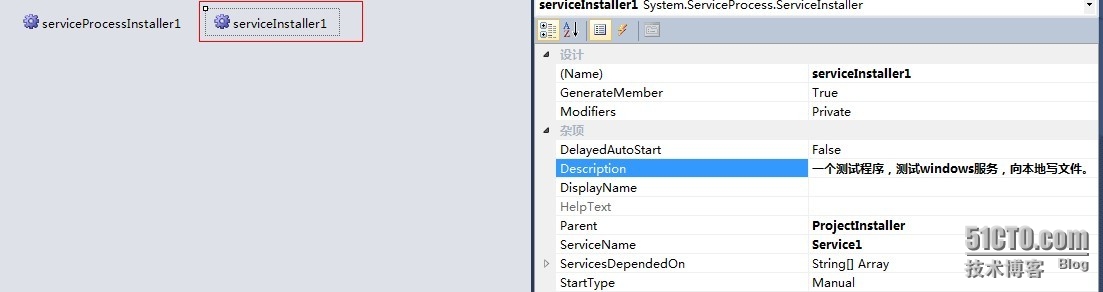
给serviceProcessInstaller1设置,主要是account。一般选localsystem,如图,

这样服务已经写好了。那么如何添加到windows服务里面去呢。除了之前说过的用CMD,InstallUtil.exe和服务的exe文件进行手动添加。这些可以用代码来实现的。当然主要过程都是一样的。代码实现也是使用dos命令来完成的。
二、代码安装Windows服务
上面写好的服务,最终生成的是一个exe文件。如图,

安装程序安装时需要用到这个exe的路径,所以方便起见,将这个生成的exe文件拷贝至安装程序的运行目录下。
安装代码,
运行完后,如图,

再在安装目录下看记录的文件,

这样,一个windows服务安装成功了。代码下载:http://download.csdn.net/detail/yysyangyangyangshan/6032671
本文出自 “西北白杨树” 博客,转载请与作者联系!
开发环境:Win7 32位;工具:visualstudio2010。
因为win7自带的就有.net环境,算是偷一下懒吧。因为无论是手动安装或程序安装都要用到。一个目录(默认C盘为操作系统的情况):C:\Windows\Microsoft.NET\Framework,如果你的代码是.net2.0:C:\Windows\Microsoft.NET\Framework\v2.0.50727;4.0:C:\Windows\Microsoft.NET\Framework\v4.0.30319。
下面看一下代码:
一、创建windows服务
如图新建一个Windows服务
进入程序如图
空白服务如下
public partial class Service1 : ServiceBase
{
System.Threading.Timer recordTimer;
public Service1()
{
InitializeComponent();
}
protected override void OnStart(string[] args)
{
}
protected override void OnStop()
{
}
}只要在OnStart里完成你的功能代码即可。本例中我们做一个定时向本地文件写记录的功能。如图
创建一个类,用户写文件,
public class FileOpetation
{
/// <summary>
/// 保存至本地文件
/// </summary>
/// <param name="ETMID"></param>
/// <param name="content"></param>
public static void SaveRecord(string content)
{
if (string.IsNullOrEmpty(content))
{
return;
}
FileStream fileStream = null;
StreamWriter streamWriter = null;
try
{
string path = Path.Combine(System.AppDomain.CurrentDomain.SetupInformation.ApplicationBase, string.Format("{0:yyyyMMdd}", DateTime.Now));
using (fileStream = new FileStream(path, FileMode.Append, FileAccess.Write))
{
using (streamWriter = new StreamWriter(fileStream))
{
streamWriter.Write(content);
if (streamWriter != null)
{
streamWriter.Close();
}
}
if (fileStream != null)
{
fileStream.Close();
}
}
}
catch { }
}
}
那么在Service1中调用,
public partial class Service1 : ServiceBase
{
System.Threading.Timer recordTimer;
public Service1()
{
InitializeComponent();
}
protected override void OnStart(string[] args)
{
IntialSaveRecord();
}
protected override void OnStop()
{
if (recordTimer != null)
{
recordTimer.Dispose();
}
}
private void IntialSaveRecord()
{
TimerCallback timerCallback = new TimerCallback(CallbackTask);
AutoResetEvent autoEvent = new AutoResetEvent(false);
recordTimer = new System.Threading.Timer(timerCallback, autoEvent, 10000, 60000 * 10);
}
private void CallbackTask(Object stateInfo)
{
FileOpetation.SaveRecord(string.Format(@"当前记录时间:{0},状况:程序运行正常!", DateTime.Now));
}
}这样服务算是写的差不多了,下面添加一个安装类,用于安装。如图,在service1上右键-添加安装程序,
如图,添加一个安装程序,
如图,添加完成后,
设置相应的属性,给serviceInstaller1设置属性,主要是描述信息。如图,
给serviceProcessInstaller1设置,主要是account。一般选localsystem,如图,
这样服务已经写好了。那么如何添加到windows服务里面去呢。除了之前说过的用CMD,InstallUtil.exe和服务的exe文件进行手动添加。这些可以用代码来实现的。当然主要过程都是一样的。代码实现也是使用dos命令来完成的。
二、代码安装Windows服务
上面写好的服务,最终生成的是一个exe文件。如图,
安装程序安装时需要用到这个exe的路径,所以方便起见,将这个生成的exe文件拷贝至安装程序的运行目录下。
安装代码,
class Program
{
static void Main(string[] args)
{
Application.EnableVisualStyles();
Application.SetCompatibleTextRenderingDefault(false);
string sysDisk = System.Environment.SystemDirectory.Substring(0,3);
string dotNetPath = sysDisk + @"WINDOWS\Microsoft.NET\Framework\v4.0.30319\InstallUtil.exe";//因为当前用的是4.0的环境
string serviceEXEPath = Application.StartupPath+@"\MyFirstWindowsService.exe";//把服务的exe程序拷贝到了当前运行目录下,所以用此路径
string serviceInstallCommand = string.Format(@"{0}  {1}", dotNetPath, serviceEXEPath);//安装服务时使用的dos命令
string serviceUninstallCommand = string.Format(@"{0} -U {1}", dotNetPath, serviceEXEPath);//卸载服务时使用的dos命令
try
{
if (File.Exists(dotNetPath))
{
string[] cmd = new string[] { serviceUninstallCommand };
string ss = Cmd(cmd);
CloseProcess("cmd.exe");
}
}
catch
{
}
Thread.Sleep(1000);
try
{
if (File.Exists(dotNetPath))
{
string[] cmd = new string[] { serviceInstallCommand };
string ss = Cmd(cmd);
CloseProcess("cmd.exe");
}
}
catch
{
}
try
{
Thread.Sleep(3000);
ServiceController sc = new ServiceController("MyFirstWindowsService");
if (sc != null && (sc.Status.Equals(ServiceControllerStatus.Stopped)) ||
(sc.Status.Equals(ServiceControllerStatus.StopPending)))
{
sc.Start();
}
sc.Refresh();
}
catch
{
}
}
/// <summary>
/// 运行CMD命令
/// </summary>
/// <param name="cmd">命令</param>
/// <returns></returns>
public static string Cmd(string[] cmd)
{
Process p = new Process();
p.StartInfo.FileName = "cmd.exe";
p.StartInfo.UseShellExecute = false;
p.StartInfo.RedirectStandardInput = true;
p.StartInfo.RedirectStandardOutput = true;
p.StartInfo.RedirectStandardError = true;
p.StartInfo.CreateNoWindow = true;
p.Start();
p.StandardInput.AutoFlush = true;
for (int i = 0; i < cmd.Length; i++)
{
p.StandardInput.WriteLine(cmd[i].ToString());
}
p.StandardInput.WriteLine("exit");
string strRst = p.StandardOutput.ReadToEnd();
p.WaitForExit();
p.Close();
return strRst;
}
/// <summary>
/// 关闭进程
/// </summary>
/// <param name="ProcName">进程名称</param>
/// <returns></returns>
public static bool CloseProcess(string ProcName)
{
bool result = false;
System.Collections.ArrayList procList = new System.Collections.ArrayList();
string tempName = "";
int begpos;
int endpos;
foreach (System.Diagnostics.Process thisProc in System.Diagnostics.Process.GetProcesses())
{
tempName = thisProc.ToString();
begpos = tempName.IndexOf("(") + 1;
endpos = tempName.IndexOf(")");
tempName = tempName.Substring(begpos, endpos - begpos);
procList.Add(tempName);
if (tempName == ProcName)
{
if (!thisProc.CloseMainWindow())
thisProc.Kill(); // 当发送关闭窗口命令无效时强行结束进程
result = true;
}
}
return result;
}
}这段代码其实可以放在项目中的某个地方,或单独执行程序中,只好设置好dotNetPath和serviceEXEPath路径就可以了。运行完后,如图,
再在安装目录下看记录的文件,
这样,一个windows服务安装成功了。代码下载:http://download.csdn.net/detail/yysyangyangyangshan/6032671
本文出自 “西北白杨树” 博客,转载请与作者联系!

相关文章推荐
- C#创建、安装一个Windows服务
- C#创建服务及使用程序自动安装服务,.NET创建一个即是可执行程序又是Windows服务的exe(转)
- C#创建、安装一个Windows服务
- C#创建服务及使用程序自动安装服务,.NET创建一个即是可执行程序又是Windows服务的exe
- [转]C#创建服务及使用程序自动安装服务,.NET创建一个即是可执行程序又是Windows服务的exe
- C#创建服务及使用程序自动安装服务,.NET创建一个即是可执行程序又是Windows服务的exe
- C#创建、安装一个Windows服务
- C#创建、安装一个Windows服务
- C#创建服务及使用程序自动安装服务,.NET创建一个即是可执行程序又是Windows服务的exe
- C#创建Windows服务与安装-图解
- C# 利用 Windows服务模板 创建、安装与卸载Windows服务
- C#使用定时任务框架Windows.TaskSchedule.exe安装控制台应用程序创建的Windows服务
- C#创建Windows服务与安装-图解
- C#创建Windows服务与安装-图解
- 创建一个强名称密钥文件+ 如何在 Visual C# .NET 中将程序集安装到全局程序集缓存中
- C#创建Window服务图解,安装、配置、以及C#操作Windows服务
- C#创建Windows服务与安装-图解
- C#创建、设置和安装Windows服务
- 使用C#创建一个进程杀手Windows服务
- 利用C#创建一个简单的Windows服务