运维自动化之使用PHP+MYSQL+SHELL打造私有监控系统(七)
2012-10-24 14:17
816 查看
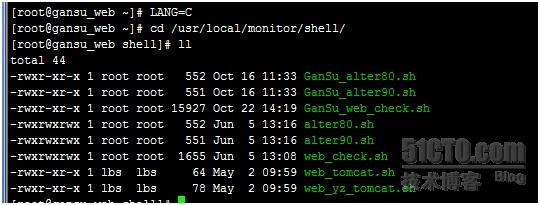
[align=left]X、create_province.sh脚本内容[/align]
[align=left]Y、数据视图化shell脚本[/align]
[align=left]每个省份都是单独的一个shell脚本,脚本里包含各种省份以年、月、日为时间,以web、交换、引擎、备用、数据库为服务器类型,以disk、io、load、memory、user为视图化的服务。[/align]
[align=left]下面是甘肃省份的数据视图化脚本,名字为gansu.sh,运行在php程序的images文件里,使用nohup sh gansu.sh &运行[/align]
[align=left]由于脚本内容非常的多,在word里超过200页,所以就不展示了,脚本我会放到最后一页的附件里。[/align]
[align=left]7、如何部署[/align]
[align=left](1)、shell监控脚本部署[/align]
[align=left]把shell监控脚本存放到/usr/local/monitor/shell目录,给予755权限,然后再crontab里输入*/3 * * * * /usr/local/monitor/shell/脚本内容,使每3分钟轮询运行脚本。[/align]
[align=left](2)mysql数据库部署[/align]
[align=left]可以使用create_database.sh脚本进行部署,也可以使用create_province.sh脚本部署。[/align]
[align=left](3)php程序部署[/align]
[align=left]先把php程序部署到服务器里,然后添加省份的时候,使用create_province.sh来进行添加,方法为:[/align]
[align=left]1、使用sh create_province.sh运行脚本[/align]
[align=left]2、如果添加脚本在数据库里数据库表存在,就会出现以下情况[/align]

[align=left]如果不存在[/align]

[align=left]你可以输入yes或no来选择是否创建数据库表与进行添加相应省份的php文件(注意只有10秒钟的等待时间,为了节省服务器资源,我使用了read -n参数)[/align]
[align=left]输入完yes后,结果如下[/align]

[align=left]可以看到数据库表创建完成,php监控的省份添加完成[/align]
[align=left]之后你在web里就能直接观看添加省份的监控[/align]
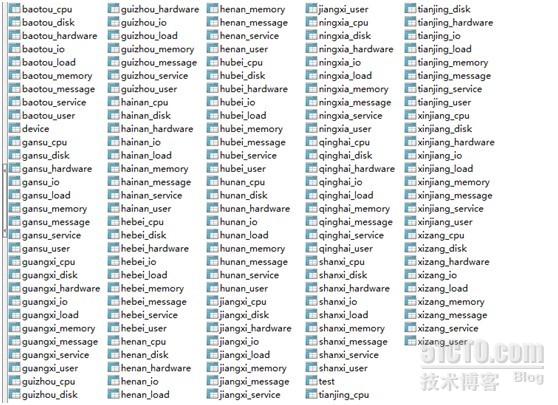
[align=left]添加省份的数据视图化的shell文件,可以使用create_gnuplot.sh来进行添加,内容如下[/align]
[align=left]8、维护与升级[/align]
[align=left]1、维护[/align]
[align=left]由于采用了时间方法的日志分钟,每3分钟检测一次 ,所以日常维护非常的方便,只要各位在目录的logs里,查看到有当天日志文件产生,在查看当天日志文件是否为每3分钟检测一次,如果满足上述条件,则此脚本正常运行。[/align]
[align=left]2、升级[/align]
[align=left]在升级的时候,为了避免部署新的程序时监控系统检测不到相应的应用服务,而且还收到了服务宕掉的邮件提示,各位在部署新程序时,应在相应用户里(部署监控系统crontab -e所在的用户)里,在监控系统自动启动检测的那一行里,在前面加上#,例如,在交换服务器里部署新的程序,需要在root用户下,输入crontab -e,然后在*/3 * * * * /usr/local/monitor/shell/监控脚本内容的最前面,加上#,最后的结果为#*/3 * * * * /usr/local/monitor/shell/监控脚本。[/align]
[align=left]9、完整监控系统页面展示[/align]
[align=left](1)shell部分[/align]
[align=left]各省都有各自的shell监控脚本,我以甘肃web为例[/align]
[align=left](2)mysql数据库部分[/align]
[align=left]我截图所有mysql数据表[/align]
[align=left](3)php程序部分[/align]
[align=left]由于在首页里已经有了php界面展示,所以现在就不展示了。[/align]
[align=left]现在这个php+mysql+shell已经成功的对生产平台监控了3个月,符合我之前的监控要求,能节省我更多的时间去做更多有用的事,现在查看平台也不需要在进入后台一个一个的查看了,可以查看各省的监控详情与监控视图,更方便的了解平台应用服务与资源的运行情况,希望我这个监控系统能对大家有更好的启发,如果您有疑问或者好的观点,希望您能留言给我,谢谢![/align]本文出自 “吟―技术交流” 博客,请务必保留此出处http://dl528888.blog.51cto.com/2382721/1035335
#!binbash
LANG="zh_CN.UTF-8"
LANG=C
#mysql info
mysql_ip='1.1.1.1'
##数据库的ip
mysql_username='root'
##数据库的用户名
mysql_passwd='****'
##数据库的密码
mysql_database='monitor'
##登录的数据库
new_here='shanxi'
##需要添加的省份中文拼音
new_name='陕西'
##需要添加省份的中文名称
old_here='gansu'
##已经添加过省份中文拼音
old_name='甘肃'
##已经添加过的省份中文名字
memory_table=''$new_here'_memory'
load_table=''$new_here'_load'
io_table=''$new_here'_io'
hardware_table=''$new_here'_hardware'
message_table=''$new_here'_message'
user_table=''$new_here'_user'
disk_table=''$new_here'_disk'
cpu_table=''$new_here'_cpu'
service_table=''$new_here'_service'
monitor_dir='/tmp/monitor'
##当前php监控存放的位置
test_dir='/tmp/old'
##如果想添加新省份,临时存放的位置
#create table module
create_table ()
{
#create table memory
mysql -h $mysql_ip -u$mysql_username -p$mysql_passwd $mysql_database -e "create table $memory_table(id int(10) not null primary key auto_increment,province varchar(30) not null,server varchar(30) not null,ip varchar(20) not null,monitor_server varchar(30) not null,service varchar(20) not null,alert int(10) not null,value int(10) not null,status varchar(10) not null,date datetime)ENGINE=InnoDB DEFAULT CHARSET=utf8;"
#create table load
mysql -h $mysql_ip -u$mysql_username -p$mysql_passwd $mysql_database -e "create table $load_table(id int(10) not null primary key auto_increment,province varchar(30) not null,server varchar(30) not null,ip varchar(20) not null,monitor_server varchar(30) not null,service varchar(20) not null,alert int(10) not null,value int(10) not null,status varchar(10) not null,date datetime)ENGINE=InnoDB DEFAULT CHARSET=utf8;"
#create table io
mysql -h $mysql_ip -u$mysql_username -p$mysql_passwd $mysql_database -e "create table $io_table(id int(10) not null primary key auto_increment,province varchar(30) not null,server varchar(30) not null,ip varchar(20) not null,monitor_server varchar(30) not null,service varchar(20) not null,alert int(10) not null,value int(10) not null,status varchar(10) not null,date datetime)ENGINE=InnoDB DEFAULT CHARSET=utf8;"
#create table hardware
mysql -h $mysql_ip -u$mysql_username -p$mysql_passwd $mysql_database -e "create table $hardware_table(id int(10) not null primary key auto_increment,province varchar(30) not null,server varchar(30) not null,ip varchar(20) not null,monitor_server varchar(30) not null,service varchar(20) not null,alert int(10) not null,value int(10) not null,status varchar(10) not null,date datetime)ENGINE=InnoDB DEFAULT CHARSET=utf8;"
#create table message
mysql -h $mysql_ip -u$mysql_username -p$mysql_passwd $mysql_database -e "create table $message_table(id int(10) not null primary key auto_increment,province varchar(30) not null,server varchar(30) not null,ip varchar(20) not null,monitor_server varchar(30) not null,service varchar(20) not null,alert int(10) not null,value int(10) not null,status varchar(10) not null,date datetime)ENGINE=InnoDB DEFAULT CHARSET=utf8;"
#create table user
mysql -h $mysql_ip -u$mysql_username -p$mysql_passwd $mysql_database -e "create table $user_table(id int(10) not null primary key auto_increment,province varchar(30) not null,server varchar(30) not null,ip varchar(20) not null,monitor_server varchar(30) not null,service varchar(20) not null,alert int(10) not null,value int(10) not null,status varchar(10) not null,date datetime)ENGINE=InnoDB DEFAULT CHARSET=utf8;"
#create table disk
mysql -h $mysql_ip -u$mysql_username -p$mysql_passwd $mysql_database -e "create table $disk_table(id int(10) not null primary key auto_increment,province varchar(30) not null,server varchar(30) not null,ip varchar(20) not null,monitor_server varchar(30) not null,service varchar(20) not null,alert int(10) not null,partition varchar(30) not null,value int(10) not null,status varchar(10) not null,date datetime)ENGINE=InnoDB DEFAULT CHARSET=utf8;"
#create table cpu
mysql -h $mysql_ip -u$mysql_username -p$mysql_passwd $mysql_database -e "create table $cpu_table(id int(10) not null primary key auto_increment,province varchar(30) not null,server varchar(30) not null,ip varchar(20) not null,monitor_server varchar(30) not null,service varchar(20) not null,alert int(10) not null,value int(10) not null,status varchar(10) not null,date datetime)ENGINE=InnoDB DEFAULT CHARSET=utf8;"
#create table service
mysql -h $mysql_ip -u$mysql_username -p$mysql_passwd $mysql_database -e "create table $service_table(id int(10) not null primary key auto_increment,province varchar(30) not null,server varchar(30) not null,ip varchar(20) not null,monitor_server varchar(30) not null,service varchar(20) not null,status varchar(10) not null,date datetime)ENGINE=InnoDB DEFAULT CHARSET=utf8;"
}
#create test directory
if [ ! -d "$test_dir" ];then
/bin/mkdir $test_dir
fi
#mondiy monitor software module
mondiy_software ()
{
#copy monitor province software
/usr/bin/rsync -avz $monitor_dir/*$old_here* $test_dir/ >>/dev/null 2>&1
cd $test_dir
#rename old_name to here_name
/usr/bin/rename $old_here $new_here *
#mondiy old_here and old_name
sed -i 's/'$old_here'/'$new_here'/g' *$new_here*
sed -i 's/'$old_name'/'$new_name'/g' *$new_here*
#mondiy province.php
sed -i 's/<\/b>/ | <a href="'$new_here'.php">'$new_name'<\/a><\/b>/' $monitor_dir/province.php
#mondiy warn_province.php
sed -i 's/<\/b>/ | <a href="'$new_here'_warn.php">'$new_name'<\/a><\/b>/' $monitor_dir/warn_province.php
#mondiy view_day_province.php
sed -i 's/<\/b>/ | <a href="'$new_here'_day_view.php">'$new_name'<\/a><\/b>/' $monitor_dir/view_day_province.php
#mondiy view_month_province.php
sed -i 's/<\/b>/ | <a href="'$new_here'_month_view.php">'$new_name'<\/a><\/b>/' $monitor_dir/view_month_province.php
#mondiy view_year_province.php
sed -i 's/<\/b>/ | <a href="'$new_here'_year_view.php">'$new_name'<\/a><\/b>/' $monitor_dir/view_year_province.php
#copy test_dir to monitor_dir
/usr/bin/rsync -avz $test_dir/*$new_here* $monitor_dir/ >>/dev/null 2>&1
#delete test_dir file
/bin/rm -rf $test_dir/*$new_here*
}
#check table is or not exist
/usr/bin/mysql -h $mysql_ip -u$mysql_username -p$mysql_passwd $mysql_database -e "desc $io_table">>/dev/null 2>&1
if [ $? -eq 0 ];then
echo "$io_table is exist!"
else
echo "$io_table is not exist!"
echo "Do you want to create $new_here table?If you want to create $new_here table,please input:(yes|no)"
read -t 30 -p "Please input you choose:" choose
case $choose in
yes|y)
echo "Now start creaet $new_here table......"
create_table
echo "$new_here table crease finish!"
echo "Now start to mondiy monitor software......"
mondiy_software
echo "$new_name has been added monitor software!"
;;
no|n)
echo "Your choose is no,so we will to exit!"
exit
;;
*)
echo "please input:(yes|no)"
;;
esac
fi
[align=left]Y、数据视图化shell脚本[/align]
[align=left]每个省份都是单独的一个shell脚本,脚本里包含各种省份以年、月、日为时间,以web、交换、引擎、备用、数据库为服务器类型,以disk、io、load、memory、user为视图化的服务。[/align]
[align=left]下面是甘肃省份的数据视图化脚本,名字为gansu.sh,运行在php程序的images文件里,使用nohup sh gansu.sh &运行[/align]
[align=left]由于脚本内容非常的多,在word里超过200页,所以就不展示了,脚本我会放到最后一页的附件里。[/align]
[align=left]7、如何部署[/align]
[align=left](1)、shell监控脚本部署[/align]
[align=left]把shell监控脚本存放到/usr/local/monitor/shell目录,给予755权限,然后再crontab里输入*/3 * * * * /usr/local/monitor/shell/脚本内容,使每3分钟轮询运行脚本。[/align]
[align=left](2)mysql数据库部署[/align]
[align=left]可以使用create_database.sh脚本进行部署,也可以使用create_province.sh脚本部署。[/align]
[align=left](3)php程序部署[/align]
[align=left]先把php程序部署到服务器里,然后添加省份的时候,使用create_province.sh来进行添加,方法为:[/align]
[align=left]1、使用sh create_province.sh运行脚本[/align]
[align=left]2、如果添加脚本在数据库里数据库表存在,就会出现以下情况[/align]
[align=left]如果不存在[/align]
[align=left]你可以输入yes或no来选择是否创建数据库表与进行添加相应省份的php文件(注意只有10秒钟的等待时间,为了节省服务器资源,我使用了read -n参数)[/align]
[align=left]输入完yes后,结果如下[/align]
[align=left]可以看到数据库表创建完成,php监控的省份添加完成[/align]
[align=left]之后你在web里就能直接观看添加省份的监控[/align]
[align=left]添加省份的数据视图化的shell文件,可以使用create_gnuplot.sh来进行添加,内容如下[/align]
#!/bin/bash
old_dir='/tmp/old_dir'
##当前已经存在的数据实体化脚本目录
new_dir='/tmp/new_dir'
##临时存放省份的数据实体化脚本目录
if [ ! -d "$new_dir" ];then
mkdir $new_dir
fi
for i in gansu tianjin guangxi guizhou hainan hebei hunan qinghai xinjiang henan xizang baotou hubei jiangxi ningxia shanxi
##在这里输入你想添加省份的中午拼音
do
ls $i.sh>>/dev/null 2>&1
if  [ $? -eq 0 ];then
echo "$i.sh is exist!"
else
echo "$i.sh is not exist!"
echo "Start to create $i.sh..."
/usr/bin/rsync -avz $old_dir/gansu.sh $new_dir/$i.sh>>/dev/null 2>&1
sed -i 's/gansu/'$i'/g' $new_dir/$i.sh
/usr/bin/rsync -avz $new_dir/$i.sh $old_dir/$i.sh>>/dev/null 2>&1
fi
done
[align=left]8、维护与升级[/align]
[align=left]1、维护[/align]
[align=left]由于采用了时间方法的日志分钟,每3分钟检测一次 ,所以日常维护非常的方便,只要各位在目录的logs里,查看到有当天日志文件产生,在查看当天日志文件是否为每3分钟检测一次,如果满足上述条件,则此脚本正常运行。[/align]
[align=left]2、升级[/align]
[align=left]在升级的时候,为了避免部署新的程序时监控系统检测不到相应的应用服务,而且还收到了服务宕掉的邮件提示,各位在部署新程序时,应在相应用户里(部署监控系统crontab -e所在的用户)里,在监控系统自动启动检测的那一行里,在前面加上#,例如,在交换服务器里部署新的程序,需要在root用户下,输入crontab -e,然后在*/3 * * * * /usr/local/monitor/shell/监控脚本内容的最前面,加上#,最后的结果为#*/3 * * * * /usr/local/monitor/shell/监控脚本。[/align]
[align=left]9、完整监控系统页面展示[/align]
[align=left](1)shell部分[/align]
[align=left]各省都有各自的shell监控脚本,我以甘肃web为例[/align]
[align=left](2)mysql数据库部分[/align]
[align=left]我截图所有mysql数据表[/align]
[align=left](3)php程序部分[/align]
[align=left]由于在首页里已经有了php界面展示,所以现在就不展示了。[/align]
[align=left]现在这个php+mysql+shell已经成功的对生产平台监控了3个月,符合我之前的监控要求,能节省我更多的时间去做更多有用的事,现在查看平台也不需要在进入后台一个一个的查看了,可以查看各省的监控详情与监控视图,更方便的了解平台应用服务与资源的运行情况,希望我这个监控系统能对大家有更好的启发,如果您有疑问或者好的观点,希望您能留言给我,谢谢![/align]本文出自 “吟―技术交流” 博客,请务必保留此出处http://dl528888.blog.51cto.com/2382721/1035335

相关文章推荐
- 运维自动化之使用PHP+MYSQL+SHELL打造私有监控系统(五)
- 运维自动化之使用PHP+MYSQL+SHELL打造私有监控系统(二)
- 运维自动化之使用PHP+MYSQL+SHELL打造私有监控系统(一)
- 运维自动化之使用PHP+MYSQL+SHELL打造私有监控系统(二)
- 运维自动化之使用PHP+MYSQL+SHELL打造私有监控系统(三)
- 运维自动化之使用PHP+MYSQL+SHELL打造私有监控系统(六)
- 运维自动化之使用PHP+MYSQL+SHELL打造私有监控系统(四)
- 运维自动化之使用PHP+MYSQL+SHELL打造私有监控系统(三)
- 运维自动化之使用PHP+MYSQL+SHELL打造私有监控系统(四)
- 运维自动化之使用PHP+MYSQL+SHELL打造私有监控系统
- 运维自动化之使用PHP+MYSQL+SHELL打造私有监控系统
- 运维自动化之使用PHP+MYSQL+SHELL打造私有监控系统(一)
- PHP + Mysql + Shell 自动化监控 转载 and 修改
- 使用 Grafana、collectd 和 InfluxDB 打造现代监控系统
- 运维自动化之Cobbler系统安装使用详解[good]
- 使用 shell 脚本对 Linux 系统和进程资源进行监控
- 使用Shell来监控linux系统和进程(3)
- 使用Shell脚本对Linux系统和进程资源进行监控
- 使用 shell 脚本对 Linux 系统和进程资源进行监控
- 使用 Grafana+collectd+InfluxDB 打造现代监控系统 2015年03月19日 | 标签: collectd, grafana, influxdb | 作者:vpsee 想打造