Plone的一个简单工作流使用示例
2012-09-03 18:26
417 查看
Getting Started with Content Types
If you don’t know what a content type is, don’t worry! Sit back, relax, and do the tutorial! I’ll save the mumbo jumbo definitions for another day. In this first part, we will make a Todo list without touching any code. It won’t be fancy, but it will giveyou a good idea of how things work in Plone.
The way that Plone handles content is a little different than your average relational database driven framework, so if you don’t understand something right away, sit back, relax, and finish the tutorial.
Create a New Content Type
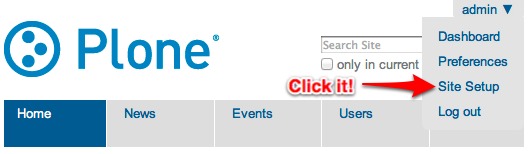
First we need to create a new content type to represent an item on our Todo list. This will be a type with one field, that which needs to be done.Navigate to site setup as shown below, or just enterhttp://localhost:8080/Plone/@@overview-controlpanel in your browser. This is where you can configure Plone for happy
fun time.
Now comes the fun part. We want to create our own type Through-The-Web aka.TTW. This type will be a Todo Item. Let’s click
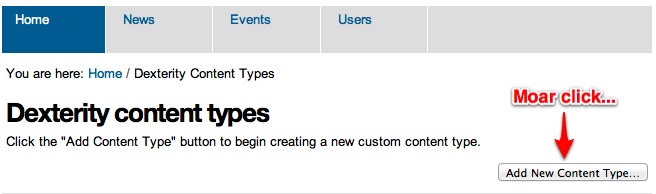
Dexterity Content Types (or go directly tohttp://localhost:8080/Plone/@@dexterity-types).

Create a Todo List Item by clicking
Add New ContentType.
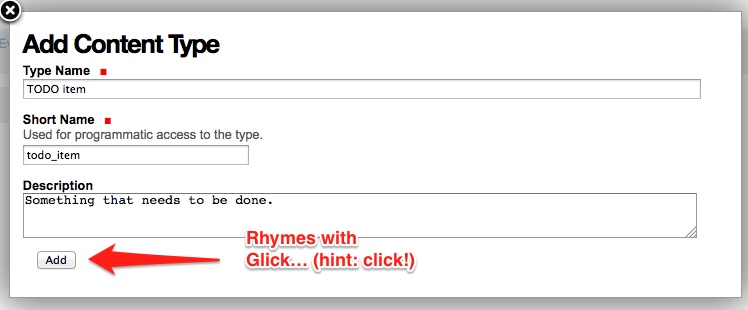
Fill in the fields as seen below and then click
Add.
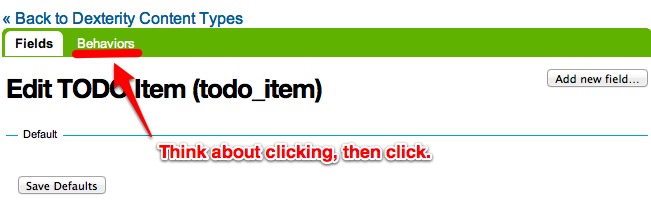
Now you will see that there is a new type to play with. Let’s adjust a few
things. Click the name of the new type to edit.

There are two important things we need to do here: we need to adjust somebehaviors, and add some
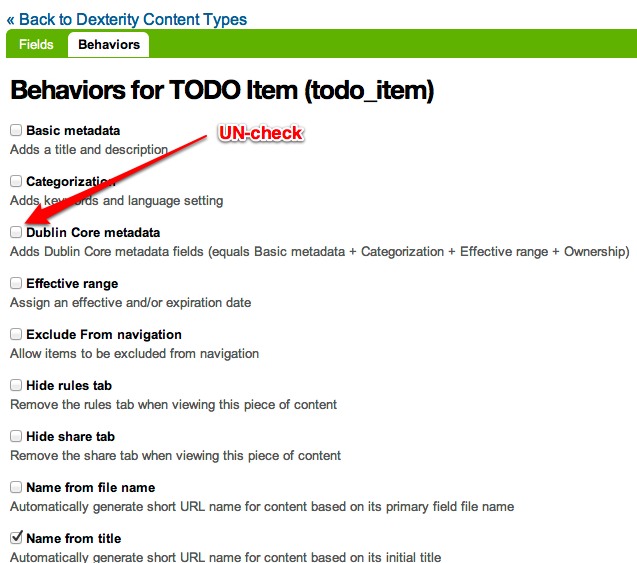
fields. Let’s look at the behaviors first.
By default, all Plone content-types have Dublin Core metadata enabled (you may know it astitle and
description. We don’t need this for our über simple Todo list item. UncheckDublin
Coremetadata and then click
Save.
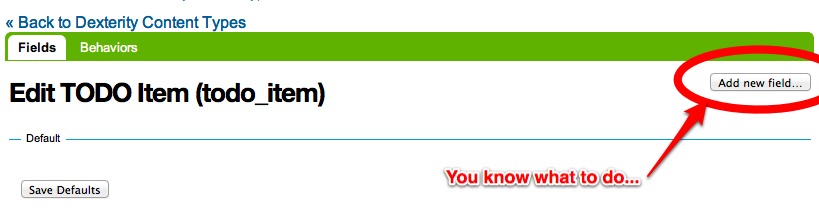
Next we need to add some fields. Because this type is so simple, we will add just one field, but feel free to go CRAZY. Start by clickingAdd
newfield....
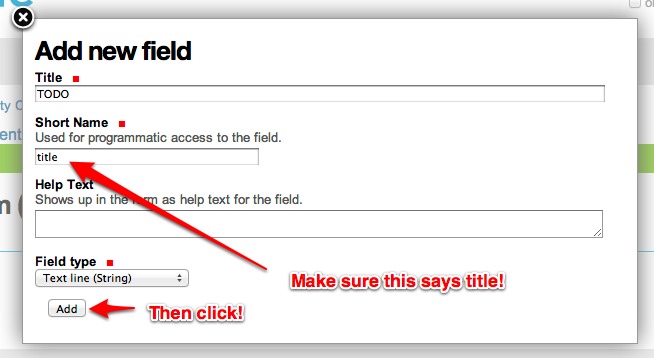
Add a field called Todo, or anything else you want. But! Note that it’s very important that theshort name is
title. By using this key short name, we make sure that all Todo Items are searchable from smart search. Update the field as seen below and clickAdd.
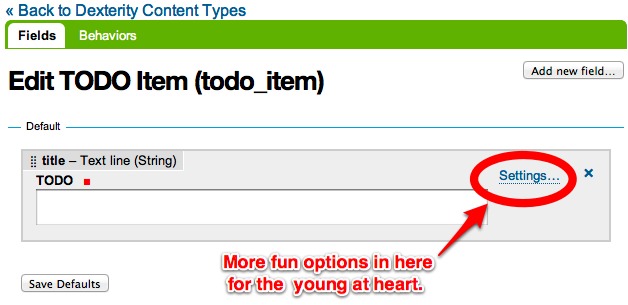
You will see that a new field has been added to your content type. If you are feeling adventuresome, click on the settings tab next to the field to set other properties, or just see what’s available.
Trying out the Todo Item content-type
Now it’s time to reap the rewards of all of your effort. Let’s put all of our Todo Items in one particular folder so that we can have collections of items throughout the site. For this tutorial, we will be putting everything in the root of the site so it’seasy to debug.
From the root, add a new folder called
Todo.

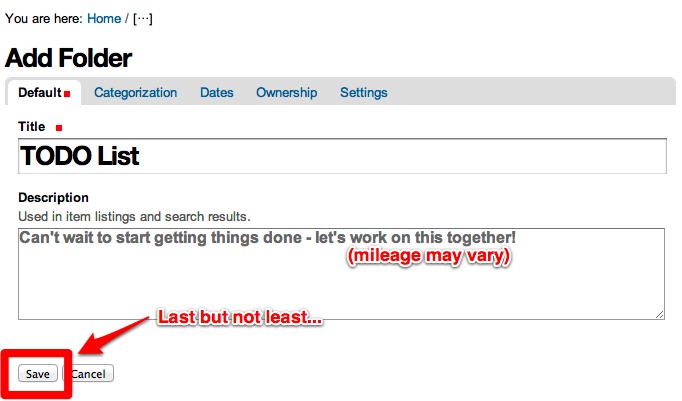
Add a new Todo Item to the new Todo folder.

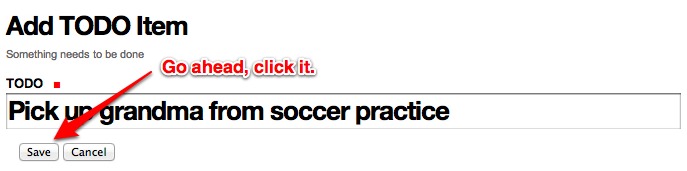
Celebrate!
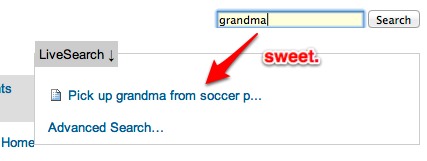
You may be wondering about earlier, when we asked you to make sure that the
short name for the Todo Item was called title. The time has come to let you in on a little secret. Calling the short name eithertitle
or description will automatically add that text to the livesearch menu. WHAT?!? I know! When life gives you lemonade, spike it with vodka and enjoy liberally! You can now search for your Todo Items
in Live Search.
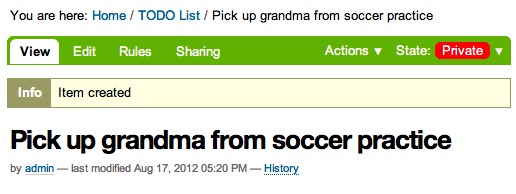
But wait a minute... This todo item is marked private, and that doesn’t really make sense. It’s a good thing Plone has an easy solution for that. In the next section, we will go over the basics of
that magical, mystical word: workflow.
Getting Started with Workflows
The Todo Item we added in the last section is marked asprivate because by default all new Plone content types are assigned a complex publication workflow. I know what you are thinking: Publication whodie whatie grble gobble??!?! Just like before, let’s bypass trying to explain what
that means and just fix it. Relax, enjoy, and finish the tutorial!
If you aren’t interested in workflows, or already know all about this stuff, feel free to skip straight to the next chapter!
Todo Items really have 2 states that we are interested in: open andcomplete. Let’s make that happen.
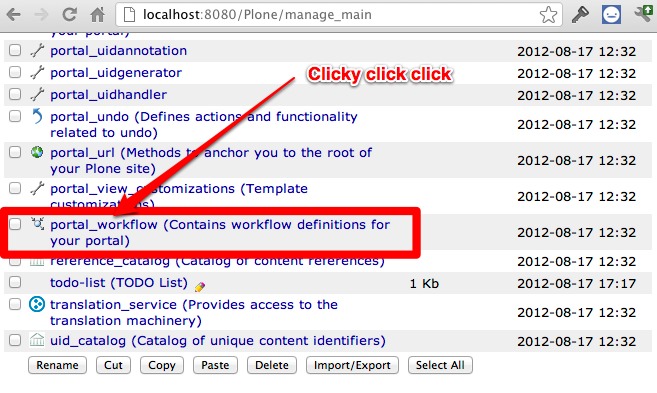
Head over to the ZMI at http://localhost:8080/Plone/manage_main.
In the ZMI, open the portal_workflow tool.
On this page, we see all content-types in our portal mapped to a workflow. Our new type, Todo Item, is mapped to(Default). You can see right below that the default isSimple
PublicationWorkflow. This is just too complex for our little Todo Item.

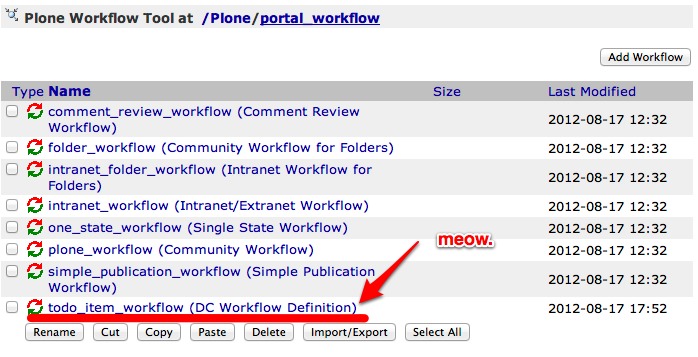
So let’s create a new one that suites our needs perfectly! Click thecontents tab at the top of the page to get a listing of all the available workflows.
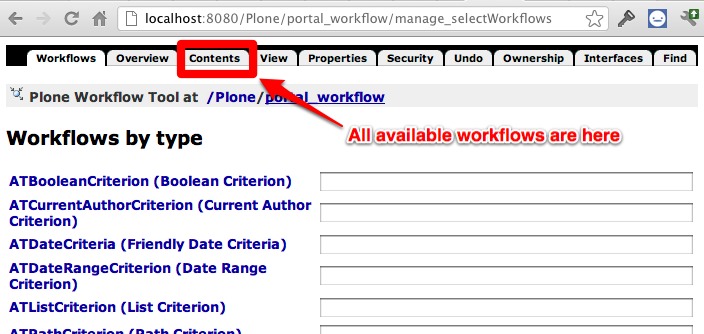
You can poke around here all you like, but the details of each one of these workflows are better left to another tutorial. When in doubt, you can always come back to these workflows to see examples of how things can be done. Onwards and upwards!
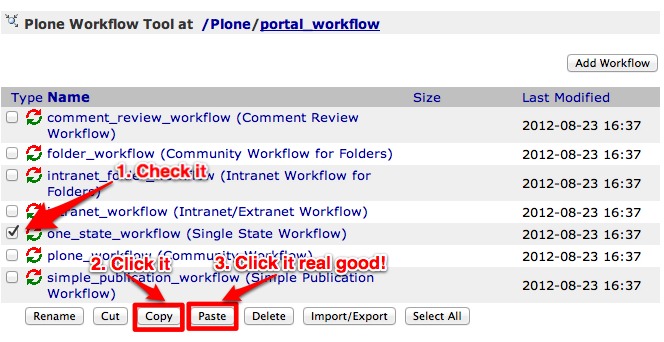
Let’s create a new workflow for our Todo Items and call it
todo_item_workflow. We will make a new workflow by copying and customizing one of the workflows that are already there. Copy simple_pubication_workflow
TODO: Break this into several different images to be more clear.
Rename the copied workflow to ‘todo_item_workflow’
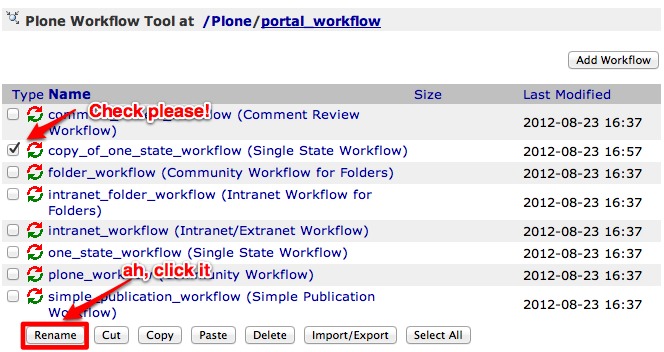

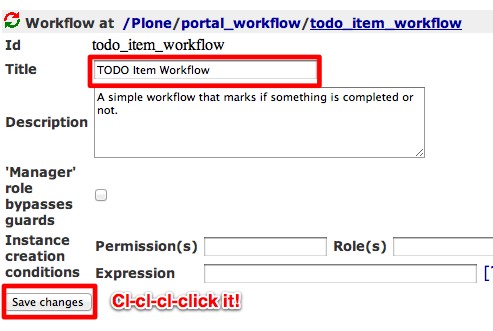
You will be spit back out and the workflow contents page. Click the workflow to start editing
Let’s update the name of the workflow so we don’t double take later on
Workflow is something that takes time to get used to if you have never encoutered the concept. The best analogy in our case is to a car. The car engine has two simple states: on and off. To transition from on to off and vice versa, it needs
some action from the driver. The same for our TODO items. They have to states: incomplete and complete. In order to get them from Incomplete to Complete, the user needs to click something. Don’t understand yet? Relax, sit back, and finish the tutorial.
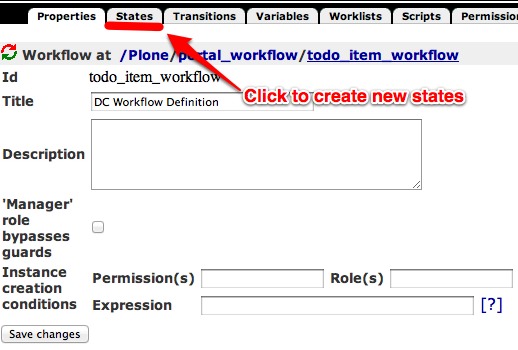
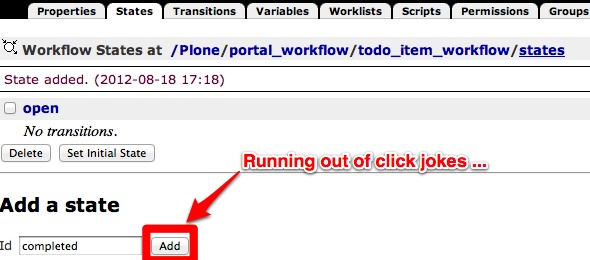
Lets start by adding out base states. We will call them “open” and “complete”. From the edit workflow screen, click on the “States” tab.
Delete the currently listed state
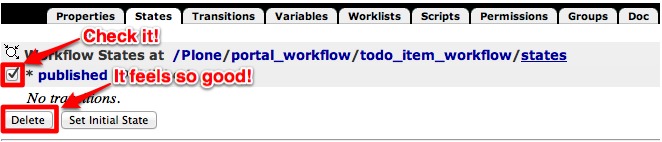
Add two states with the ids “open” and “completed”.

Next lets add the transitions. The transitions will take the TODO item from open to completed and vice versa (in case a user accidentally marks an item as complete. Click on the transitions tab.
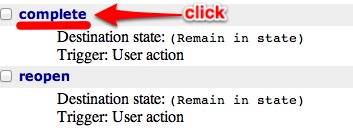
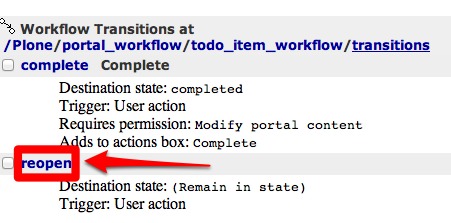
Add two transitions: complete, and reopen. When a user “complete”s a task, it will move into the “completed” state. When a user “reopens” a task, it will go back to the “open” state.
Let’s add a few details to these new transitions. Let’s start with complete. Click on “complete” to edit the transition.
First add a title so you remember later what this does. Description is optional but adding one will help you keep your thoughts clear and remind future you what now you is thinking. The destination state should be set tocompleted.
We also want to make sure that only people with mega permissions, or the owner itself, can change the state so we addModify
portalcontent to the Permissions box.
All this means nothing if we don’t give the user a chance to change the state. Next toDisplay
inactions box, we can set the title for what will be displayed in the workflow drop down box of the item (where Pending, Reject, etc where earlier). Let’s call itComplete.
Last but not least, we need to add the url that the action points to. I could make this tutorial 100 years long and explain why you have to do this, but accept that it has to be done, relax, and follow this formula:
URL = %(content_url)s/content_status_modify?workflow_action=X
where X is the id of the transition. So for this case, in the URL box, you will add
%(content_url)s/content_status_modify?workflow_action=complete
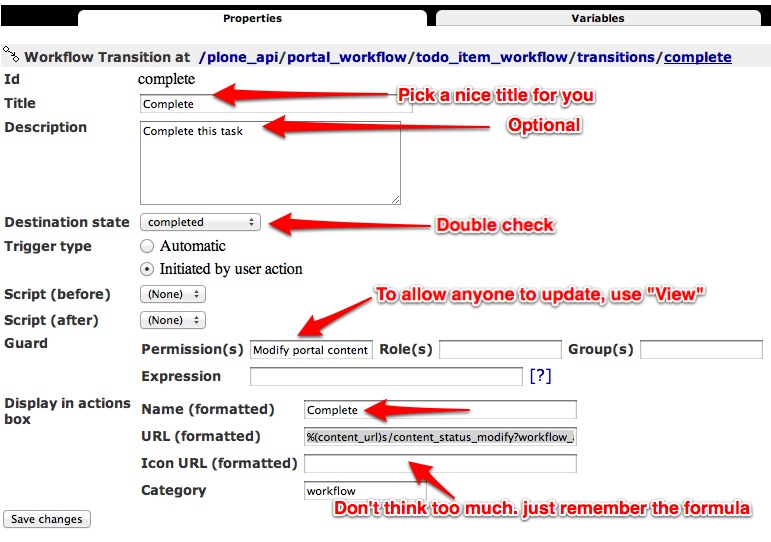
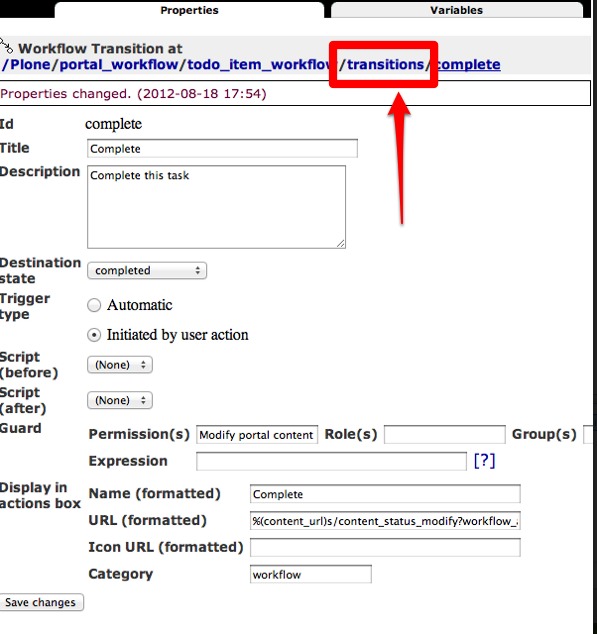
Double check everything and click “Save”.
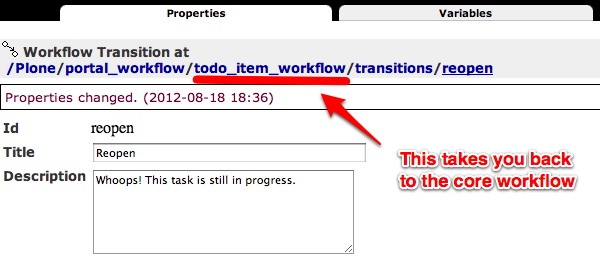
If your brain isn’t hurting yet it will be soon. Go back to the transitions listing.
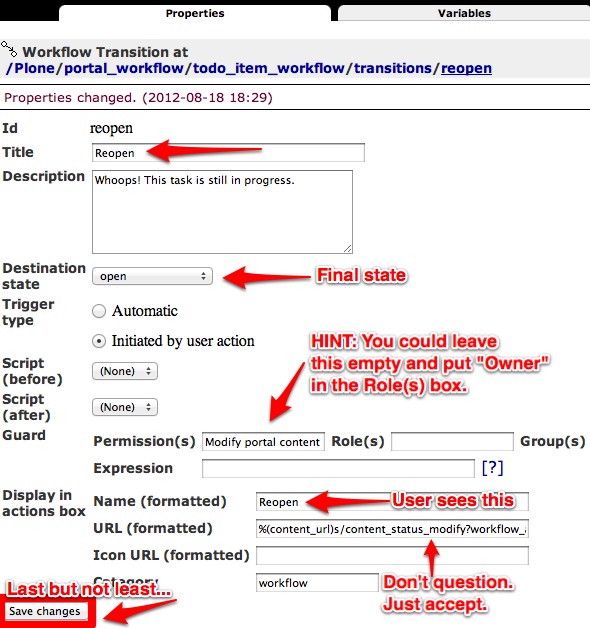
Let’s update the reopen transition and update in a similar manner. This time, the destination state is “open”, and following the formula above, the URL is “%(content_url)s/content_status_modify?workflow_action=reopen”.
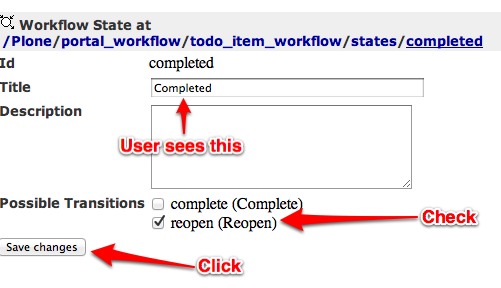
Now we have 2 states and 2 transitions, but they aren’t 100% linked together... yet. Go back to the workflow listing, click the states tab and then and click on “completed” to edit the state.
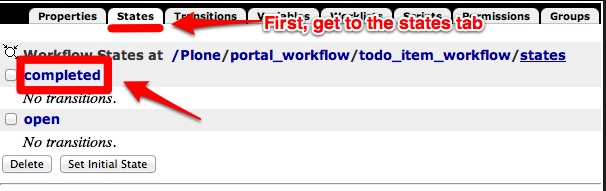
Add a title, since this is what users see in the top right corner of the TODO items, and then check “reopen” as a possible transition. This means that when a TODO item is completed, it will only allow the user to reopen it (and not re-complete
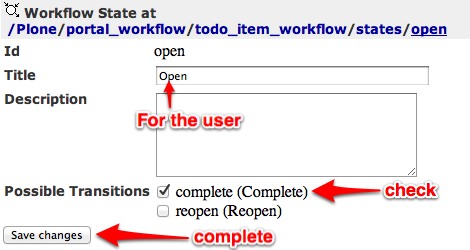
it, for example). In the same respect, open the open transition, add a title, and mark “complete” as a possible transition.
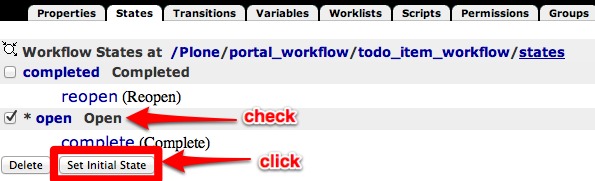
When we create a new TODO item, we need to tell Plone what the first state is. Go back to the workflow states listing, and make “open” the initial state.
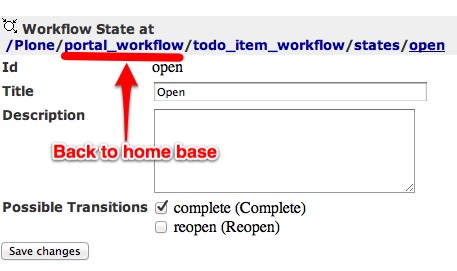
And that’s it! Almost... Last but not least, we need to assign our new workflow to our TODO item type. Go back to the main workflow screen.
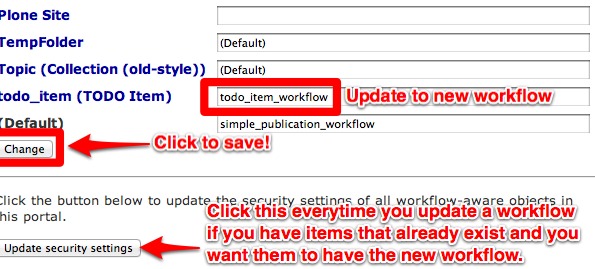
Instead of mapping to the “(Default)” workflow, we are going to map to the id of our new workflow, todo_item_workflow, and then click “Change”.
If you already have TODO items in your site, you MUST click “Update Security Settings” to update the workflow for the items. Instead of going into gross detail about why this is the case, just sit back, relax, finish the tutorial, and remember to click this
button any time you make changes (yes! you can continue to change and update your workflows!).
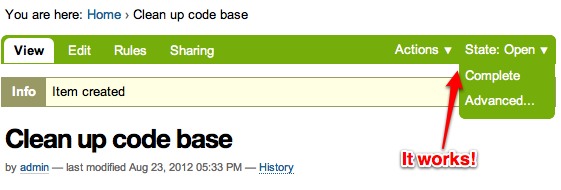
Could the time have arrived? Time to test? YES! Go to your TODO Items folder and add a new TODO Item. Validate that the workflow works as expected. By toggling between the states.
Congrats! You have now passed Plone Workflow 101. Next we will transition from editing through the web (TTW) to developing. With plone.api, it’s as easy as pie.
来源:http://tutorialtodoapp.readthedocs.org/en/latest/chapter_1.html#getting-started-with-content-types
完整内容:http://tutorialtodoapp.readthedocs.org/en/latest/
包括了视图定制的方法

相关文章推荐
- 使用Spring来创建一个简单的工作流引擎
- 使用Spring来创建一个简单的工作流引擎
- handlersocket使用 第一章 基本语法和一个简单示例
- flex 与 java交互 的一个简单示例 (使用RemoteObject)
- 使用Unicode写文本文件:一个简单类的示例
- Xqk.Data数据框架使用说明之:一个简单的示例
- C++中enum的使用的一个简单示例
- 使用 JointCode.Shuttle 进行跨 AppDomain 通信的一个简单示例
- 由一个简单示例 引出java继承中父子类成员变量共享问题 以及super的使用
- 一个超级简单的HTML模板框架源代码以及使用示例
- 使用Python的Bottle框架写一个简单的服务接口的示例
- 使用Java开源工作流jBPM开发一个简单的Demo
- memcached 是一个简单使用示例
- hadoop学习(7)—— 使用yarn运行mapreduce一个简单的wordcount示例
- 一个简单的使用SDL播放YUV文件的示例
- 使用MyBatis搭建一个访问mysql数据库的简单示例
- 使用短信控件的一个简单示例
- 一个简单的使用SDL播放YUV文件的示例
- urllib库的简单使用 && 一个简单的Python爬虫示例
- 使用Python的Bottle框架写一个简单的服务接口的示例