NeHe教程Qt实现——lesson07
2012-03-17 09:29
232 查看
NeHe 系列教程之七: 光照及纹理过滤
英文教程地址:lesson07
本课将以第一课的代码为基础, 实现光照效果。
首先是对象定义与纹理加载的代码:
加载纹理的代码如下, 采用了三种不同的纹理过滤方式:
接着是OpenGL 初始函数,启用了光照效果
绘制函数如下:
最后按键处理,主要是开启和关闭光照,以及切换不同的纹理过滤方式:
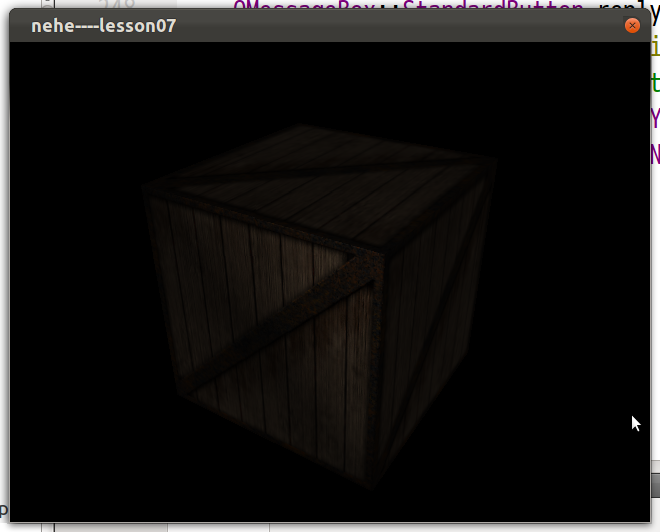
运行效果图如下所示:
英文教程地址:lesson07
本课将以第一课的代码为基础, 实现光照效果。
首先是对象定义与纹理加载的代码:
namespace {
bool	light;                       // Lighting ON / OFF
bool	lp;                         // L Pressed?
bool	fp;                         // F Pressed?
GLfloat	xrot;                       // X Rotation
GLfloat	yrot;                       // Y Rotation
GLfloat xspeed;                     // X Rotation Speed
GLfloat yspeed;                     // Y Rotation Speed
GLfloat	z=-5.0f;                    // Depth Into The Screen

GLfloat LightAmbient[]= { 0.5f, 0.5f, 0.5f, 1.0f };             // Ambient Light Values ( NEW )
GLfloat LightDiffuse[]= { 1.0f, 1.0f, 1.0f, 1.0f };              // Diffuse Light Values ( NEW )
GLfloat LightPosition[]= { 0.0f, 0.0f, 2.0f, 1.0f };            // Light Position ( NEW )
GLuint  filter;                                 // Which Filter To Use
GLuint  texture[3];                             // Storage for 3 textures

QVector<QVector3D> vertices;
QVector<QVector2D> texCoords;
QVector<QVector3D> normals;

void makeObject()
{

vertices<<QVector3D(-1.0f, -1.0f,  1.0f)<<QVector3D(1.0f, -1.0f,  1.0f)<<QVector3D(1.0f,  1.0f,  1.0f)<<QVector3D(-1.0f,  1.0f,  1.0f)
<<QVector3D(-1.0f, -1.0f, -1.0f)<<QVector3D(-1.0f,  1.0f, -1.0f)<<QVector3D(1.0f,  1.0f, -1.0f)<<QVector3D(1.0f, -1.0f, -1.0f)
<<QVector3D(-1.0f,  1.0f, -1.0f)<<QVector3D(-1.0f,  1.0f,  1.0f)<<QVector3D(1.0f,  1.0f,  1.0f)<<QVector3D(1.0f,  1.0f, -1.0f)
<<QVector3D(-1.0f, -1.0f, -1.0f)<<QVector3D(1.0f, -1.0f, -1.0f)<<QVector3D(1.0f, -1.0f,  1.0f)<<QVector3D(-1.0f, -1.0f,  1.0f)
<<QVector3D(1.0f, -1.0f, -1.0f)<<QVector3D(1.0f,  1.0f, -1.0f)<<QVector3D(1.0f,  1.0f,  1.0f)<<QVector3D(1.0f, -1.0f,  1.0f)
<<QVector3D(-1.0f, -1.0f, -1.0f)<<QVector3D(-1.0f, -1.0f,  1.0f)<<QVector3D(-1.0f,  1.0f,  1.0f)<<QVector3D(-1.0f,  1.0f, -1.0f);

texCoords<<QVector2D(0.0f, 0.0f)<<QVector2D(1.0f, 0.0f)<<QVector2D(1.0f, 1.0f)<<QVector2D(0.0f, 1.0f)
<<QVector2D(1.0f, 0.0f)<<QVector2D(1.0f, 1.0f)<<QVector2D(0.0f, 1.0f)<<QVector2D(0.0f, 0.0f)
<<QVector2D(0.0f, 1.0f)<<QVector2D(0.0f, 0.0f)<<QVector2D(1.0f, 0.0f)<<QVector2D(1.0f, 1.0f)
<<QVector2D(1.0f, 1.0f)<<QVector2D(0.0f, 1.0f)<<QVector2D(0.0f, 0.0f)<<QVector2D(1.0f, 0.0f)
<<QVector2D(1.0f, 0.0f)<<QVector2D(1.0f, 1.0f)<<QVector2D(0.0f, 1.0f)<<QVector2D(0.0f, 0.0f)
<<QVector2D(0.0f, 0.0f)<<QVector2D(1.0f, 0.0f)<<QVector2D(1.0f, 1.0f)<<QVector2D(0.0f, 1.0f);

normals<<QVector3D(0.0f, 0.0f, 1.0f)<<QVector3D(0.0f, 0.0f, 1.0f)<<QVector3D(0.0f, 0.0f, 1.0f)<<QVector3D(0.0f, 0.0f, 1.0f)
<<QVector3D(0.0f, 0.0f,-1.0f)<<QVector3D(0.0f, 0.0f,-1.0f)<<QVector3D(0.0f, 0.0f,-1.0f)<<QVector3D(0.0f, 0.0f,-1.0f)
<<QVector3D(0.0f, 1.0f, 0.0f)<<QVector3D(0.0f, 1.0f, 0.0f)<<QVector3D(0.0f, 1.0f, 0.0f)<<QVector3D(0.0f, 1.0f, 0.0f)
<<QVector3D(0.0f, -1.0f, 0.0f)<<QVector3D(0.0f, -1.0f, 0.0f)<<QVector3D(0.0f, -1.0f, 0.0f)<<QVector3D(0.0f, -1.0f, 0.0f)
<<QVector3D(1.0f, 0.0f, 0.0f)<<QVector3D(1.0f, 0.0f, 0.0f)<<QVector3D(1.0f, 0.0f, 0.0f)<<QVector3D(1.0f, 0.0f, 0.0f)
<<QVector3D(-1.0f, 0.0f, 0.0f)<<QVector3D(-1.0f, 0.0f, 0.0f)<<QVector3D(-1.0f, 0.0f, 0.0f)<<QVector3D(-1.0f, 0.0f, 0.0f);

glVertexPointer(3, GL_FLOAT, 0, vertices.constData());
glTexCoordPointer(2, GL_FLOAT, 0, texCoords.constData());
glNormalPointer(GL_FLOAT, 0, normals.constData());

}

void drawObject()
{
glEnableClientState(GL_VERTEX_ARRAY);
glEnableClientState(GL_TEXTURE_COORD_ARRAY);
glEnableClientState(GL_NORMAL_ARRAY);

glBindTexture(GL_TEXTURE_2D, texture[filter]);
glDrawArrays(GL_QUADS, 0, vertices.size());

glDisableClientState(GL_VERTEX_ARRAY);
glDisableClientState(GL_TEXTURE_COORD_ARRAY);
glDisableClientState(GL_NORMAL_ARRAY);
}
}
加载纹理的代码如下, 采用了三种不同的纹理过滤方式:
void MyGLWidget::loadTextures()
{
QImage image;
if (image.load(":/Crate.bmp")) {
image =  convertToGLFormat(image);
glGenTextures(3, texture);
// Create Nearest Filtered Texture
glBindTexture(GL_TEXTURE_2D, texture[0]);
glTexParameteri(GL_TEXTURE_2D,GL_TEXTURE_MAG_FILTER,GL_NEAREST);
glTexParameteri(GL_TEXTURE_2D,GL_TEXTURE_MIN_FILTER,GL_NEAREST);
glTexImage2D(GL_TEXTURE_2D, 0, GL_RGBA, image.width(), image.height(), 0, GL_RGBA, GL_UNSIGNED_BYTE, image.bits());

// Create Linear Filtered Texture
glBindTexture(GL_TEXTURE_2D, texture[1]);
glTexParameteri(GL_TEXTURE_2D,GL_TEXTURE_MAG_FILTER,GL_LINEAR);
glTexParameteri(GL_TEXTURE_2D,GL_TEXTURE_MIN_FILTER,GL_LINEAR);
glTexImage2D(GL_TEXTURE_2D, 0, GL_RGBA, image.width(), image.height(), 0, GL_RGBA, GL_UNSIGNED_BYTE, image.bits());

// Create MipMapped Texture
glBindTexture(GL_TEXTURE_2D, texture[2]);
glTexParameteri(GL_TEXTURE_2D,GL_TEXTURE_MAG_FILTER,GL_LINEAR);
glTexParameteri(GL_TEXTURE_2D,GL_TEXTURE_MIN_FILTER,GL_LINEAR_MIPMAP_NEAREST);
gluBuild2DMipmaps(GL_TEXTURE_2D, GL_RGBA, image.width(), image.height(), GL_RGBA, GL_UNSIGNED_BYTE, image.bits());
}
}
接着是OpenGL 初始函数,启用了光照效果
void MyGLWidget::initializeGL()
{
makeObject();
loadTextures();
glEnable(GL_TEXTURE_2D);    // Enable Texture Mapping
glShadeModel(GL_SMOOTH);   // Enables Smooth Shading
glClearColor(0.0f, 0.0f, 0.0f, 0.5f);  // Black Background
glClearDepth(1.0f);             // Depth Buffer Setup
glEnable(GL_DEPTH_TEST);        // Enables Depth Testing
glDepthFunc(GL_LEQUAL);        // The Type Of Depth Test To Do
glHint(GL_PERSPECTIVE_CORRECTION_HINT, GL_NICEST); // Really Nice Perspective Calculations

glLightfv(GL_LIGHT1, GL_AMBIENT, LightAmbient);             // Setup The Ambient Light
glLightfv(GL_LIGHT1, GL_DIFFUSE, LightDiffuse);
glLightfv(GL_LIGHT1, GL_POSITION,LightPosition);            // Position The Light
glEnable(GL_LIGHT1);                            // Enable Light One
}
绘制函数如下:
void MyGLWidget::paintGL()
{
glClear(GL_COLOR_BUFFER_BIT | GL_DEPTH_BUFFER_BIT);  // Clear The Screen And The Depth Buffer
glLoadIdentity();       // Reset The Current Modelview Matrix

glTranslatef(0.0f,0.0f,z);                      // Translate Into/Out Of The Screen By z

glRotatef(xrot,1.0f,0.0f,0.0f);                     // Rotate On The X Axis By xrot
glRotatef(yrot,0.0f,1.0f,0.0f);                     // Rotate On The Y Axis By yrot

drawObject();

xrot += xspeed;                        // Add xspeed To xrot
yrot += yspeed;                       // Add yspeed To yrot
}
最后按键处理,主要是开启和关闭光照,以及切换不同的纹理过滤方式:
void MyGLWidget::keyReleaseEvent(QKeyEvent *e)
{
switch (e->key()) {
case Qt::Key_L:
lp = false;
break;
case Qt::Key_I:
fp = false;
break;
default:
QGLWidget::keyReleaseEvent(e);
}
}
void MyGLWidget::keyPressEvent(QKeyEvent *e)
{
switch (e->key()) {
case Qt::Key_I:
fp = true;
filter += 1;
if (filter > 2)
filter = 0;
break;
case Qt::Key_F:
fullscreen = !fullscreen;
if (fullscreen) {
showFullScreen();
} else {
resize(640, 480);
showNormal();
}
break;
case Qt::Key_L:
if (!lp) {
lp=true; // lp Becomes TRUE
light=!light; // Toggle Light TRUE/FALSE
if (!light) // If Not Light
{
glDisable(GL_LIGHTING); // Disable Lighting
}
else // Otherwise
{
glEnable(GL_LIGHTING); // Enable Lighting
}
}
break;
case Qt::Key_PageUp:
z -= 0.02f;
break;
case Qt::Key_PageDown:
z += 0.02f;
break;
case Qt::Key_Up:
xspeed -= 0.01f;
break;
case Qt::Key_Down:
xspeed += 0.01f;
break;
case Qt::Key_Right:
yspeed += 0.01f;
break;
case Qt::Key_Left:
yspeed -= 0.01f;
break;
case Qt::Key_Escape:
QMessageBox::StandardButton reply;
reply = QMessageBox::question(NULL, "NeHe",
"Do you want to exit?",
QMessageBox::Yes | QMessageBox::No,
QMessageBox::Yes);
if (reply == QMessageBox::Yes) {
qApp->quit();
}
break;
default:
QGLWidget::keyPressEvent(e);
break;
}
}运行效果图如下所示:

相关文章推荐
- NeHe教程Qt实现——lesson07
- NeHe教程Qt实现——lesson13
- NeHe教程Qt实现——lesson01
- NeHe教程Qt实现——lesson12
- NeHe教程Qt实现——lesson10
- NeHe教程Qt实现——lesson15
- NeHe教程Qt实现——lesson02
- NeHe教程Qt实现——lesson13
- NeHe教程Qt实现——lesson03
- NeHe教程Qt实现——lesson08
- NeHe教程Qt实现——lesson16
- NeHe教程Qt实现——lesson02
- NeHe教程Qt实现——lesson17
- NeHe教程Qt实现——lesson15
- NeHe教程Qt实现——lesson12
- NeHe教程Qt实现——lesson11
- NeHe教程Qt实现——lesson17
- NeHe教程Qt实现——lesson04
- NeHe教程Qt实现——lesson14
- NeHe教程Qt实现——lesson05