cocos2D 虚拟摇杆Joystick功能实现
2012-02-05 22:21
537 查看
Joystick 摇杆功能的实现 (两种实现方式)
一、SneakyInput Nick Pannuto编写的开源类库
主要有五个核心类:
SneakyButton
SneakyButtonSkinnedBase
SneakyJoystick
SneakyJoystickSkinnedBase
ColoredCircleSprite(可选)
以下是具体的用法:
@implementation InputLayer
- (id)init
{
if(self = [super init])
{
winSize = [[CCDirector sharedDirector] winSize];
[self addJoystick];
[self addFireButton];
[self scheduleUpdate];
}
return self;
}
//添加一个按钮
- (void)addFireButton
{
fireButton = [SneakyButton button];
fireButton.isHoldable = YES; // 按住按钮持续触发
//按钮添加皮肤
SneakyButtonSkinnedBase *skinFireButton = [SneakyButtonSkinnedBase skinButton];
skinFireButton.defaultSprite = [CCSprite spriteWithSpriteFrameName:@"button-default.png"];
skinFireButton.pressSprite = [CCSprite spriteWithSpriteFrameName:@"button-pressed.png"];
skinFireButton.button = fireButton;
skinFireButton.position = CGPointMake(winSize.width - skinFireButton.contentSize.width,
skinFireButton.contentSize.height);
[self addChild:skinFireButton];
}
//添加一个摇杆
- (void)addJoystick
{
joystick = [SneakyJoystick joystick:CGRectMake(0, 0, 0, 0 )];
joystick.autoCenter = YES; //是否自动回到中心
//360度
joystick.hasDeadzone = YES; //是否支持死亡区域,该区域不会触发
joystick.deadRadius = 20;//死亡区域的半径
//限制可移动的方向数量
// joystick.isDPad = YES;
// joystick.numberOfDirections = 8; //方向数量
//给摇杆添加皮肤
SneakyJoystickSkinnedBase *skinJoystick = [SneakyJoystickSkinnedBase skinJoystick];
skinJoystick.backgroundSprite = [CCSprite spriteWithSpriteFrameName:@"button-disabled.png"];
skinJoystick.thumbSprite = [CCSprite spriteWithSpriteFrameName:@"button-disabled.png"];
skinJoystick.thumbSprite.scale = 0.5f;
skinJoystick.joystick = joystick;
skinJoystick.position = CGPointMake(skinJoystick.contentSize.width ,
skinJoystick.contentSize.height);
[self addChild:skinJoystick];
}
- (void)update:(ccTime)delta
{
GameScene *scene = [GameScene sharedGameScene];
Ship *ship = (Ship *)[scene ship];
totalTime += delta;
//点击按钮触发
if(fireButton.active && totalTime > nextShootTime)
{
nextShootTime = totalTime + 0.5f;
[scene shootBullet:ship];
}
if (fireButton.active == NO)
{
nextShootTime = 0;
}
//joystick.velocity 这个值非常小需要将其放大(根据实际情况调值)
CGPoint velocity = ccpMult(joystick.velocity, 200);
if(velocity.x != 0 && velocity.y != 0)
{
ship.position = CGPointMake(ship.position.x + velocity.x * delta,
ship.position.y + velocity.y *delta);
}
}
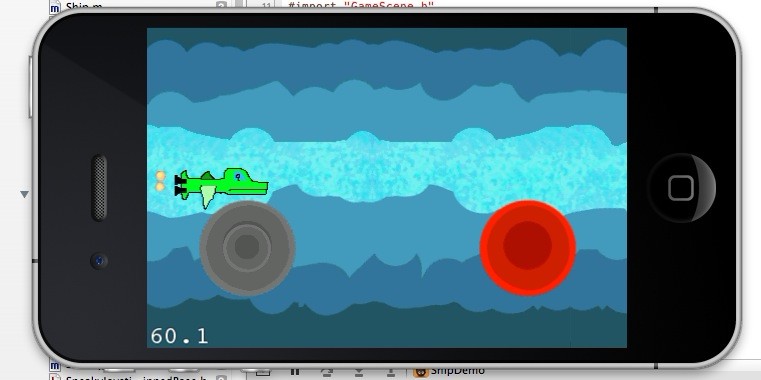
运行图如下:
二、CCJoystick类(最新版的已经支持搓招了哦,下载链接http://code.google.com/p/ccjoystick/downloads/list)
CCJoyStick 是一个基于 Cocos2d 的摇杆类,简单几行代码即可为您的游戏增加一个强大的模拟摇杆。而且最新版本已经支持摇杆搓招儿,满足格斗类游戏开发者的需求。
基于该类可自主扩展诸多摇杆效果,比如 360 度模式、8 向模式。使用方法如下:
// 创建摇杆
myjoystick=[CCJoyStick initWithBallRadius:25 MoveAreaRadius:65 isFollowTouch:NO isCanVisible:YES isAutoHide:NO hasAnimation:YES];//BallRadius即模拟摇杆球的半径,MoveAreaRadius即摇杆球可移动的范围半径,isFollowTouch即是否将摇杆基准位置 跟随touch坐标,isCanVisible即是否可见,isAutoHide即是否自动隐藏(touchend即隐藏),hasAnimation即 是否显示摇杆复位动画
//添加皮肤
[myjoystick setBallTexture:@"Ball.png"];//可选,不设置即看不见摇杆球
[myjoystick setDockTexture:@"Dock.png"];//可选,不设置即看不见底座
[myjoystick setStickTexture:@"Stick.jpg"];//可选,不设置即看不见连动杆
[myjoystick setHitAreaWithRadius:100];//摇杆激活区域为基准坐标半径,默认为另一个方法,设置屏幕矩形区域为激活区域setHitAreaWithRect
myjoystick.position=ccp(100,100);
myjoystick.delegate=self;
[self addChild:myjoystick];
该摇杆类包含3个事件:
1、- (void) onCCJoyStickUpdate:(CCNode*)sender Angle:(float)angle Direction:(CGPoint)direction Power:(float)power;//angle用来控制角色朝向,direction用来设置移动坐标,power为力度用于控制速度快慢
2 、- (void) onCCJoyStickActivated:(CCNode*)sender;
3、- (void) onCCJoyStickDeactivated:(CCNode*)sender;
实现代码如下:
1 @implementation OperateLayer
2
3 - (id)init
4 {
5 if(self = [super init])
6 {
7 winSize = [[CCDirector sharedDirector] winSize];
8 joystick = [CCJoyStick initWithBallRadius:25
9 MoveAreaRadius:65
10 isFollowTouch:NO
11 isCanVisible:YES
12 isAutoHide:NO
13 hasAnimation:YES];
14 [joystick setBallTexture:@"Ball.png"];
15 [joystick setDockTexture:@"Dock.png"];
16 [joystick setStickTexture:@"Stick.jpg"];
17 [joystick setHitAreaWithRadius:100];
18
19 joystick.position = CGPointMake(100, 100);
20 [joystick setDelegate:self];
21 joystick.opacity = 150;
22 [self addChild:joystick];
23
24 CCLabelTTF *label= [CCLabelTTF labelWithString:@"shoot" fontName:@"Arial" fontSize:30];
25 CCMenuItemLabel *shoot = [CCMenuItemLabel itemWithLabel:label
26 target:self
27 selector:@selector(shoot:)];
28 CCMenu *shootMenu = [CCMenu menuWithItems:shoot, nil];
29 shootMenu.position =CGPointMake( 380, 80);
30 [self addChild:shootMenu];
31 }
32 return self;
33 }
34
35 - (void)shoot:(CCMenuItem *) menuItem{
36 GameScene *scene = [GameScene sharedGameScene];
37
38 [scene shootBullet:scene.ship];
39 }
40 - (void) onCCJoyStickUpdate:(CCNode*)sender Angle:(float)angle Direction:(CGPoint)direction Power:(float)power
41 {
42 if (sender==joystick) {
43 NSLog(@"angle:%f power:%f direction:%f,%f",angle,power,direction.x,direction.y);
44
45 GameScene *scene = [GameScene sharedGameScene];
46
47 float nextx=scene.ship.position.x;
48 float nexty=scene.ship.position.y;
49
50 nextx+=direction.x * (power*8);
51 nexty+=direction.y * (power*8);
52
53 scene.ship.position=ccp(nextx,nexty);
54 }
55 }
56
57 - (void) onCCJoyStickActivated:(CCNode*)sender
58 {
59 if (sender==joystick) {
60 [joystick setBallTexture:@"Ball_hl.png"];
61 [joystick setDockTexture:@"Dock_hl.png"];
62 joystick.opacity = 255;
63 }
64 }
65 - (void) onCCJoyStickDeactivated:(CCNode*)sender
66 {
67 if (sender==joystick) {
68 [joystick setBallTexture:@"Ball.png"];
69 [joystick setDockTexture:@"Dock.png"];
70 joystick.opacity = 150;
71 }
72 }
73 @end
运行效果图:

以下是两个类库的下载链接,有需要的可以下载看看哦 ~
/Files/xuling/CCJoystick.rar
/Files/xuling/SneakyInput.rar
ps:咱新手们注意了哈,用最新的cocos2d时,看看AppDelegate.m 中的
[glView setMultipleTouchEnabled:YES];设置为YES了没有。 我刚开始做的时候就没设置还查了好久,嘿嘿,有点菜 ...
一、SneakyInput Nick Pannuto编写的开源类库
主要有五个核心类:
SneakyButton
SneakyButtonSkinnedBase
SneakyJoystick
SneakyJoystickSkinnedBase
ColoredCircleSprite(可选)
以下是具体的用法:
@implementation InputLayer
- (id)init
{
if(self = [super init])
{
winSize = [[CCDirector sharedDirector] winSize];
[self addJoystick];
[self addFireButton];
[self scheduleUpdate];
}
return self;
}
//添加一个按钮
- (void)addFireButton
{
fireButton = [SneakyButton button];
fireButton.isHoldable = YES; // 按住按钮持续触发
//按钮添加皮肤
SneakyButtonSkinnedBase *skinFireButton = [SneakyButtonSkinnedBase skinButton];
skinFireButton.defaultSprite = [CCSprite spriteWithSpriteFrameName:@"button-default.png"];
skinFireButton.pressSprite = [CCSprite spriteWithSpriteFrameName:@"button-pressed.png"];
skinFireButton.button = fireButton;
skinFireButton.position = CGPointMake(winSize.width - skinFireButton.contentSize.width,
skinFireButton.contentSize.height);
[self addChild:skinFireButton];
}
//添加一个摇杆
- (void)addJoystick
{
joystick = [SneakyJoystick joystick:CGRectMake(0, 0, 0, 0 )];
joystick.autoCenter = YES; //是否自动回到中心
//360度
joystick.hasDeadzone = YES; //是否支持死亡区域,该区域不会触发
joystick.deadRadius = 20;//死亡区域的半径
//限制可移动的方向数量
// joystick.isDPad = YES;
// joystick.numberOfDirections = 8; //方向数量
//给摇杆添加皮肤
SneakyJoystickSkinnedBase *skinJoystick = [SneakyJoystickSkinnedBase skinJoystick];
skinJoystick.backgroundSprite = [CCSprite spriteWithSpriteFrameName:@"button-disabled.png"];
skinJoystick.thumbSprite = [CCSprite spriteWithSpriteFrameName:@"button-disabled.png"];
skinJoystick.thumbSprite.scale = 0.5f;
skinJoystick.joystick = joystick;
skinJoystick.position = CGPointMake(skinJoystick.contentSize.width ,
skinJoystick.contentSize.height);
[self addChild:skinJoystick];
}
- (void)update:(ccTime)delta
{
GameScene *scene = [GameScene sharedGameScene];
Ship *ship = (Ship *)[scene ship];
totalTime += delta;
//点击按钮触发
if(fireButton.active && totalTime > nextShootTime)
{
nextShootTime = totalTime + 0.5f;
[scene shootBullet:ship];
}
if (fireButton.active == NO)
{
nextShootTime = 0;
}
//joystick.velocity 这个值非常小需要将其放大(根据实际情况调值)
CGPoint velocity = ccpMult(joystick.velocity, 200);
if(velocity.x != 0 && velocity.y != 0)
{
ship.position = CGPointMake(ship.position.x + velocity.x * delta,
ship.position.y + velocity.y *delta);
}
}
运行图如下:
二、CCJoystick类(最新版的已经支持搓招了哦,下载链接http://code.google.com/p/ccjoystick/downloads/list)
CCJoyStick 是一个基于 Cocos2d 的摇杆类,简单几行代码即可为您的游戏增加一个强大的模拟摇杆。而且最新版本已经支持摇杆搓招儿,满足格斗类游戏开发者的需求。
基于该类可自主扩展诸多摇杆效果,比如 360 度模式、8 向模式。使用方法如下:
// 创建摇杆
myjoystick=[CCJoyStick initWithBallRadius:25 MoveAreaRadius:65 isFollowTouch:NO isCanVisible:YES isAutoHide:NO hasAnimation:YES];//BallRadius即模拟摇杆球的半径,MoveAreaRadius即摇杆球可移动的范围半径,isFollowTouch即是否将摇杆基准位置 跟随touch坐标,isCanVisible即是否可见,isAutoHide即是否自动隐藏(touchend即隐藏),hasAnimation即 是否显示摇杆复位动画
//添加皮肤
[myjoystick setBallTexture:@"Ball.png"];//可选,不设置即看不见摇杆球
[myjoystick setDockTexture:@"Dock.png"];//可选,不设置即看不见底座
[myjoystick setStickTexture:@"Stick.jpg"];//可选,不设置即看不见连动杆
[myjoystick setHitAreaWithRadius:100];//摇杆激活区域为基准坐标半径,默认为另一个方法,设置屏幕矩形区域为激活区域setHitAreaWithRect
myjoystick.position=ccp(100,100);
myjoystick.delegate=self;
[self addChild:myjoystick];
该摇杆类包含3个事件:
1、- (void) onCCJoyStickUpdate:(CCNode*)sender Angle:(float)angle Direction:(CGPoint)direction Power:(float)power;//angle用来控制角色朝向,direction用来设置移动坐标,power为力度用于控制速度快慢
2 、- (void) onCCJoyStickActivated:(CCNode*)sender;
3、- (void) onCCJoyStickDeactivated:(CCNode*)sender;
实现代码如下:
1 @implementation OperateLayer
2
3 - (id)init
4 {
5 if(self = [super init])
6 {
7 winSize = [[CCDirector sharedDirector] winSize];
8 joystick = [CCJoyStick initWithBallRadius:25
9 MoveAreaRadius:65
10 isFollowTouch:NO
11 isCanVisible:YES
12 isAutoHide:NO
13 hasAnimation:YES];
14 [joystick setBallTexture:@"Ball.png"];
15 [joystick setDockTexture:@"Dock.png"];
16 [joystick setStickTexture:@"Stick.jpg"];
17 [joystick setHitAreaWithRadius:100];
18
19 joystick.position = CGPointMake(100, 100);
20 [joystick setDelegate:self];
21 joystick.opacity = 150;
22 [self addChild:joystick];
23
24 CCLabelTTF *label= [CCLabelTTF labelWithString:@"shoot" fontName:@"Arial" fontSize:30];
25 CCMenuItemLabel *shoot = [CCMenuItemLabel itemWithLabel:label
26 target:self
27 selector:@selector(shoot:)];
28 CCMenu *shootMenu = [CCMenu menuWithItems:shoot, nil];
29 shootMenu.position =CGPointMake( 380, 80);
30 [self addChild:shootMenu];
31 }
32 return self;
33 }
34
35 - (void)shoot:(CCMenuItem *) menuItem{
36 GameScene *scene = [GameScene sharedGameScene];
37
38 [scene shootBullet:scene.ship];
39 }
40 - (void) onCCJoyStickUpdate:(CCNode*)sender Angle:(float)angle Direction:(CGPoint)direction Power:(float)power
41 {
42 if (sender==joystick) {
43 NSLog(@"angle:%f power:%f direction:%f,%f",angle,power,direction.x,direction.y);
44
45 GameScene *scene = [GameScene sharedGameScene];
46
47 float nextx=scene.ship.position.x;
48 float nexty=scene.ship.position.y;
49
50 nextx+=direction.x * (power*8);
51 nexty+=direction.y * (power*8);
52
53 scene.ship.position=ccp(nextx,nexty);
54 }
55 }
56
57 - (void) onCCJoyStickActivated:(CCNode*)sender
58 {
59 if (sender==joystick) {
60 [joystick setBallTexture:@"Ball_hl.png"];
61 [joystick setDockTexture:@"Dock_hl.png"];
62 joystick.opacity = 255;
63 }
64 }
65 - (void) onCCJoyStickDeactivated:(CCNode*)sender
66 {
67 if (sender==joystick) {
68 [joystick setBallTexture:@"Ball.png"];
69 [joystick setDockTexture:@"Dock.png"];
70 joystick.opacity = 150;
71 }
72 }
73 @end
运行效果图:
以下是两个类库的下载链接,有需要的可以下载看看哦 ~
/Files/xuling/CCJoystick.rar
/Files/xuling/SneakyInput.rar
ps:咱新手们注意了哈,用最新的cocos2d时,看看AppDelegate.m 中的
[glView setMultipleTouchEnabled:YES];设置为YES了没有。 我刚开始做的时候就没设置还查了好久,嘿嘿,有点菜 ...

相关文章推荐
- ios joystick 虚拟摇杆实现 ( 非 Cocos2d )
- Cocos2d-x3.2实现虚拟摇杆多点触摸-----沈大海
- 基于Cocos2d-x3.2的虚拟摇杆实现及操控角色移动
- cocos2d-x的初步学习十二之虚拟摇杆Joystick
- Cocos2d-js3.3 虚拟摇杆的实现
- cocos2d-x的初步学习十二之虚拟摇杆Joystick
- Cocos2d-x3.2实现虚拟摇杆多点触摸
- Cocos2d-x3.2实现虚拟摇杆多点触摸
- cocos2d-x 之虚拟摇杆实现
- Cocos2d-x3.2实现虚拟摇杆多点触摸
- 「cocos2d-x」虚拟摇杆实现(2)
- 「cocos2d-x」虚拟摇杆实现(1)
- Cocos2d-js3.3虚拟摇杆的实现
- cocos2d-x的初步学习十三之虚拟摇杆SneakyInput
- Cocos2d-x教程(26)-Cocos2d-x + Lua脚本实现大地图缩放功能
- Cocos2d-x V3.2+Cocos Studio1.6 实现一个简单的uibutton点击功能
- 教你一步步实现一个虚拟摇杆
- 在cocos2d-x中使用libcurl实现上传文件功能(quick版)
- 关于cocos2dx虚拟摇杆的lua实现