spring核心:bean工厂的装配 3
2010-10-17 09:48
363 查看
本文中主要包含下面的几个内容:
7.何时使用singleton
8.设置bean的属性和协作者
9.bean构造函数选择决议
10.自动装配
11.依赖检查
7.何时使用singleton
如果bean使用的是singleton的话,那么通过getBean得到的始终是一个对象,如果使用的是prototype的话,那么每次spring会重新new一个新的对象。下面是测试的代码片段:
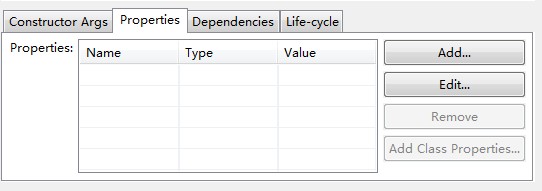
8.设置bean的属性和协作者
在spring中反转控制和依赖注入大致上通过两种方法实现:
1.通过set属性实现
2.通过类的构造函数实现
下面是一个简单的通过set属性实现的反转控制和依赖注入的demo:
SetterBean.java
通过这种方法生成的bean定义如下:
当然也可以这么写:
这里需要特别注意的是需要property的name属性需要和类中的set方法相对应。
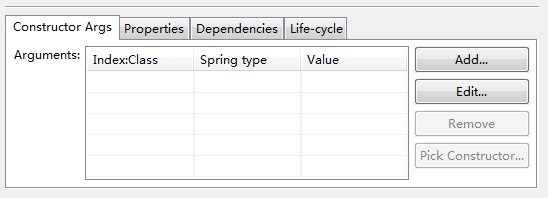
2.通过构造函数实现反转控制和依赖注入简单demo:
ConstructorBean.java :
applicationContext.xml :
需要注意的是通过构造函数实现依赖注入和反转控制时,constructor-arg的顺序没有必要和类的构造函数的性质相一致。
9.bean构造函数选择决议
bean构造函数选择决议,及类似于函数重载时需要选择那个函数。
这里需要注意的是两个属性:
1.constructor-arg的type属性:默认的情况下,spring将<value>中的内容解析为string,所以在spring增加type属性,显示捆绑xxx类型。
2.constructor-arg的index属性:index属性用来索引各构造函数的参数的顺序,从0开始。
例如如果将修改成这样:
显然这是错的,于是产生如下的错误:
10.自动装配
自动装配通过autowire属性实现,主要是针对setter方式实现依赖注入和反转控制的bean:
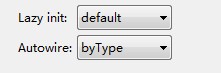
这里有两个常见属性:byType,byName,其中byType的话,spring会自动查找和set中同类型的bean。同理byName,是通过和类文件中属性同名的bean相关联。
11.依赖检查
依赖检查确保所有的或者是部分的bean属性得到正确的设置。
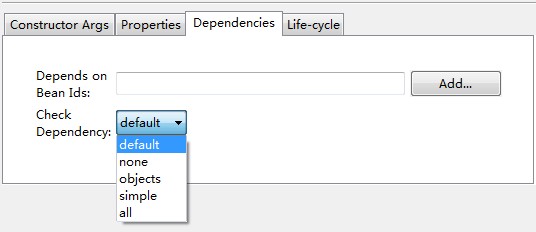
其中object最常用,主要是对bean中被使用者进行检查。
7.何时使用singleton
8.设置bean的属性和协作者
9.bean构造函数选择决议
10.自动装配
11.依赖检查
7.何时使用singleton
如果bean使用的是singleton的话,那么通过getBean得到的始终是一个对象,如果使用的是prototype的话,那么每次spring会重新new一个新的对象。下面是测试的代码片段:
<bean id="singletoninstance" class="singletonornot.POJO"
			abstract="false" scope="singleton" lazy-init="default"
			autowire="default" >
		</bean>


		<bean id="prototypeinstance" class="singletonornot.POJO"
			abstract="false" scope="prototype" lazy-init="default"
			autowire="default" >
		</bean>
POJO p1 = (POJO)context.getBean("singletoninstance");
		POJO p2 = (POJO)context.getBean("singletoninstance");
		if (p1 == p2) {
			System.out.println("p1 and p2 are the same");
		}


		POJO p3 = (POJO)context.getBean("prototypeinstance");
		POJO p4 = (POJO)context.getBean("prototypeinstance");
		if (p3 == p4) {
			System.out.println("p1 and p2 are the same");
		}
8.设置bean的属性和协作者
在spring中反转控制和依赖注入大致上通过两种方法实现:
1.通过set属性实现
2.通过类的构造函数实现
下面是一个简单的通过set属性实现的反转控制和依赖注入的demo:
SetterBean.java
/**
 *
 */
package beanfactory.coredi;
/**
 * @author jefferyxu
 *
 */
public class SetterBean {
	private AnotherBean beanOne;
	private YetAnotherBean beanTwo;
	private int i;

	public void setIntegerProperty(int i) {
		this.i = i;
	}

	/**
	 * @return the beanOne
	 */
	public AnotherBean getBeanOne() {
		return beanOne;
	}
	/**
	 * @param beanOne the beanOne to set
	 */
	public void setBeanOne(AnotherBean beanOne) {
		this.beanOne = beanOne;
	}
	/**
	 * @return the beanTwo
	 */
	public YetAnotherBean getBeanTwo() {
		return beanTwo;
	}
	/**
	 * @param beanTwo the beanTwo to set
	 */
	public void setBeanTwo(YetAnotherBean beanTwo) {
		this.beanTwo = beanTwo;
	}

	public String toString() {
		return "bean one :" + this.beanOne + " bean tow " + this.beanTwo +
		 " integer property " + this.i;
	}
}
通过这种方法生成的bean定义如下:
<bean id="setterBean" class="beanfactory.coredi.SetterBean"
			abstract="false" lazy-init="default" autowire="default"
			 p:beanOne-ref="anotherBean"
			p:beanTwo-ref="yetAnotherBean" p:integerProperty="1">
		</bean>
当然也可以这么写:
<bean id="setterBean" class="beanfactory.coredi.SetterBean">
			<property name="beanOne">
				<ref bean="anotherBean"/>
			</property>

			<property name="beanTwo">
				<ref bean="yetAnotherBean"/>
			</property>

			<!--
				注意这里填写的name属性需要和setterBean类中set
				方法相对应,这里写的是integerProperty,所以 需要
				存在setIntegerProperty方法
			 -->
			<property name="integerProperty">
				<value>1</value>
			</property>
		</bean>
这里需要特别注意的是需要property的name属性需要和类中的set方法相对应。
2.通过构造函数实现反转控制和依赖注入简单demo:
ConstructorBean.java :
/**
 *
 */
package beanfactory.coredi;
/**
 * @author jefferyxu
 *
 */
public class ConstructorBean {
	private AnotherBean beanOne;
	private YetAnotherBean beanTwo;
	private int i;

	public ConstructorBean(AnotherBean one,
			YetAnotherBean two,
			int i) {
		this.beanOne = one;
		this.beanTwo = two;
		this.i = i;
	}

	public String toString(){
		return "bean one :" + this.beanOne + " bean tow " + this.beanTwo +
		 " integer property " + this.i;
	}
}
applicationContext.xml :
<bean id="contructorBean" class="beanfactory.coredi.ConstructorBean">
			<!-- 注意这里参数的顺序没有必要 按照构造函数中的顺序 -->
			<constructor-arg>
				<ref bean="yetAnotherBean"/>
			</constructor-arg>

			<constructor-arg>
				<ref bean="anotherBean"/>
			</constructor-arg>
			<constructor-arg>
				<value>1</value>
			</constructor-arg>
		</bean>
需要注意的是通过构造函数实现依赖注入和反转控制时,constructor-arg的顺序没有必要和类的构造函数的性质相一致。
9.bean构造函数选择决议
bean构造函数选择决议,及类似于函数重载时需要选择那个函数。
这里需要注意的是两个属性:
1.constructor-arg的type属性:默认的情况下,spring将<value>中的内容解析为string,所以在spring增加type属性,显示捆绑xxx类型。
2.constructor-arg的index属性:index属性用来索引各构造函数的参数的顺序,从0开始。
例如如果将修改成这样:
<constructor-arg index="0">
				<value>1</value>
			</constructor-arg>
显然这是错的,于是产生如下的错误:
Unsatisfied dependency expressed through constructor argument with index 0 of type
10.自动装配
自动装配通过autowire属性实现,主要是针对setter方式实现依赖注入和反转控制的bean:
这里有两个常见属性:byType,byName,其中byType的话,spring会自动查找和set中同类型的bean。同理byName,是通过和类文件中属性同名的bean相关联。
11.依赖检查
依赖检查确保所有的或者是部分的bean属性得到正确的设置。
其中object最常用,主要是对bean中被使用者进行检查。

相关文章推荐
- spring核心:bean工厂的装配 3
- spring核心:bean工厂的装配 4
- spring核心:bean工厂的装配 4
- spring核心:bean工厂的装配 5
- spring核心:bean工厂的装配 1
- spring核心:bean工厂的装配 5
- spring核心:bean工厂的装配 1
- spring核心:bean工厂的装配 6
- spring核心:bean工厂的装配 2
- spring核心:bean工厂的装配 6
- Spring核心Bean工厂装配__Spring学习笔记
- spring核心:bean工厂的装配 2
- Spring核心Bean工厂装配__Spring学习笔记
- Spring-装配Bean的3种方式-工厂静态方法方式配置Bean
- Spring-装配Bean的3种方式-实现工厂方法方式装配Bean
- 【Spring 核心】装配bean(二) JavaConfig装配
- 【Spring 核心】装配bean(三)XML配置
- Spring--IoC--Bean的装配--静态工厂Bean
- 【Spring 核心】装配Bean(一) 自动化装配
- Spring--IoC--Bean的装配--工厂方法设计模式