C#学习笔记(十八):图形绘制进阶-线条、字体
2006-03-21 11:48
459 查看
使用Pen类绘制线条[/b]
Pen类在System.Drawing名称空间中。
例如,如下代码即可在Form窗体加载调用绘图方法时绘制一些直线
protected override void OnPaint(PaintEventArgs e)
{
Graphics g = e.Graphics;
using (Pen blackPen = new Pen(Color.Black,1))
{
for (int y = 0;y < ClientRectangle.Height;y += ClientRectangle.Height / 10)
{
g.DrawLine(blackPen, new Point(0,0), new Point(ClientRectangle.Width,y));
}
}
}
获得Pen有更简单的方式,Pens包含的属性可以包含创建大约150种钢笔,每个钢笔都有前面介绍的约定义颜色。下面我们使用这种钢笔做一个例子:
protected override void OnPaint(PaintEventArgs e)
{
for (int y = 0;y < ClientRectangle.Height;y += ClientRectangle.Height / 10)
{
e.Graphics.DrawLine(Pens.Black, new Point(0,0), new Point(ClientRectangle.Width,y));
}
}
这样就可以不用创建一个Pen的对象,最后也不用担心忘记释放对象而调用Dispose()方法。
使用Brush类绘制图形[/b]
Brush类是一个抽象的基类,要实例化一个Brush对象,应适用派生于Brush的类,例如SolidBrush、TextureBrush和LinearGradientBrush。Brush类在System.Drawing名称空间中,但TextureBrush和LinearGradientBrush在System.Drawing.Drawing2D名称空间中。
1.SolidBrush用一种单色填充图形。
2.TextureBrush用一个位图填充图形。在构造这个画笔时,还指定了一个边框矩形和一个填充模式。边框矩形指定画笔适用位图的哪一部分——可以不使用整个位图。填充模式有许多选项,包括平铺纹理的Tile、TileFlipX、TileFlipY和TileFlipXY,它们指定连续平铺时翻转对象。使用TextureBrush可以创建非常有趣和富有相像力的效果。
3.LinearGradientBrush封装了一个画笔,该画笔可以绘制两种颜色渐变的图形,其中第一种颜色以指定的角度逐渐过渡到第二种颜色。角度则可以根据程度来指定。0º表示颜色从左向右过渡。90º表示颜色从上到下过渡。
还有一种画笔PathGradientBrush,它可以创建精细的阴影效果,其中阴影从路径的中心趋向路径的边界。这种画笔可以让人想起用彩笔绘制的阴影地图,可以实现类似在不同的省或国家爱之间的边界上涂上较暗的颜色。
使用的时候需要对窗体的构造函数进行相应的修改:
public Form3()
{
//
// Windows 窗体设计器支持所必需的
//
InitializeComponent();
// 控件被绘制为不透明的,不绘制背景
SetStyle(ControlStyles.Opaque,true);
//
// TODO: 在 InitializeComponent 调用后添加任何构造函数代码
//
}
会出现如下效果,默认运行时是个透明白色的背景。但是将任何一个窗口覆盖上后就绘制成了被覆盖部分的位图。
覆盖前:
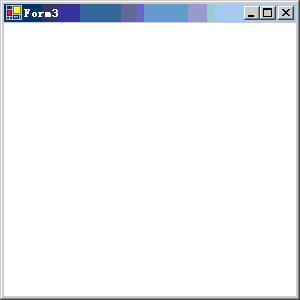
当将选中的窗口覆盖他后就会出现如下效果:
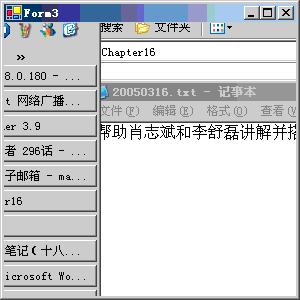
就是被重新绘制了。
(由于图片上传出现问题,不知如何上传,以前可以上传的名字都不能用了,还有好多以前可用的图片现在都不可用了,好像不接受中文命名)
这并不是我们需要的。我们引入System.Drawing.Drawing2D命名空间,为了此名称空间下的使用LinearGradientBrush画笔。
protected override void OnPaint(PaintEventArgs e)
{
Graphics g = e.Graphics;
g.FillRectangle(Brushes.White, ClientRectangle);
g.FillRectangle(Brushes.Red, new Rectangle(10,60,50,50));
// 实现渐变色
Brush linearGradientBrush = new LinearGradientBrush(new Rectangle(10,60,50,50), Color.Red, Color.White, 45);
g.FillRectangle(linearGradientBrush, new Rectangle(10,60,50,50));
linearGradientBrush.Dispose();
g.FillEllipse(Brushes.Aquamarine, new Rectangle(60,20,50,30));
g.FillPie(Brushes.Chartreuse, new Rectangle(60,60,50,50),90,210);
g.FillPolygon(Brushes.BlueViolet, new Point[]{new Point(110,10),new Point(150,10),new Point(160,40),new Point(120,20),new Point(120,60)});
}
使用Font绘制文本[/b]
Font类封装了字体的3个主要特征:字体系列、字体大小和字体样式。Font类在System.Drawing明称空间中。
在.NET Framework中,Size并不仅仅是点的大小,通过Unit属性可以改变GraphicsUnit属性,Unit定义了字体的测量单位。一个点等于1/72英寸,所以10点的字体有10/72英寸高。在GraphicsUnit枚举中,可以把字体的大小指定为:
l 点的大小
l 显示大小(1/75英寸)
l 文档(1/300英寸)
l 英寸
l 毫米
l 像素
一般情况下,屏幕上每英寸有72个像素。打印机上每英寸右300个像素、600个像素,甚至更多。使用Graphics对象的MeasureString()方法可以计算出给定字体的字符串宽度。
protected override void OnPaint(PaintEventArgs e)
{
Graphics g = e.Graphics;
string str = "This is a string";
SizeF size = g.MeasureString(str,Font);
g.DrawRectangle(Pens.Black,0,0,size.Width,size.Height);
g.DrawString(str,Font,Brushes.Blue,new RectangleF(0,0,size.Width,size.Height));
}
这个例子将在获取字符串的宽度和高度后绘制出一个黑色矩形,然后将字符串以蓝色绘制在矩形中。
StringFormat类封装了文本局部信息,包括对齐和行间距信息。
public Form3()
{
//
// Windows 窗体设计器支持所必需的
//
InitializeComponent();
// 控件被绘制为不透明的,不绘制背景
SetStyle(ControlStyles.Opaque,true);
Bounds = new Rectangle(0,0,500,300);
//
// TODO: 在 InitializeComponent 调用后添加任何构造函数代码
//
}
protected override void OnPaint(PaintEventArgs e)
{
Graphics g = e.Graphics;
int y = 0;
g.FillRectangle(Brushes.White,ClientRectangle);
// Draw left justifed text
Rectangle rect = new Rectangle(0,y,400,Font.Height);
g.DrawRectangle(Pens.Blue,rect);
g.DrawString("This text is left justified.",Font,Brushes.Black,rect);
y += Font.Height + 20;
// Draw right justifed text
Font aFont = new Font("Arial",16,FontStyle.Bold);
rect = new Rectangle(0,y,400,aFont.Height);
g.DrawRectangle(Pens.Blue,rect);
StringFormat sf = new StringFormat();
sf.Alignment = StringAlignment.Far;
g.DrawString("This text is right justified.",aFont,Brushes.Blue,rect,sf);
y += Font.Height + 20;
aFont.Dispose();
// Draw centered text
Font cFont = new Font("Courier New",12,FontStyle.Underline);
rect = new Rectangle(0,y,400,cFont.Height);
g.DrawRectangle(Pens.Blue,rect);
sf = new StringFormat();
sf.Alignment = StringAlignment.Center;
g.DrawString("This text is centered and underlined.",cFont,Brushes.Red,rect,sf);
y += Font.Height + 20;
cFont.Dispose();
// Draw multiline text
Font trFont = new Font("Times New Roman",12);
rect = new Rectangle(0,y,400,trFont.Height * 3);
g.DrawRectangle(Pens.Blue,rect);
String longString = "This text is much longer, and drawn ";
longString += "into a rectangle that is higher than ";
longString += "one line, so that it will wrap. It is ";
longString += "very easy to wrap text using GDI+.";
g.DrawString(longString,trFont,Brushes.Black,rect);
trFont.Dispose();
}
实现画不同类型的字体。
Pen类在System.Drawing名称空间中。
例如,如下代码即可在Form窗体加载调用绘图方法时绘制一些直线
protected override void OnPaint(PaintEventArgs e)
{
Graphics g = e.Graphics;
using (Pen blackPen = new Pen(Color.Black,1))
{
for (int y = 0;y < ClientRectangle.Height;y += ClientRectangle.Height / 10)
{
g.DrawLine(blackPen, new Point(0,0), new Point(ClientRectangle.Width,y));
}
}
}
获得Pen有更简单的方式,Pens包含的属性可以包含创建大约150种钢笔,每个钢笔都有前面介绍的约定义颜色。下面我们使用这种钢笔做一个例子:
protected override void OnPaint(PaintEventArgs e)
{
for (int y = 0;y < ClientRectangle.Height;y += ClientRectangle.Height / 10)
{
e.Graphics.DrawLine(Pens.Black, new Point(0,0), new Point(ClientRectangle.Width,y));
}
}
这样就可以不用创建一个Pen的对象,最后也不用担心忘记释放对象而调用Dispose()方法。
使用Brush类绘制图形[/b]
Brush类是一个抽象的基类,要实例化一个Brush对象,应适用派生于Brush的类,例如SolidBrush、TextureBrush和LinearGradientBrush。Brush类在System.Drawing名称空间中,但TextureBrush和LinearGradientBrush在System.Drawing.Drawing2D名称空间中。
1.SolidBrush用一种单色填充图形。
2.TextureBrush用一个位图填充图形。在构造这个画笔时,还指定了一个边框矩形和一个填充模式。边框矩形指定画笔适用位图的哪一部分——可以不使用整个位图。填充模式有许多选项,包括平铺纹理的Tile、TileFlipX、TileFlipY和TileFlipXY,它们指定连续平铺时翻转对象。使用TextureBrush可以创建非常有趣和富有相像力的效果。
3.LinearGradientBrush封装了一个画笔,该画笔可以绘制两种颜色渐变的图形,其中第一种颜色以指定的角度逐渐过渡到第二种颜色。角度则可以根据程度来指定。0º表示颜色从左向右过渡。90º表示颜色从上到下过渡。
还有一种画笔PathGradientBrush,它可以创建精细的阴影效果,其中阴影从路径的中心趋向路径的边界。这种画笔可以让人想起用彩笔绘制的阴影地图,可以实现类似在不同的省或国家爱之间的边界上涂上较暗的颜色。
使用的时候需要对窗体的构造函数进行相应的修改:
public Form3()
{
//
// Windows 窗体设计器支持所必需的
//
InitializeComponent();
// 控件被绘制为不透明的,不绘制背景
SetStyle(ControlStyles.Opaque,true);
//
// TODO: 在 InitializeComponent 调用后添加任何构造函数代码
//
}
会出现如下效果,默认运行时是个透明白色的背景。但是将任何一个窗口覆盖上后就绘制成了被覆盖部分的位图。
覆盖前:
当将选中的窗口覆盖他后就会出现如下效果:
就是被重新绘制了。
(由于图片上传出现问题,不知如何上传,以前可以上传的名字都不能用了,还有好多以前可用的图片现在都不可用了,好像不接受中文命名)
这并不是我们需要的。我们引入System.Drawing.Drawing2D命名空间,为了此名称空间下的使用LinearGradientBrush画笔。
protected override void OnPaint(PaintEventArgs e)
{
Graphics g = e.Graphics;
g.FillRectangle(Brushes.White, ClientRectangle);
g.FillRectangle(Brushes.Red, new Rectangle(10,60,50,50));
// 实现渐变色
Brush linearGradientBrush = new LinearGradientBrush(new Rectangle(10,60,50,50), Color.Red, Color.White, 45);
g.FillRectangle(linearGradientBrush, new Rectangle(10,60,50,50));
linearGradientBrush.Dispose();
g.FillEllipse(Brushes.Aquamarine, new Rectangle(60,20,50,30));
g.FillPie(Brushes.Chartreuse, new Rectangle(60,60,50,50),90,210);
g.FillPolygon(Brushes.BlueViolet, new Point[]{new Point(110,10),new Point(150,10),new Point(160,40),new Point(120,20),new Point(120,60)});
}
使用Font绘制文本[/b]
Font类封装了字体的3个主要特征:字体系列、字体大小和字体样式。Font类在System.Drawing明称空间中。
在.NET Framework中,Size并不仅仅是点的大小,通过Unit属性可以改变GraphicsUnit属性,Unit定义了字体的测量单位。一个点等于1/72英寸,所以10点的字体有10/72英寸高。在GraphicsUnit枚举中,可以把字体的大小指定为:
l 点的大小
l 显示大小(1/75英寸)
l 文档(1/300英寸)
l 英寸
l 毫米
l 像素
一般情况下,屏幕上每英寸有72个像素。打印机上每英寸右300个像素、600个像素,甚至更多。使用Graphics对象的MeasureString()方法可以计算出给定字体的字符串宽度。
protected override void OnPaint(PaintEventArgs e)
{
Graphics g = e.Graphics;
string str = "This is a string";
SizeF size = g.MeasureString(str,Font);
g.DrawRectangle(Pens.Black,0,0,size.Width,size.Height);
g.DrawString(str,Font,Brushes.Blue,new RectangleF(0,0,size.Width,size.Height));
}
这个例子将在获取字符串的宽度和高度后绘制出一个黑色矩形,然后将字符串以蓝色绘制在矩形中。
StringFormat类封装了文本局部信息,包括对齐和行间距信息。
public Form3()
{
//
// Windows 窗体设计器支持所必需的
//
InitializeComponent();
// 控件被绘制为不透明的,不绘制背景
SetStyle(ControlStyles.Opaque,true);
Bounds = new Rectangle(0,0,500,300);
//
// TODO: 在 InitializeComponent 调用后添加任何构造函数代码
//
}
protected override void OnPaint(PaintEventArgs e)
{
Graphics g = e.Graphics;
int y = 0;
g.FillRectangle(Brushes.White,ClientRectangle);
// Draw left justifed text
Rectangle rect = new Rectangle(0,y,400,Font.Height);
g.DrawRectangle(Pens.Blue,rect);
g.DrawString("This text is left justified.",Font,Brushes.Black,rect);
y += Font.Height + 20;
// Draw right justifed text
Font aFont = new Font("Arial",16,FontStyle.Bold);
rect = new Rectangle(0,y,400,aFont.Height);
g.DrawRectangle(Pens.Blue,rect);
StringFormat sf = new StringFormat();
sf.Alignment = StringAlignment.Far;
g.DrawString("This text is right justified.",aFont,Brushes.Blue,rect,sf);
y += Font.Height + 20;
aFont.Dispose();
// Draw centered text
Font cFont = new Font("Courier New",12,FontStyle.Underline);
rect = new Rectangle(0,y,400,cFont.Height);
g.DrawRectangle(Pens.Blue,rect);
sf = new StringFormat();
sf.Alignment = StringAlignment.Center;
g.DrawString("This text is centered and underlined.",cFont,Brushes.Red,rect,sf);
y += Font.Height + 20;
cFont.Dispose();
// Draw multiline text
Font trFont = new Font("Times New Roman",12);
rect = new Rectangle(0,y,400,trFont.Height * 3);
g.DrawRectangle(Pens.Blue,rect);
String longString = "This text is much longer, and drawn ";
longString += "into a rectangle that is higher than ";
longString += "one line, so that it will wrap. It is ";
longString += "very easy to wrap text using GDI+.";
g.DrawString(longString,trFont,Brushes.Black,rect);
trFont.Dispose();
}
实现画不同类型的字体。

相关文章推荐
- C#学习笔记(十八):图形绘制进阶-线条、字体
- Turtle绘制带颜色和字体的图形(Python3)
- 第二章 2绘制线条简单图形
- UI进阶第六天,绘制图形
- C#学习笔记(十七):图形绘制基础
- Flex 图形标绘——线条、箭头的绘制
- GDI基础(1):绘制线条和图形
- 安卓自定义View进阶-Canvas之绘制图形
- JAVA程序设计(12.2)---- 多态、监听器初级应用:在窗口中绘制图形,可以选择圆形 正方形 线条
- 第二章 2绘制线条简单图形
- 图形的绘制,设置对话框,颜色对话框,字体对话框的创建
- Quartz2D - 基本图形绘制(线条)
- 安卓自定义View进阶-Canvas之绘制图形
- Quartz2D常见图形的绘制:线条、多边形、圆
- C#学习笔记(十七):图形绘制基础
- IOS开发 图形绘制,绘制线条,矩形,和垂直和居中绘制文字
- Unity 通过Mesh网格渲染绘制图形与字体
- HTML5 Canvas(1) 绘制基本图形和线条
- 图形的绘制,如何使用自定义画笔(颜色,线宽,线形)。如何为程序中添加选项菜单和选项设置对话框,如何使用标准颜色对话框,如何使用字体对话框,在选项对话框中实现预览功能。实现选项对话框和窗口类中的数据交换。如何改变对话框和控件的背景色,如何改变控件的文本颜色,
- 原生js实现Canvas实现拖拽式绘图,支持画笔、线条、箭头、三角形和圆形等等图形绘制功能,有实例Demo